What is ‘Webcam/Camera Driver’ in Windows 10/11?
In this post, we are going to discuss on How to install Camera Driver Windows 10/11. You will be guided with easy steps/methods to do so. Let’s starts the discussion.
‘Webcam/Camera Driver’: Webcam/Camera Driver is important software required to communicate your camera device (Hardware) with operating system installed in your computer. Camera driver acts as mediator between your camera device and operating system. For example, Logitech webcam/camera is connected in your Windows 10 64-bit computer, then Logitech Webcam Driver for Windows 10 64-bit must be installed in your computer properly.
If you don’t want any camera/webcam relating issue in your Windows computer, you should make sure camera driver is properly installed in your computer and is up-to-date to latest & compatible version. If you install incompatible version of camera driver or the camera driver is outdated/corrupted, you may experience camera relating issue in computer like camera not working/detected/capturing issue, or other issue.
In such case, camera driver update is necessary in computer in order to fix camera/webcam relating issue. It is quite simple to install camera driver in your Windows 10/11 computer automatically and manually. Windows build-in Device Manager utility offers you to check the status all device drivers including camera driver and allows you to perform camera driver update/uninstall/rollback operation on it. Let’s go for the steps to get Camera driver in Windows PC.
How to install Camera Driver Windows 10/11?
Method 1: Download and install Camera Driver Update in Windows 10/11 computer from manufacturer official site
Step 1: Open your browser like Google Chrome and go to your camera/webcam manufacturer official site
Step 2: Once you are on the page, search for your camera product and go to driver download page for your camera product, then download the correct & latest driver for it according to your Windows OS architecture like Windows 32-bit or 64-bit.
Step 3: Once downloaded, double-click on downloaded driver setup file and follow on-screen instructions to finish installation. Once installed, restart your computer and check if camera/webcam works.
Method 2: Reinstall or Update Camera Driver using Device Manager
You can update Camera Driver to compatible & latest version using Device Manager.
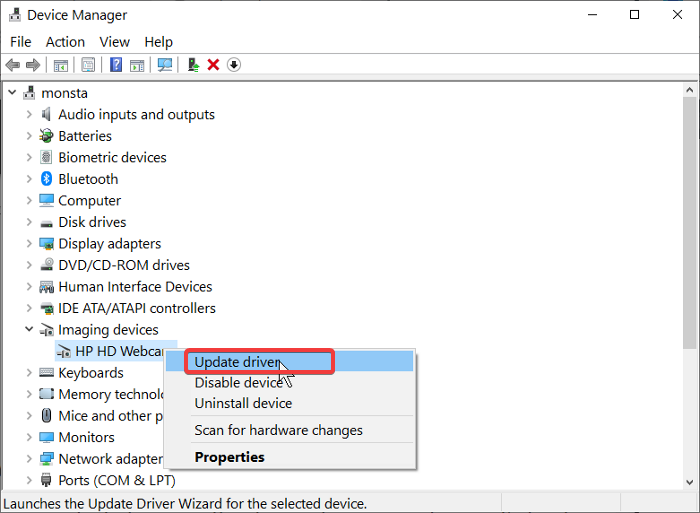
Step 1: Open ‘Device Manager’ in Windows PC via Windows Search Box and expand ‘Imaging Devices’ or ‘Cameras’ category
Step 2: Right-click on your camera/webcam device and select ‘Update Driver’ and follow on-screen instructions to finish update. Once updated, restart your computer and check if the issue is resolved.
Method 3: Download or reinstall camera driver update in Windows PC [Automatically]
You can also try to update all Windows drivers including camera driver update using Automatic Driver Update Tool. You can get this tool through button/link below.
Fix Windows PC issues with ‘PC Repair Tool’
‘PC Repair Tool’ is easy & quick way to find and fix BSOD errors, DLL errors, EXE errors, problems with programs/applications, malware or viruses issues, system files or registry, and other system issues with just few clicks.
Conclusion
I am sure this post helped you on How to install Camera Driver Windows 10/11 with several easy steps/methods. You can read & follow our instructions to do so. That’s all. For any suggestions or queries, please write on comment box below.