Are you one of those who use desktop (Virtual Private Network) app for the Windows Platform? Using Hamachi is a great idea as it is one of the finest and dependable VPN applications ever.
Millions of gamers use Hamachi to create a virtual LAN network to play with their friends and family.
Most of them are quite happy with the services but many of them are fed up with the same.
So in this particular blog will discuss upon Hamachi cannot get adapter config as Reddit and other online forums and community websites are filled with related queries.
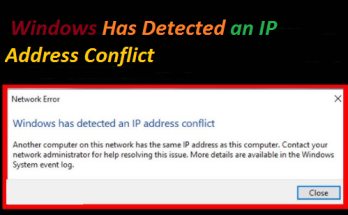
Windows 10/11 users have claimed that they are prompted with an error when they try to connect to the Hamachi VPN service.
The above error message is prompted which literally leads to an infuriating situation. But hold your patience as we have collected ample information about the error which will help you down the road.
What are the reasons to occur Hamachi cannot get adapter config?
After so many researches some of the potential causes have been detected. Kindly go through them one by one.
Legacy Drivers
Some of the users reported that their Hamachi VPN was not installed as Legacy Hardware and when they try to install the application as Legacy Hardware, the issue was simply resolved.
Outdated Drivers
Obsolete or missing Drivers installed on your computer might results in the above error.
Antivirus/Firewall
Sometimes the antivirus/ firewall installed on your PC are quite devoted to their job and hence become an obstacle in your path which leads to the unexpected issue.
Admin Permission
It has been observed that lack of admin permission can be one of the potential reasons to occur the error .
Fixes for Hamachi cannot get adapter config
Before discussing the fixes I would like advise you to kindly restart your computer. Once you have rebooted your PC, you can apply the below listed methods one by one.
Fix 1: Install Hamachi as Legacy Hardware
In order to resolve the error you need to install Hamachi as Legacy Hardware. Follow the below mention steps to do so:
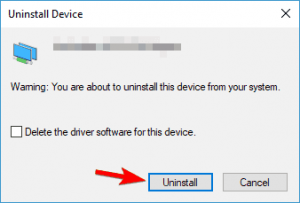
- Navigate to the Network Adaptors in Device Manager> click on Virtual Ethernet Adapter Entry> and select Uninstall.
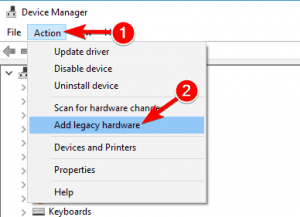
- After Uninstalling, navigate to the top menu and tap on Action>tap on the Add Legacy Hardware option
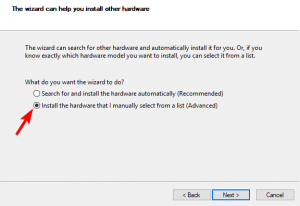
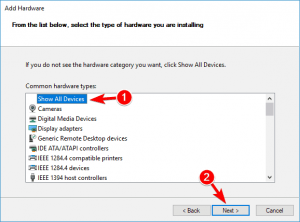
- Press Next and select the option Install the hardware that I manually select from a list (Advanced) in a new Window> tap on the Next button
- Then open Show all Devices>Next>Have Disk… from drop down menu>go to the location where Hamachi was installed and select the .inf driver file from the location.
Fix 2: Modify Your Network Adapter’s Priority
You can also try to change the Network Adapter’s Priority. To do so follow the below mention steps:
- From the Windows Start menu, open Control Panel> navigate to the Network and Internet
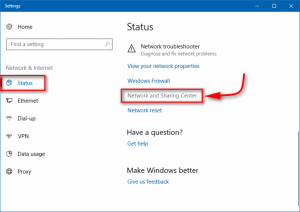
- Click on Network and Sharing Center> then Change Adapter Settings under Control Panel
- Open Properties by double-clicking on Hamachi, after that locate & Untick the Microsoft Network Adapter Multiplexor Protocol
- Select Properties>Advanced > IP Settings
- Then Uncheck Automatic Metric, and in Interface Metric type 9000> tap on the OK button
Fix 3: Disable Antivirus & Firewall
Disabling the third-party Antivirus Software and Firewall can also solve your troubles.
Follow the below mention instructions to disable an Antivirus:
- Tap and hold the right button on the mouse>select the stop or disable option
In order to disable the Firewall, follow the below mention steps:
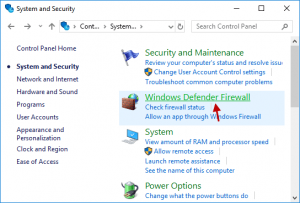
- Search for Firewall and tap on the first outcome
- Go to Advanced Settings and choose Windows Defender Firewall Properties
- Select Customize in front of Protected Network Connections button by tapping on Domain Profile from the top.
- Lastly discard the Hamachi option and press on the Apply and OK buttons to save the changes>simply Reboot your computer
Fix 4: Run Hamachi with Admin Privileges
Running the application with Admin Privileges may surely help you out. To do so you can follow the below mention instructions:
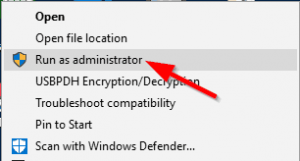
- Find the Hamachi Shortcut and choose Run as Administrator on right click.
- Select Properties by right-clicking the Hamachi icon
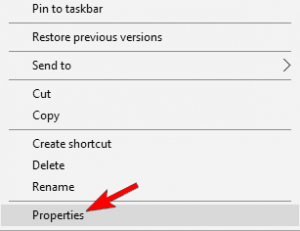
- Under the Properties Window, navigate to the Compatibility tab after that check the box that states Run this application as Administrator
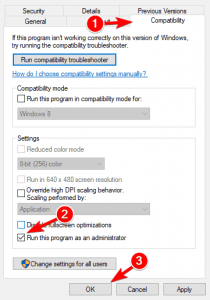
- Lastly tap on OK button and restart Hamachi VPN with Admin Privileges t save the changes
Fix 5: Disable & Enable Hamachi Connection
It happens sometimes that we invest so many hours but we still can’t find the real cause and the internal malfunctions on the Internet leads to such scenarios. Hence try to disable and then enable the Hamachi Connection, to do so follow the below mention guidelines:
- On your Keyboard press Windows + R keys together to open Internet Connection Settings and type in cpl in the Run dialog box and press OK button
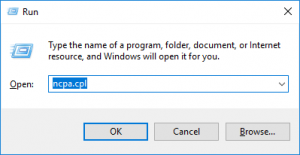
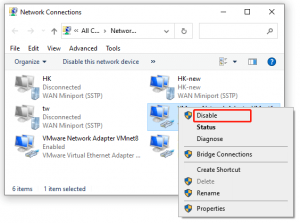
- Find and Right-Click Hamachi, select “Disable”. Before Right-Clicking on it wait for a while and select Enable
- Kindly double check to see that the issue resolved or not
Fix 6: Download & Update Hamachi Driver
An obsolete driver will surely make you suffer from the Hamachi cannot get adapter config error. It is highly recommended to update the Hamachi drivers to avoid suck kind of errors in future. You can follow the below mention guidelines to update the drivers:
- Press Windows + X key and select Device Manager
- Expand Network Adapters, tap on Virtual Ethernet Adapter Entry and the select Update Drivers
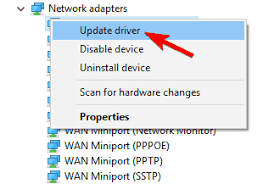
- In order to finish the Update Process ,follow the on-screen instructions and then Restart your System
The above mention method was manual and there is another option available for you to update the driver that is Automatic Driver Tool that will update your drivers in just a single click.
Fix 7: Remove Hamachi Registry Entries & Re-install the Application
Still stuck with the Hamachi cannot get adapter config error, don’t get panic, you can try this one. In this method you need to clear the application Registry. To do so you can follow the below mention Steps:
- On your keyboard press Windows + R keys and in the appeared box type regedit to start a Registry Editor
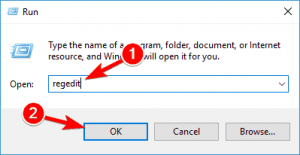
- Remember : Make a backup plan of your Registry after launching Registry Editor
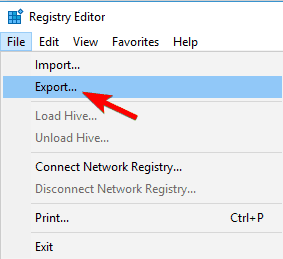
- Click on the files and tap on Export option and don’t forget to select the location where you need to export your backfile of Registry
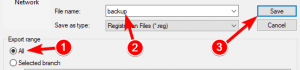
- During exporting, ensure to tap on All and then press on Save button to save the export of your Registry. In case if you find something incorrect then tap on file and then press on Restore option in order to restore the Registry folder back
- Press on the ctrl + F key and in the appeared box type in Hamachi and tap on the Enter key

- If you find any key then Delete it
- Press the F3 key in order to find the succeeding Hamachi key> Repeat this step till you remove all
- Once you deleted all the Hamachi keys > now Install the new Hamachi application
Now it’s your Turn
That’s it. In this tutorial I have provided enough solutions to fix the Hamachi cannot get adapter config error. I really hope any one of them will definitely help you out.
After fixing the above issue by one of the above recommended solution, just wait for a while and think that how many times in a week it happens with you that you invest a lot of time on surfing the net just for resolving these silly errors. Then trust me you need a PC Repair Tool. This tool will resolve your multiple PC issues within minutes now it’s up to you.
Lastly, if you have any queries regarding the same do write us on our Facebook and twitter page. Thanks a lot.