Tips to Create macOS Monterey bootable USB on Windows 10/11 PC:
In this post, we are going to discuss on How to Create macOS Monterey bootable USB on Windows 10/11 PC. You will be guided with easy steps/methods to do so. Let’s starts the discussion.
Make macOS Monterey bootable USB on Windows 10/11:
We have already discussed on How to create Windows 10 Installation Media Bootable USB on MacOS and you can visit & read the post for this. Here, you are provided with easy ways to Create macOS Monterey Installation Media bootable USB on Windows 10/11 computer. Once you have successfully created macOS Monterey Installation Media bootable USB, you are now able to install macOS Monterey in your Mac computer using the bootable USB with just few steps.
macOS Monterey bootable USB is one of the best solutions for your Mac problem like MacBook, MacBook Air, MacBook Pro, iMac, Mac Pro, or Mac Mini are not working properly. If you are facing major problems in your Mac computer, then macOS Monterey bootable USB will help you to repair MacOS or to perform clean MacOS Installation in your Mac computer in order to resolve the issues.
If you are experiencing problems in your Mac computer and you are unable to perform MacOS Bootable USB creation, then you can try making this bootable USB in Windows computer. For example, you can use a Windows 10/11, or Windows 8/8.1/7 computer to quickly create a USB bootable installation media to reinstall macOS Monterey, Big Sur, or Catalina on your Mac device. Let’s go for the solution.
Requirements for making macOS Monterey bootable USB:
- Broken Mac computer running macOS (version 10, 11, 12, or higher).
- A trial copy of the TransMac software.
- You should have one high-quality USB flash drive with 16GB of storage.
- You need to make copy of macOS (DMG file).
How to Create macOS Monterey bootable USB on Windows 11/10/8/8.1/7 PC?
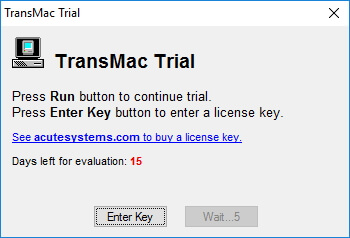
Step 1: At first, you need to download & install ‘TransMac’ software in your Windows PC. It is paid software but it provides you a 15-day trial, which is more than enough time.
Step 2: Now, connect a USB Flash drive to your Windows computer. Create a backup of all data stored in USB drive on some safe storage device and then erase your USB flash drive to delete everything from it.
Step 3: Once TransMac Software installed, right-click ‘TransMac’ Software icon and select ‘Run as Administrator’ to open the app with administrator permission
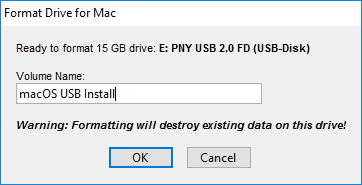
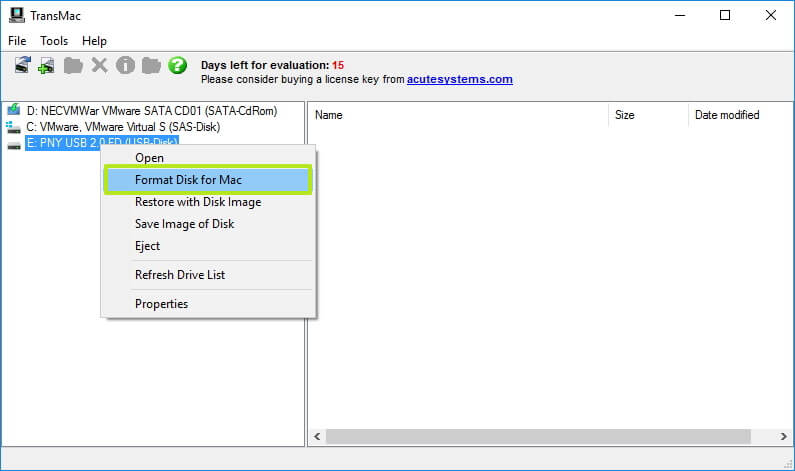
Step 4: Click ‘Run’ button. In left pane, right-click ‘USB Flash Drive’ and select ‘Format Disk for Mac’ option to format the drive. USB drive needs a GPT partition to work on Mac so you should take care about it during formatting.
Step 5: Click ‘Yes’ button to format the drive on warning message, confirm a name for the drive. Like ‘macOS Monterey bootable USB’ and click ‘OK’ button, and hit ‘Yes’ button for confirmation, and then hit ‘Ok’ button
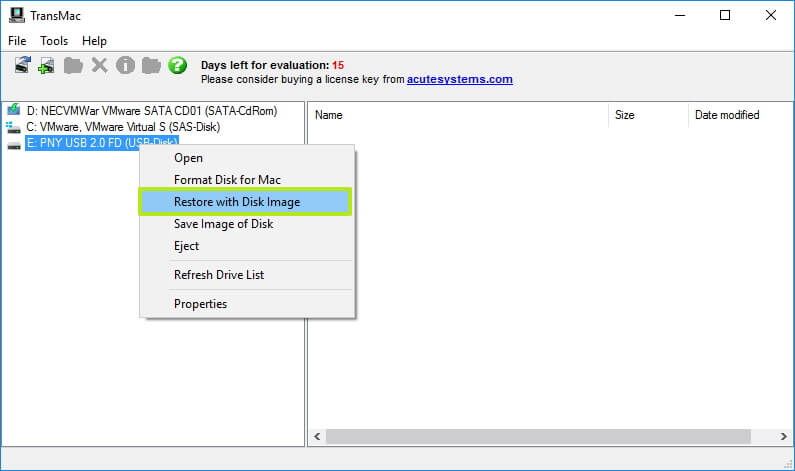
Step 6: Now, right-click the USB flash drive in left pane and select ‘Restore with Disk Image’ option, click ‘Yes’ to confirm erasing the USB flash drive data.
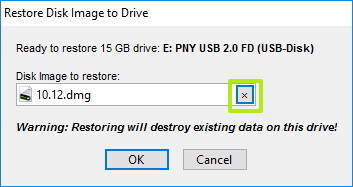
Step 7: Now, in right pane, click ‘Browse’ button and select ‘.dmg’ file with MacOS installation files and hit ‘Open > Ok’ and hit ‘Yes’ to confirm.
Step 8: Once completed, you can now insert USB flash drive on your Mac computer and install/ reinstall/upgrade or repair the operating system to latest MacOS version.
How to create GPT Partition on USB Flash drive?
Sometimes, USB flash drive may not work with TransMac Software possibly due to the Partition problem. In such case, you need to redo the entire process again and create GPT partition on USB flash drive.
Step 1: Type ‘cmd’ in Windows Search Box and press ‘SHIFT + ENTER’ keys on keyboard to open ‘Command Prompt as Administrator’
Step 2: In Command Prompt opened, type ‘Diskpart’ command and hit ‘Enter’ key to execute. Now, execute ‘List Disk’ command to view all drives connected to computer
Step 3: Type ‘Select disk $’ command and hit ‘Enter’ key to execute. Here, you need to replace ‘$’ with your USB flash drive like ‘4’ that is your USB drive number.
Step 4: Type ‘Clean’ and hit ‘Enter’ key to execute
Step 5: Now, type ‘Convert GPT’ command and hit ‘Enter’ key to execute to in order to create GPT partition
Step 6: Enter ‘Create Partition Primary’ command and hit ‘Enter’ key to complete the process.
Step 7: Once you have created GPT Partition on USB Flash Drive, you can now follow the instructions mentioned in above method to make macOS Monterey bootable USB on Windows 10/11 PC.
Conclusion
I am sure this post helped you on How to Create macOS Monterey bootable USB on Windows 11/10/8/8.1/7 PC with easy steps/methods. You can read & follow our instructions to do so. That’s all. For any suggestions or queries, please write on comment box below.