Tips to connect printer through network
Here, we are going to discuss on “How to connect printer through network”. You will be guided with easy steps/methods to do so. Let’s starts the discussion.
‘Connect Printer through Network’ or ‘Network Printers’: When you connect a printer device to network through wired or wireless connections, all connected devices through the same network are allowed to print to single printer/or multiple printers to share the workload among several computers. It means Network Printers offers multiple printers to perform printing tasks to a single/multiple printer connected through the network.
Setting up a printer on network allows you to connect your computers without physically plugging them into the printer. To do so, you need to have a build-in WiFi Adapter or wired network connection port if you want to connect a printer to your home network. Depending on printer brands & types, wireless network connection process might differ. However, here you are provided with easy steps to establish the network connection with printer in order print the document from computers not physically connected to printer.
How to connect printer through network? [WiFi Printer]
This method is for the printer with build-in WiFi Adapter to connect wirelessly to your home network.
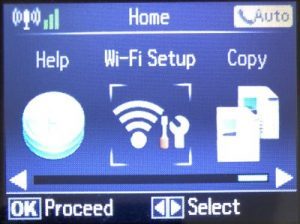
Step 1: Turn ON your printer (WiFi Printer) and on printer’s screen, find and select the option for configuring network or WiFi connectivity. The option may be ‘Network Setup’, ‘WiFi Setup’ or similar.
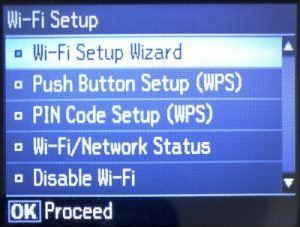
Step 2: In ‘Network Setup’ or ‘WiFi Setup’ menu, there should be one or two options for connecting to wireless router like ‘WiFi Setup Wizard’ or ‘Network Setup Wizard’, which will proceed for connecting printer to your wireless router. Some printers may also have an option to connect to wireless router using WPS.
Step 3: Select the designed connectivity option in Setup menu and follow on-screen instructions for connectivity option chosen and finish it.
How to connect printer through network using WiFi or Network Setup Wizard?
Step 1: On Printer’s LCD screen, select your WIFI network name or SSID, to connect your wireless router
Step 2: Enter the correct password for your WiFi network in order to login into WiFi network and hit ‘OK’ or ‘Next’
Step 3: Now, follow on-screen instructions to connect printer to your WiFi network. Once connected, printer usually indicates that it is now connected to network
How to connect printer through network using WPS?
Step 1: While configuring printer for network connection and under ‘WiFi Setup’ or ‘Network Setup’, if you see two WPS options, try ‘Push Button setup (WPS)’ or similar option
Step 2: Most printers display message on LCD screen telling you to start WPS connectivity process on router. So, you need to go to your Router and find WPS button on router, press ‘WPS’ button to start the process. Now, back to printer’s LCD screen and hit ‘Ok’ or ‘Next’ to continue the process. This way, your printer looks for the router’s WPS signal and once detected from your router, it connects to WiFi network. Once connection is established, the message is displayed that indicates the printer is now connected to network.
How to connect printer through network using network-capable wired network connection?
If your printer doesn’t have WiFi capabilities and does have a wired network port, then you can try wired network connection of your printer to perform printing tasks from your computers not physically connected to printer.
Step 1: Turn OFF your printer if it is turned ON and look on the back of printer for wired network port
Step 2: Connect one-end of Cat 5 Network Cable to wired network port on printer
Step 3: Other end of network cable to available wired network port of your network router. Make sure both end of cable is connected properly.
Step 4: Now, turn ON your printer and wait to establish the connection. To check if the printer is connected to network or not, check to see if printer has IP address through its LCD screen, it should also provide network connectivity status and indicates the printer is connected to network. Or you can go to Printer menu on LCD display by clicking ‘Menu’ or ‘Setup’ button, navigate to ‘Networking’ or ‘Network Setup’ and then select ‘TCP/IP’, ‘IP address’, ‘Network Status’, ‘WiFi Status’ to view IP address settings. Your printer’s IP address should be listed there.
How to connect printer through network on Windows 10?
Step 1: Turn On your printer and connect printer to the network using above methods
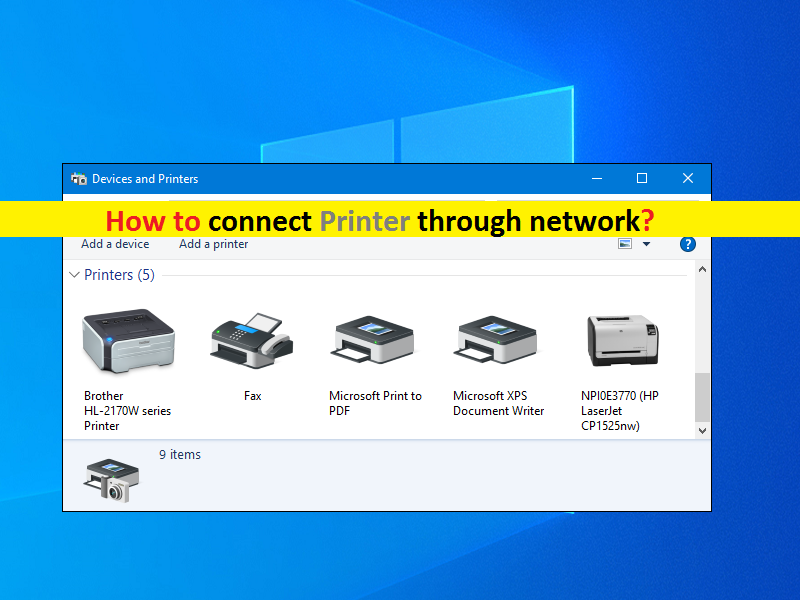
Step 2: In Windows 10 computer, open ‘Control Panel’ and go to ‘Devices and Printers’ and click on ‘Add a Printer’ link at top of menu bar.
Step 3: In ‘Add Printer’ window opened, select the printer and click ‘Next’ if it is detected. If not, click ‘The printer that I want isn’t listed’ and skip to add the printer by name or ‘TCP/IP’ addresss
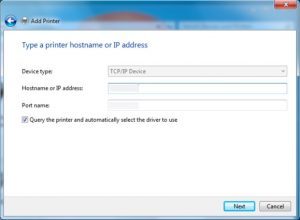
Step 4: If you choose ‘TCP/IP address’ option, then you need to select ‘Add a printer using TCP/IP address or hostname’ option and enter your printer’s IP address. You can IP address of Printer using ‘step 4’ of above method, and then hit ‘Next’
Step 5: Follow on-screen instructions to finish the process. Once done, try printing the document in your Windows 10 computer with Network printer.
Conclusion
I am sure this post helped you on How to connect printer through network with easy steps/methods. You can read & follow our instructions to do so. That’s all. For any suggestions or queries, please write on comment box below.