Tips to Ungroup Items in taskbar Windows 11:
In this article, we are going to discuss on How to Ungroup Items in taskbar Windows 11. You will be guided with easy steps/methods to do so. Let’s starts the discussion.
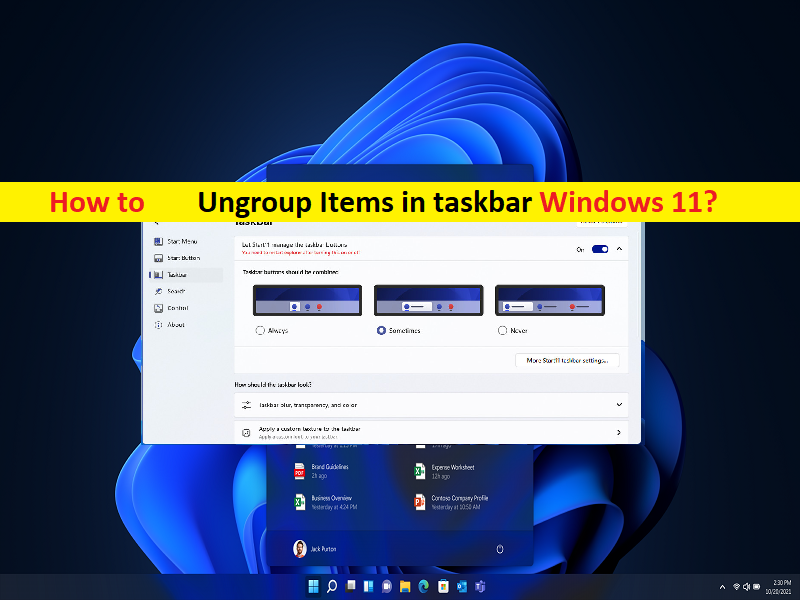
‘Ungroup Items in taskbar Windows 11’:
Microsoft Windows 11 was long-anticipated operating system version that finally came out in October 2021. It features improved UI (User Interface) and other elements from previous Windows versions. Windows 11 OS allows you to install Android apps easily and also includes a myriad of security improvements to ensure user safety. However, it is not guarantee that you must like these improvements and changes in Windows 11 computer.
As you fundamentally changed the way some of Windows features are handled, not all changes were met you positively. For example, it might possible you are not happy about disabled thumbnail previews or that the newest version requires a relatively new processor to be available in first place. Another feature of Windows 11 is Windows 11 icon/item grouping in taskbar that is also something, many users were not want to enable it on their device.
Several users reported they are unhappy about item grouping which increased the number of clicks required to access the correct window and many users said that Microsoft had scarified usability fro sake of visual aesthetics, which is not completely unture.
Item grouping was introduced to counter the cluttered taskbar where all Windows from the same app would be grouped into the single taskbar icon. When you attempt to access a particular window by hovering over the correct instance, you may experience multiple files open of same app or browser on the screen. In such case, you can ungroup items in taskbar in Windows 11 computer to resolve it.
How to Ungroup Items in taskbar Windows 11?
Method 1: Update Windows OS
Updating Windows OS latest version can resolve the issue.
Step 1: Open ‘Settings’ app in Windows PC via Windows Search Box and go to ‘Windows Update’ and click ‘Check for updates’ button
Step 2: Download and install all available and pending updates in computer, and once updated, restart your computer and check if it works.
Method 2: Backup your registry database
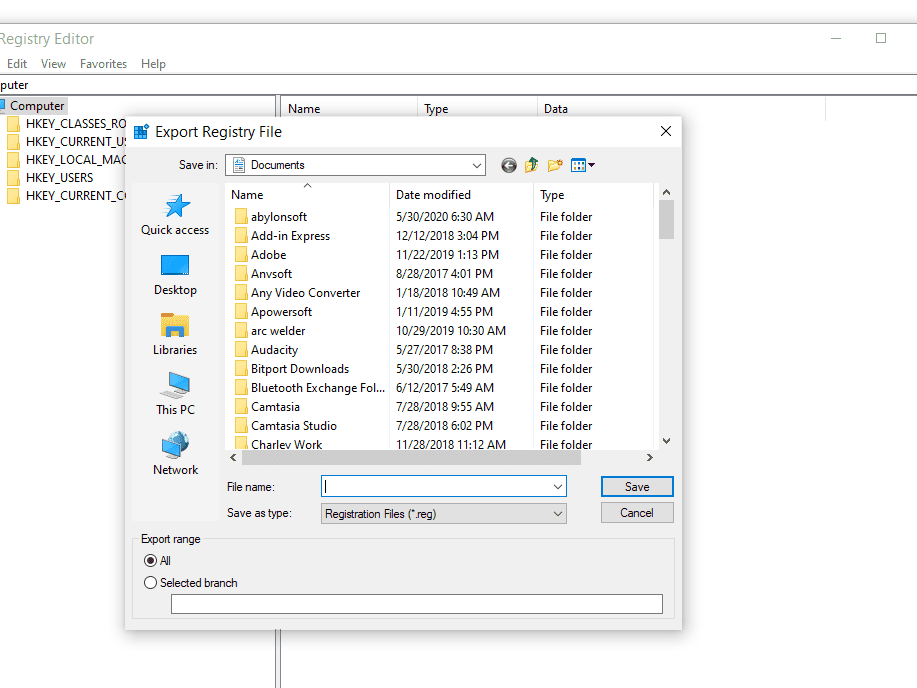
Step 1: Open ‘Registry Editor’ app in Windows PC via Windows Search Box and go to ‘File > Export’
Step 2: Under ‘Export Range’ at bottom, select ‘All’, name the backup and hit ‘Save’ to save the backup.
Method 3: Ungroup Items in taskbar Windows 11
Step 1: Open your browser and visit ‘https://github.com/Open-Shell/Open-Shell-Menu/releases’ page or Open-Shell download page, expand ‘Assets’ and download ‘OpenShellSetup_4_4_169.exe’ from there
Step 2: Double-click on downloaded setup and follow on-screen instructions to finish installation.
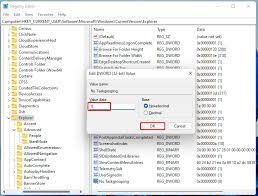
Step 3: Once installed, open ‘Registry Editor’ app and navigate to following path
HKEY_CURRENT_USER\\Software\\Microsoft\\Windows\\CurrentVersion\\Policies\\Explorer
Step 4: Select ‘Explorer’, right-click on empty space in right pane and select ‘New > DWORD (32-bit) Value’ and name it to ‘NoTaskGrouping’, double-click it, change value data to ‘1’ and click ‘ok’
Step 5: Now, open ‘Registry Editor’ app again and navigate to following path
HKEY_LOCAL_MACHINE\\SOFTWARE\\Microsoft\\Windows\\CurrentVersion\\Shell\\Update\\Packages
Step 6: Select the packages folder in left, right-click on empty space in right pane and select ‘New > DWORD (32-bit) Value’, name it to ‘UndockingDisabled’ and double-click it to edit, set its value data to ‘1’ and hit ‘Ok’ button
Step 7: Now, press ‘CTRL + SHIFT + ESC’ keys on keyboard to open ‘Task Manager’, find ‘Windows Explorer’ entry, and right-click it and select ‘Restart’. Once done, check if it works.
Conclusion
I am sure this post helped you on How to Ungroup Items in taskbar Windows 11. You can read & follow our instructions to do so. That’s all. For any suggestions or queries, please write on comment box below.


