What is ‘Windows 11 is slow after update’ issue?
In this article, we are going to discuss on How to fix Windows 11 is slow after update. You will be guided with easy steps/methods to resolve the issue. Let’s starts the discussion.
‘Windows 11 is slow after update’ issue: It is common Windows Problem considered as Windows 11 PC/Laptop slowdown issue. When you perform Windows Update operation in your computer, the update helps you improve your Windows PC performances and experience. However, several users reported they faced Windows 11 is slow after update issue and explained they are unable to use their Windows 11 computer normally due to slow PC performance issue. This issue might be the indications of corruption in system files/applications and services in Windows computer.
There could be several reasons behind the issue including the interference of third-party applications, background apps and services, conflicting software, problematic hardware attached in computer, outdated/corrupted graphics card driver and/or other device drivers, lack of enough storage space on RAM or hard disk drives, problematic Windows OS update, and other issues. It is possible to fix the issue with our instructions. Let’s go for the solution.
How to fix Windows 11 is slow after update?
Method 1: Fix Windows 11 is slow after update with ‘PC Repair Tool’
‘PC Repair Tool’ is easy & quick way to find and fix BSOD errors, EXE errors, DLL errors, problems with programs/applications, malware or viruses issues, system files or registry issues, and other system issues with just few clicks.
Method 2: Restart your computer
Sometimes, this type of issue is occurred due to some temporary issues in your Windows computer. You can just restart your computer to fix temporary issues and resolve this issue, and check if it works for you.
Method 3: Run Performance Monitor
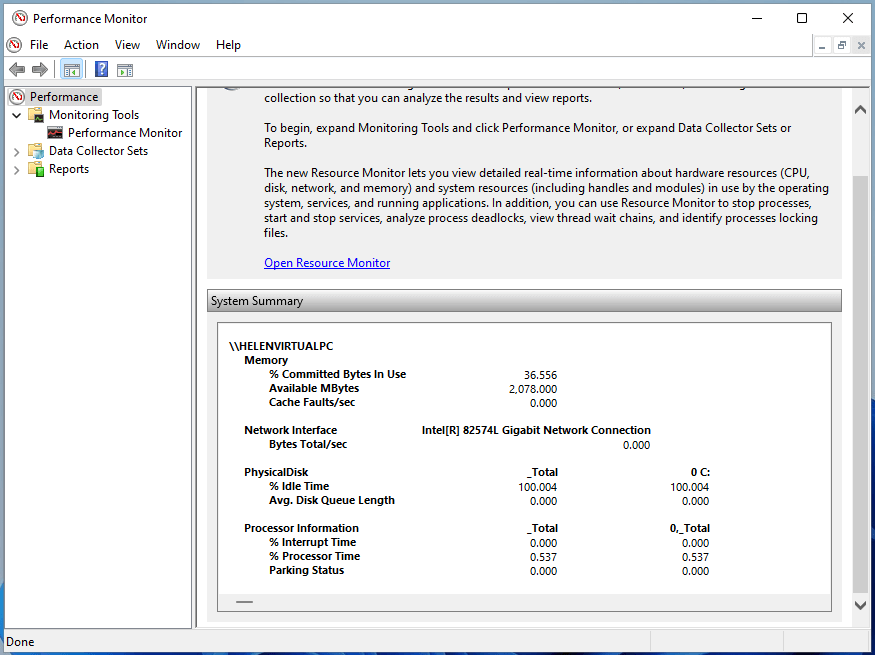
Step 1: Type ‘Performance Monitor’ in Windows Search Box and open it from results appear
Step 2: Click ‘Data Collector Sets’ in left pane and double-click ‘System’ in right pane
Step 3: You would now find two options, System Diagnostics and System Performance. Right-click on ‘System Performance‘ and select ‘Start’ from context menu. This tool will now run a performance test assessing how the various apps, processes and services impact the system.
Step 4: Once completed, select ‘Reports’ in left pane and double-click ‘System’ on right pane and select ‘System Performance’. If you have run test earlier, you will find all reports listed here with date & time for each. Select the one for test you run earlier. You can also see the detailed report of performance on various parameters underneath the summary. Go through various section for better understanding of the performance. This will provide you an insight as to what is leading to system slowdown and thereby help you formulate a strategy to optimize system performance.
Method 4: Close apps and processes hogging the system
Step 1: Press ‘CTRL + SHIFT + ESC’ keys on keyboard to open ‘Task Manager’
Step 2: Under ‘Processes’ tab, right-click on the processes that is causing high disk usage issue, and select ‘End Task’ to close them. Once done, check if the issue is resolved.
Method 5: Disable Startup Programs
Step 1: Open ‘Task Manager’ in Windows PC and click ‘Startup’ tab
Step 2: Select the program that you want to disable from loading at startup and click ‘Disable’ at bottom. Once done, check if it works.
Method 6: Change Power Plan
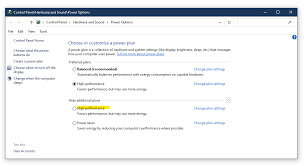
Step 1: Open ‘Control Panel’ in Windows PC via Windows Search Box and go to ‘Power Options Show additional plans’
Step 2: Tick ‘High Performance’ checkbox to select the power plan and save the changes, and check If it works.
Method 7: Delete Temp files
Step 1: Press ‘Windows + R’ keys on keyboard, type ‘%temp%’ in ‘Run’ window and hit ‘Ok’ button to open ‘Temp’ folder
Step 2: Select all files inside temp folder and delete them. Once done, check if it works for you.
Method 8: Run Disk Cleanup Tool
Step 1: Open ‘Disk Cleanup’ tool via Windows Search Box and select your Windows Drive like C: from dropdown and hit ‘ok’ button
Step 2: Select all checkboxes or checkboxes according to your needs, and then hit ‘Ok’ button and then click ‘Delete Files’ in confirmation box. Once finished, check if it works for you.
Method 9: Disable animations
Animation or visual effects offered by Windows too appear to affect its performance and slow down the system. You can disable it in order to fix. To do so, you need open ‘View Advanced System Settings’ via Windows Search Box and click ‘Settings’ under ‘Performance’ section, select ‘Custom’ radio option, untick the checkboxes for the animations or visual effects that you would like to disable. Finally, click ‘Ok’ button to save the changes.
Method 10: Defragment hard drive
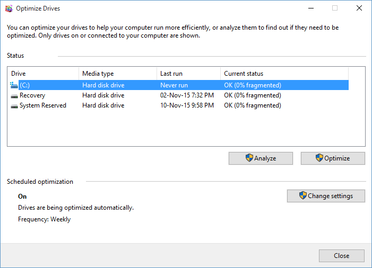
Step 1: Open ‘Defragment and Optimize Drives’ app via Windows Search Box
Step 2: Select the driver you want to defragment and click ‘Analyze’ at bottom to check the current fragment status
Step 3: Now click ‘Optimize’ and wait to finish the process. Once done, check if it works for you.
Method 11: Update Windows OS
Step 1: Open ‘Settings’ app in Windows PC and go to ‘Windows Update’ and click ‘Check for updates’
Step 2: Download and install all available updates and pending updates and once updated, restart your computer and check if the issue is resolved.
Method 12: Increase Page File/Virtual memory
Step 1: Open ‘View Advanced System Settings’ via Windows Search Box and click ‘Settings’ under ‘performance’ section
Step 2: Click ‘Advanced’ tab, and click ‘Change’ under ‘virtual memory’, uncheck ‘Automatically manage paging file size for all drivers’ option, select ‘C:’ drive, check ‘Now paging file’ and click ‘Set’. .
Step 3: Now, select a data drive, check ‘Custom Size’, enter the value for the page file in sections provided. Click ‘Set > Ok’ to save the changes, and check if the issue is resolved.
Method 13: Update Device Drivers
Updating all necessary device drivers to latest version can resolve the issue. You can update all Windows drivers to latest & compatible version using Automatic Driver Update Tool. You can get this tool through button/link below.
Method 14: Uninstall the problematic application
You can also try to fix the issue by uninstalling the problematic program in computer. Let’s try.
Step 1: Open ‘Control Panel’ in Windows PC and go to ‘Uninstall a program > Programs > Features’
Step 2: Find and right-click on the problematic applications, and select ‘Uninstall’ to uninstall it. Repeat same step to uninstall other faculty software and once done, restart your computer and check if it works for you.
Method 15: Remove browser extensions
Step 1: Open Google Chrome browser and click ‘Three-Dots’ icon at top-right corner and select ‘More Tools > Extensions’
Step 2: Disable extensions from there and then restart your computer, and check if it works for you.
Conclusion
I am sure this post helped you on How to fix Windows 11 is slow after update with several easy steps/methods. You can read & follow our instructions to do so. That’s all. For any suggestions or queries, please write on comment box below.


