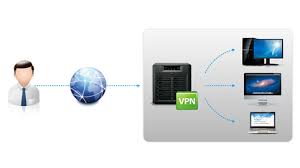
In this article, we will provide you detailed the guide on how to setup synology NAS as VPN server and how to connect to it to remotely access the shared files on your sinology NAS server and to its internal networks over the internet and prevent the risk of the internet attacks and data interaction.
Guide how to setup and connect Synology NAS as VPN server
Here, we are providing you complete tutorial how you can setup your L2TP VPN server on Synology NAS. The entire process can be categorized in two parts, the first one being to setup L2TP Server on Synology NAS and setup a VPN client for sinology NAS VPN server next to it. Check below the complete steps:
Part 1: Setup and Configure Synology NAS as VPN server
Step 1: install and enable VPN L2TP Server on Synology NAS
- Go to the packages and install the required VPN server package,
- Open it, navigate to L2Tp/IP Sec and click on the Enble L2TP/IP Sec VPN Server,
- Now, go to the Dynamic IP address fields and specify a virtual IP address of VPN server,
- Limit the number of VPN connections now by setting maximum connection number,
- Then, sect the maximum number of connections with same account to limit the number of concurrent VPN connections with the same account,
- Choose MS-CHAP v2 authentication method the next so that the VPN client passwords would be encrypted,
- Click on the Pre-shared box the then and pick Use a Securely Generated Password,
- Check the box that says Enable SHA2-256 compatible mode (96-bit) to permit certain clients to use L2TP/IP Sec connection,
- Click Apply and finally click OK button when you receive a message informing you which particular ports you have to open in your firewall for the L2TP VPN server to work.
Step 2: Setup port forwarding rules
Your next step is to configure the L2TP/ IP Sec port forwarding rules for sinology VPN server on your router/ firewall. Here is how you should do:
- Log-in to your router/s interface,
- Inside the configuration setup, forwarded the below ports to the IP address of the sinology VPN server:
1701, 500 & 4500 (UDP)
Part 2: Connect to Synology VPN server from Windows 10
After completing the setup process, you can connect to synology NAS as VPN server by using the three steps below:
Step 1: Allow L2TP connections behind NAT in the Windows Registry
Windows 10, 8 or 7 and the Windows Server 2016, 2012 and 2018 Oss do not support L2TP/ IP Sec connections when the PC or the VPN server are located behind a NAT. to bypass this problem, you would have to change the registry as follows:
- Press Win+ R, type regedit and hit Enter to open Registry Editor,
- On the left pane, navigate to the below key:
- HKEY_LOCAL_MACHINE\SYSTEM\CurrentControlSet\Sevices\PolicyAgent
- Right-click on an empty space on the right pane and select New –> DWORD (32 bit) Value,
- Type AssumeUDPEncapsulationContextOnSendRule as the new key name and hit Enter,
- Double-click at AssumeUDPEncapsulationContextOnSendRule value, type 2 at the Value data and click on Ok button,
- Once done, reboot the device.
Step 2: Configure a new VPN L2TP connection for Syonlogy VPN server
After making the required changes to the Windows registry, you are reading to create and setup the VPN connection to the Synology NAS L2TP VPN Server. To do that:
- Open Settings and click on Network and Internet,
- Click on VPN on left and then click + to Add a VPN connection,
- Give the necessary information on the provided page and click on the Save button once done,
- Now, click on Change adapter options,
- Right-click on the VPN connection for synology NAS and select properties,
- Go to the Security tab, select all protocols and check the options that say Challenge Handshake Authentication Protocol (CHAP) and Microsoft CHAP Version 2 (MS-SHAP v2),
- Now, at the Networking tab, uncheck Internet Protocol Version 6 (TCP/IPv6), select the Internet Protocol Version 4 (TCP/IPv4) and click on properties,
- Now, click on Advanced option, uncheck “Use default gateway on remote network” option and then click OK button three times to apply the changes and close the windows,
- Click on the Network icon on the taskbar, select Synoloy VPN and click on Connect,
- Once connected, proceed and check if you can access to the shared files.
Step 3: Access the NAS shared files
To do that, Press Win+ R, type ‘\\’ followed by your Virtual IP address of the VPN server and then click ok. Now, you can access the files shares on your synology NAS server.
Conclusion
That’s all! We are now rounding off this article. Hope so the provided steps are helpful for you. Please share the post to your colleagues so that this would help them too. In case of any queries, questions and suggestions, our comment section is always open for you.


