This article provides you two easy ways how to set default printer in Windows 10. Use whichever the methods you want to choose – both are quickest and easiest one.
What the actual problem the users have to encounter with?
Windows 10 automatically sets your printer to be the last used one as the current location. For the users who require printing a majority of documents on one-type of printer and use a different one occasionally have this feature very painful.
While they can simply switch to the devices to print, somebody just wants using a primary device all the time for the printing purpose. To set a default printer with no change in it, you need to adjust some settings.
Below, we’ll explain the processes that you have to walk through to set a default printer and make sure that it stays as the default printer when another one is used. You can re-enable the default setting anytime later, if that’s your preference.
Also Read: How to fix Windows couldn’t connect to the printer error in Windows 10 [Steps]
How to set default printer in Windows 10?
Basically, there are two ways that give you the same result. You can set the default printer in settings or in control panel. Both the methods are described below in stepwise manner:
Set Default Printer in Settings
Go to the settings on Windows 10 and pick the printer you want to use by default. Here is the complete process:
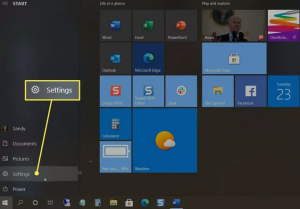
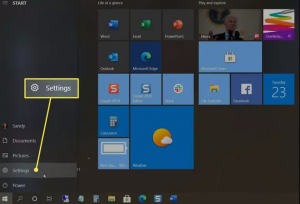
- Click on the Windows icon on the bottom left of your screen to open Start menu,
- Select settings option on the left pane,
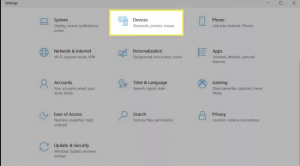
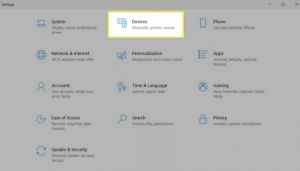
- Choose Devices on the next pop-up window,
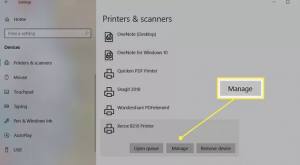
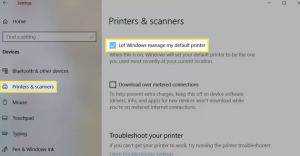
- Pick Printers & Scanners on the left and select the Printer you want to use on the right,
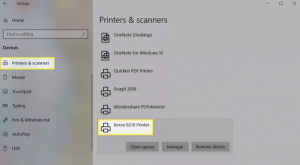
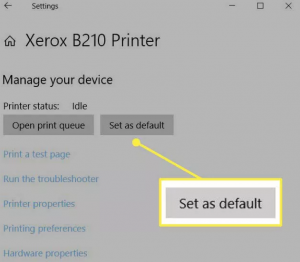
- Below is your printer name, click on Manage option,
- Finally, click set as Default.
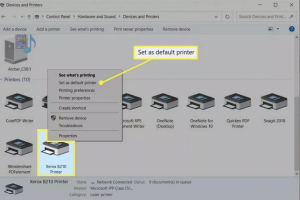
Set the Default Printer in Control Panel
Somebody would like to use the Control Panel to manage settings on Windows 10. If you are the one, follow the below steps to set the default printer:
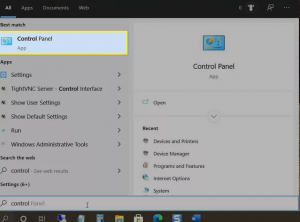
- Open Search box, type in Control Panel and then select it from the results,
- Go the Hardware and Sound section, and choose View devices and Printers option therein,
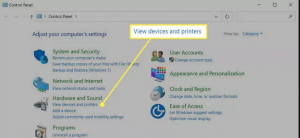
- If you are seeing this option, pick Devices and Printers,
- Scroll down to Printers, right-click to the printer you want to use and select set as default printer.
Set the default printer as last one used
This is another handy option for you. Suppose you travel between home and physical office, you can have the default printer set as the one you used most recently at that location. Here is the required step:
- Click on the Windows icon on the left of the screen and select settings,
- Choose Devices on the pop-up appears the next,
- Click on the printers & Scanners option there on the left and from the list of the printers appear on the right, check the box for Let Windows manage my default printer.
Conclusion
We have provided you the possible ways how to set default printer in Windows 10. It is a time saving option to set your default printer rather than selecting the printer you want to use each time. The then, you can print much faster as you have to go through fewer steps.


