What is ‘pagefile.sys’ in Windows 10?
In this article, we are going to discuss on “How to disable pagefile.sys Windows 10”. You will be guided with easy steps/methods to do so. Let’s starts the discussion.
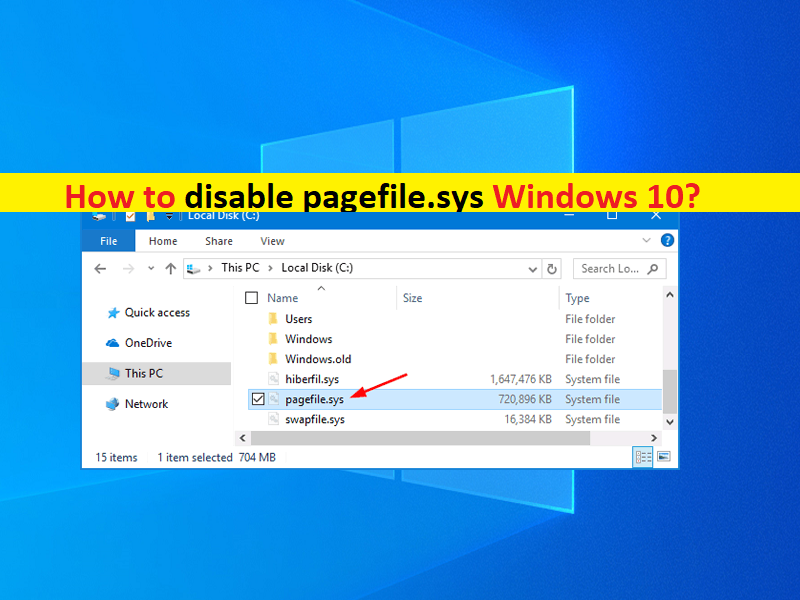
‘pagefile.sys’ or ‘Windows Page File’: pagefile.sys is important Microsoft Windows Operating System’s system file. The purpose of this system file is to store data that can’t be held by your computer’s RAM (random access memory) when it fill up. Windows Page File of pagefile.sys is located in main drive or Windows Installation drive like ‘C:\pagefile.sys’ path. When the Computer’s RAM becomes full, Windows moves a part of data to paging file. The same file is also used to store data of apps you are not using.
Some Windows users explained that disabling pagefile.sys or Page File on Windows computer will improve and speed up computer performance. The thinking goes like this: The page file or pagefile.sys is slower than RAM, and if you have enough RAM, Windows will use the Page File it should be using RAM, slowing down your computer. Some users have tested this theory and found that, while Windows can run without a page file if you have large amount of RAM, there is no performance benefit to disabling paging file.
On other hand, disabling pagefile.sys or page file can result in some bad things like app crashing at startup. For example, if program start to use up all your available memory, they will crashing instead of being swapped out of RAM into your page file. In sort, some programs may even refuse to run. It means it is not good reason to disable page file/ pagefile.sys.
However, if you feels that your computer has all RAM you could possibly need, you can get rid of pagefile.sys or page file just by turning Virtual Memory Off on your computer. It means you can turn OFF Virtual Memory in your Windows 10 computer in order to disable pagefile.sys or page file. Let’s go for the steps.
How to disable pagefile.sys Windows 10?
Method 1: Turn OFF Virtual Memory in Windows 10
Step 1: Find and right-click on ‘My Computer’, ‘This PC’ or ‘Computer’ icon, and select ‘Properties‘
Step 2: In the opened window, click ‘Advanced System Settings’ in left pane
Step 3: Click ‘Settings’ button und ‘Performance’ section and in next window opened, click ‘Advanced’ tab
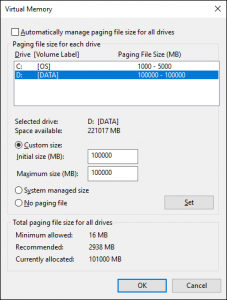
Step 4: Click ‘Change’ option under ‘Virtual Memory’, untick ‘Automatically manage paging file size for all drives’ checkbox
Step 5: Select any drives that have pagefile.sys file and click ‘No Paging File’ radio option
Step 6: Click ‘Set’ and then click ‘Ok’ button to save the changes.
Step 7: Once done, restart your computer to see the changes.
How to enable pagefile.sys or paging file in Windows 10?
It is quite simple to re-enable pagefile.sys or paging file in Windows 10 computer. To do so, you need to repeat the same steps mentioned in above method but this time you need to check ‘Automatically manage paging file size for all drives’ checkbox and then save the changes.
Fix Windows PC Issues with ‘PC Repair Tool’
‘PC Repair Tool’ is easy & quick way to find and fix BSOD errors, EXE errors, problems with programs/applications, malware or viruses issues, system files or registry issues, and other system issues with just few clicks.
Conclusion
I hope this post helped you on How to disable pagefile.sys Windows 10 with easy steps. You can read & follow our instructions to do so. That’s all. For any suggestions or queries, please write on comment box below.


