Most of us today need a portable computer as our companion in our day to day life to make it easier. This mean a good battery life is also need to fulfil our requirements otherwise it will lost the meaning of portable if it need a power cord whenever you power it on. Battery life also determines the estimate of how long the device will last without needing to charge it again.
Therefore learning about your battery health as well as life is important in maintaining that cycle of using and charging and see if the battery has any issue or problem which could be fixed or repaired. Whichever the reason may be learning about battery status is crucial in every aspect.
Windows Operating System has an in-build command line tool that can be used to obtain battery status reports which has been collected over time since the first boot into Windows 11. The information includes energy usage, battery life estimate, battery specification and it could be used to determine whether the battery is in proper condition or needs a replacement.
If you want to know how to get battery report in Windows 11 then, we have listed the instructions and methods to follow and get your desired result.
Check Battery Status in Windows 11 using Command Line Tool
To create a battery health and status report in Windows 11 then follow the steps given below:
- Open Start menu from the taskbar.
- Now go to Search bar and type cmd.
- In the list of best match, right click on Command Prompt.
- Choose Run as Administrator option from the drop down list.
- Now type or copy the following command given below and press Enter key.
- powercfg /batteryreport /output “C:\battery_report.html
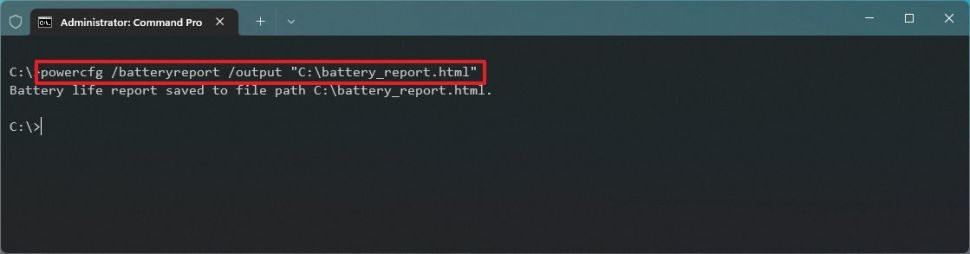
- If you have followed every step properly then a battery report will be created on your “C” or main partition of storage drive.
How to Access Battery Report in Windows 11
To get hold of the recently created battery report you created, follow the instructions mentioned below:
- Open Windows or File Explorer by double left clicking This PC
- You can also press and hold Win + E key together to open File Explorer.
- Open “C” drive under Devices and drives section.
- Here you will find a file named battery_report.html, to open double click on it.
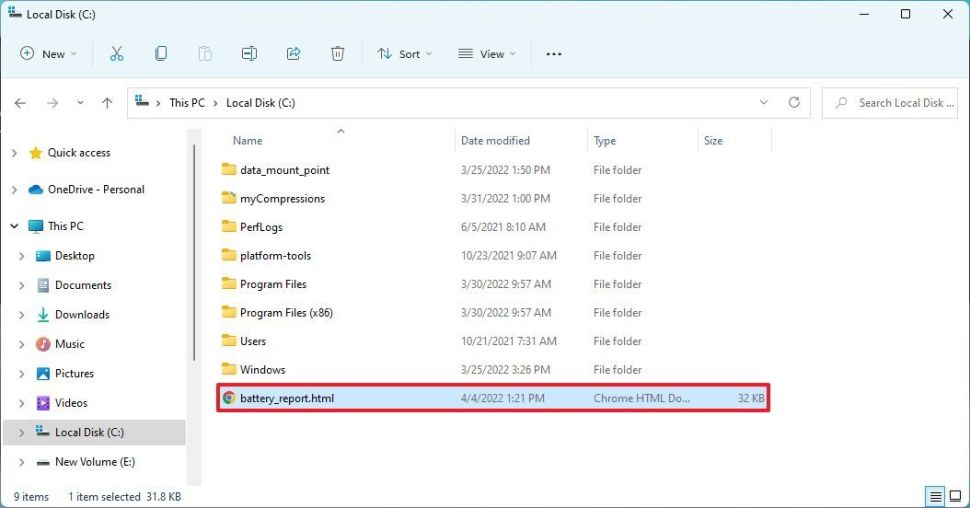
- Now your default browser will open with the report.
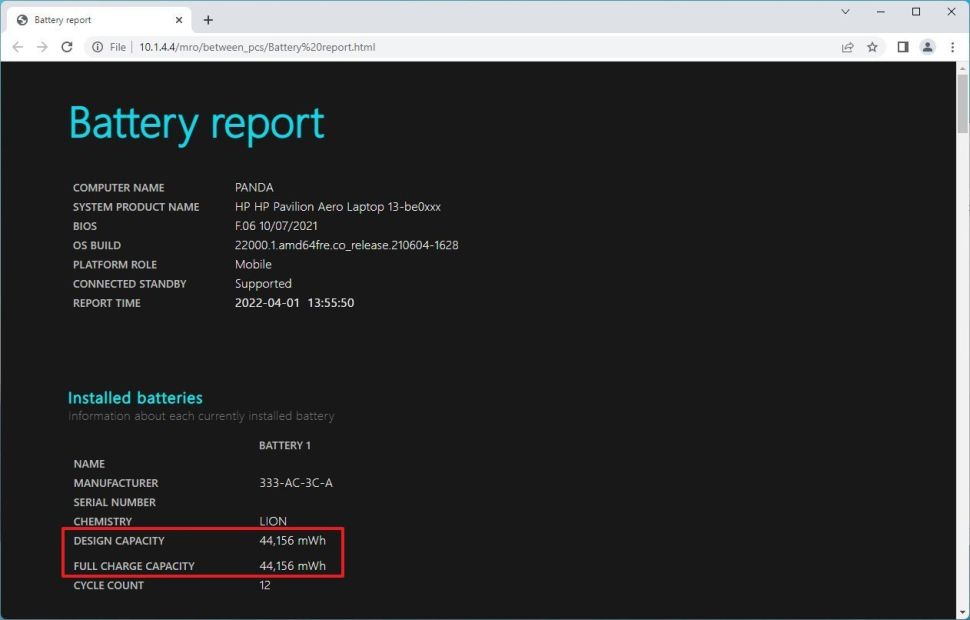
That all you have now created your battery report with almost all the information needed. You can check the report based on what it says:
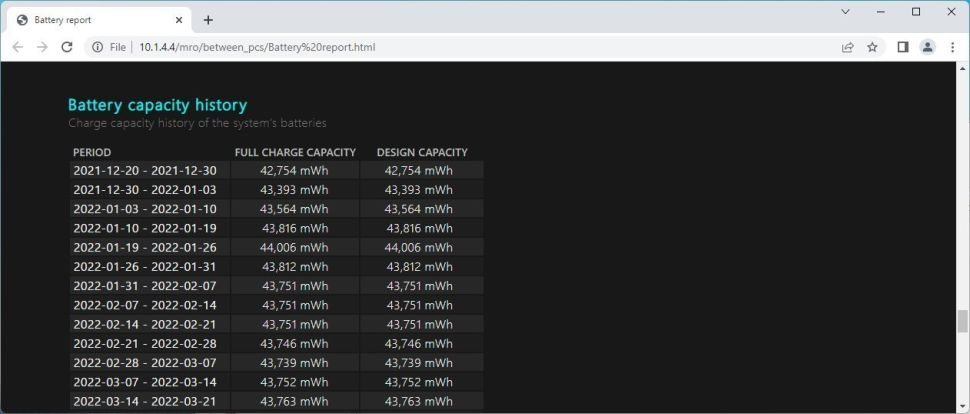
- You can further learn about your battery condition if it need replacement or not by checking Full Charge Capacity and Design Capacity, for instance your battery was designed to hold 40,000 mWh of capacity but the full charge capacity shows 20,000 mWh then this means the battery is now only be able to hold 50% of its designed capacity.
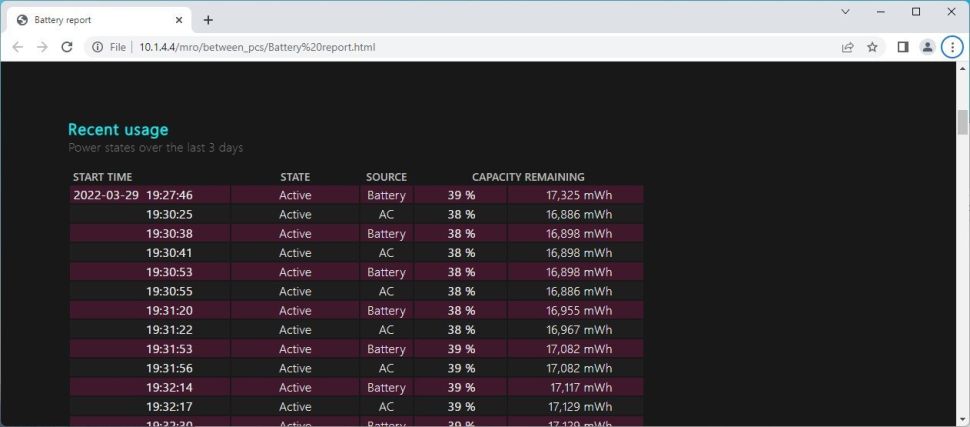
- The Recent Usage gives you the information of when the computer was active, standby or was suspended.
- The battery drain graph over the last three days in shown in Battery Usage.
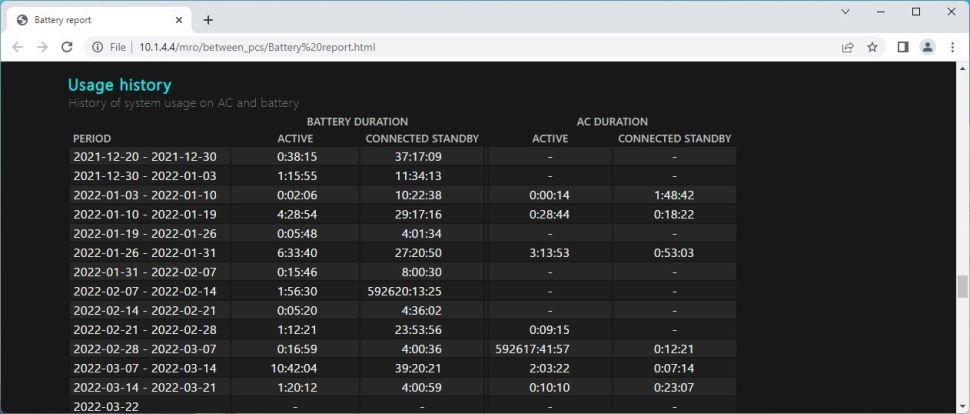
- To track when your system was using battery power and when it was charging is in the Usage history section.
- In Battery capacity history the charge history is shown.
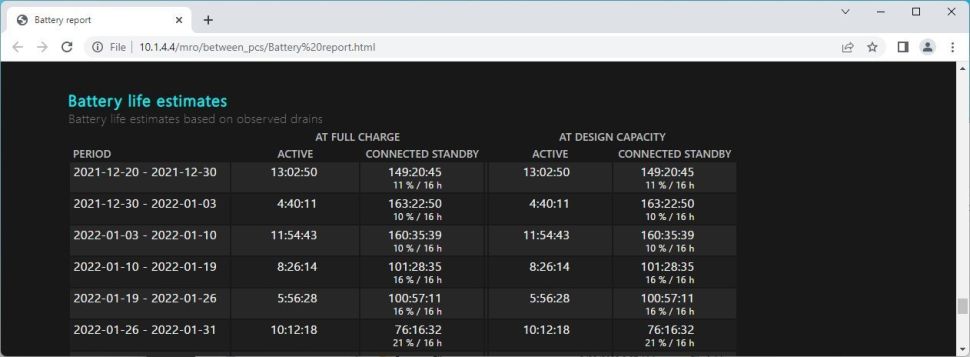
- Lastly, to check and examine the battery life based on how much the charge is drain over time is given in Battery life estimate sextion.
Conclusion
Having the ability to check the information of your battery health is very useful if you want to get the most of your device if you decide to use it on battery power. This also helps you in not getting scammed by repair persons when they falsely told you about your battery health just to charge you extra bucks. Therefore, you show know how to get battery report in Windows 11 so that you have the right information about your device and adjust to it.