Tips to fix can’t remove keyboard layout in Windows 11:
In this post, we are going to discuss on How to fix can’t remove keyboard layout in Windows 11, fix Windows 11 can’t remove keyboard layout. You will be guided with easy steps/methods to resolve the issue. Let’s starts the discussion.
‘Windows 11 can’t remove keyboard layout’:
It is common Windows Problem usually occurred when you try to remove keyboard layout in Windows 11 computer. This issue indicates you can’t remove keyboard layout in Windows 11 whenever you try to perform this. If you are not aware, keyboard layouts are great way to input languages into computer without the need for specialized hardware. However, several users reported they faced issue whenever they tried to remove a keyboard layout in Windows 11.
This issue can be occurred due to incorrect system settings relating to keyboard layout and other settings, malware or viruses infections in computer and other issues. Here, you are provided with easy ways to remove keyboard layout including via settings, registry editor and powershell. Let’s go for the solution.
How to fix Windows 11 can’t remove keyboard layout?
Method 1: Fix can’t remove keyboard layout in Windows 11 with ‘PC Repair Tool’
‘PC Repair Tool’ is easy & quick way to find and fix BSOD errors, DLL errors, EXE errors, problems with programs/applications, malware or viruses infections in computer, system files or registry issues, and other system issues with just few clicks.
Method 2: Fix Windows 11 can’t remove keyboard layout using Settings app
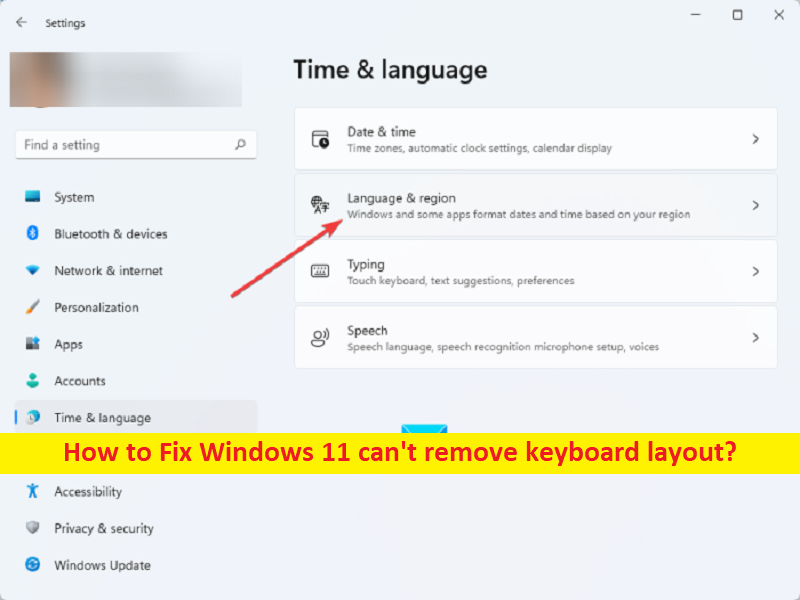
Step 1: Open ‘Settings’ app in Windows PC via Windows Search Box and go to ‘Time & Language > Language & Region’ and click the ellipsis next to language under which the layout you want to remove appears, and select ‘Language’ options.
Step 2: Click ‘Add a keyboard’ button next to installed keyboards, select the very same layout from the list that you have trouble removing. Once done, close Settings and restart your computer
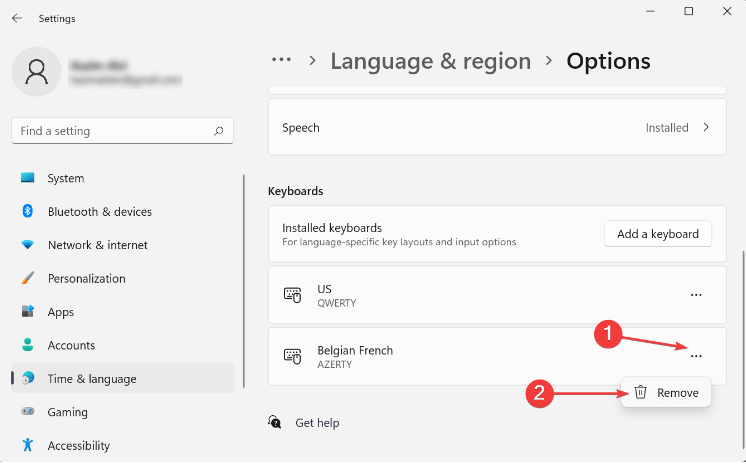
Step 3: Now, go to ‘Language Options’ in Settings app and click on ellipsis next to layout you had been trying to delete, select ‘Remove’ from the flyout menu
Step 4: Once done, restart your computer again to see the changes and check if it works.
Method 3: Fix can’t remove keyboard layout in Windows 11 using Windows Powershell
Step 1: Right-click on ‘Start menu’ and select ‘Windows Terminal (Admin)’ to open it
Step 2: Now, type the following command and hit ‘Enter’ key to execute.
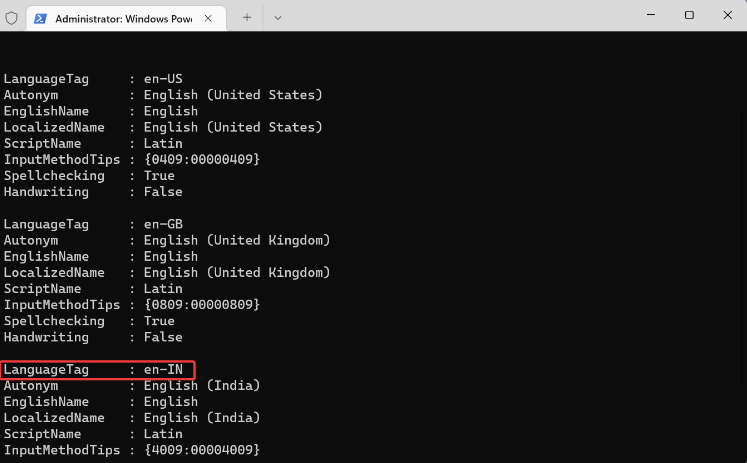
Get-WinUserLanguageList
Step 3: This will show the list of all keyboard layouts added to system. Note down the value listed next to LanguageTag for the layout you want to remove. Execute the following four commands one a time while replacing ‘<LanguageTaga>’ in second command with one you noted earlier .
$LangList = Get-WinUserLanguageList
$MarkedLang = $LangList | where LanguageTag -eq <LanguageTag>
$LangList.Remove($MarkedLang)
Set-WinUserLanguageList $LangList –Force
Step 4: Once executed, restart your computer to see the changes and check if the issue is resolved.
Method 4: Modify registry settings to fix Windows 11 can’t remove keyboard layout
Step 1: Open ‘Registry Editor’ app in Windows PC via Windows Search Box and go to following path
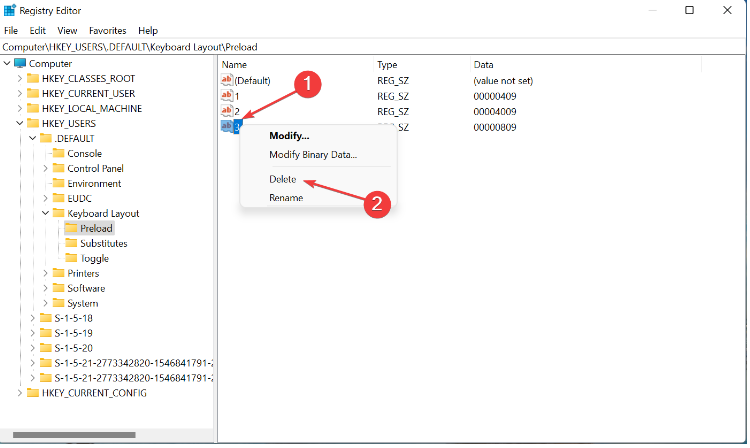
Computer\HKEY_USERS.DEFAULT\Keyboard Layout\Preload
Step 2: You will now find a list of entries on right pane and each denoting a particular keyboard layout added to PC. You can check Microsoft official site or visit ‘https://docs.microsoft.com/en-us/windows-hardware/manufacture/desktop/windows-language-pack-default-values?view=windows-11’ page for keyboard identifier to find out one you want to remove.
Step 3: Once you are able to identify the layout to be removed, right-click on it and select ‘Delete’ to delete it and confirm it.
Conclusion
I am sure this article helped you on How to fix Windows 11 can’t remove keyboard layout with easy ways. You can read & follow our instructions to do so. That’s all. For any suggestions or queries, please write on comment box below.


