What is VirtualBox FATAL: INT18: BOOT FAILURE Error in Windows 10/11?
In this article, we are going to discuss on How to fix VirtualBox FATAL: INT18: BOOT FAILURE Error in Windows 10/11. You are provided with easy steps/methods to resolve the issue. Let’s starts the discussion.
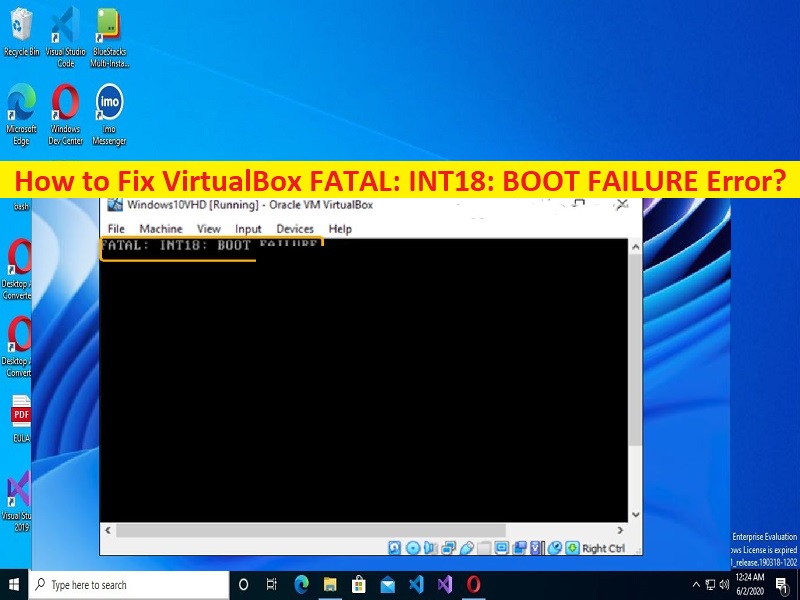
‘FATAL: INT18: BOOT FAILURE Error’ – VirtualBox error:
It is common Windows Problem usually occurred when you try to start a Windows guest machine in your Windows 10/11 host computer. This error is also appeared when you try to install software/hardware on VirtualBox in your computer. The error is appeared with message saying ‘FATAL: INT18: BOOT FAILURE’. This issue indicates the Virtual Machine (VM) is corrupt or part of boot sector is inactive. This error prevents you from using Virtual Machine in your computer comfortably.
The possible reasons behind the issue can be the issue with BCD (Boot Configuration Data) store, BCD corruption, missing Boot sector, and issue with VirtualBox itself, corruption in Windows computer, and other issues. Several users reported they faced this issue and explained the guest operating system running on VM failed to start after converting the physical disk of Windows 10/11 UEFI computer to Virtual hard disk and attaching the virtual hard disk file to a new virtualbox machine. Sometimes, it throws error code 0x0000225.
You May Also Read: Virtualbox could not open guest session verr_not_found” Error
How to fix VirtualBox FATAL: INT18: BOOT FAILURE Erroox could not open guest session verr_not_found” Error r in Windows 10/11?
Method 1: Fix ‘FATAL: INT18: BOOT FAILURE’ – Virtualbox error with ‘PC Repair Tool’
‘PC Repair Tool’ is quick & easy ways to find and fix BSOD errors, DLL errors, EXE errors, problems with programs/applications, malware or viruses infections in computer, system files or registry issues, and other system issues with just few clicks.
Method 2: Verify that guest OS partition is active
Before troubleshooting the issue, you should check if guest OS partition is active. This applies only to Generation 1 VMs. Generation 2VMs (using UEFI) doesn’t use an active partition. To check this:
Step 1: Type ‘cmd’ in Windows Search Box and press ‘CTRL + SHIFT + ENTER’ keys on keyboard to open ‘Command Prompt as Administrator’
Step 2: Open ‘Diskpart’ tool, type ‘list disk’ command and hit ‘Enter’ key to execute to see the list of disks on computer
Step 3: Look for added disks and input the command below to select a new disk. If the new disk 1, type below command
sel disk 1
Step 4: Now, execute the below commands to see list of all partitions on disk
list partition
Step 5: Now, enter the following command to select the partition you want to check. If partition is 1, then execute the following command.
Sel partition 1
Step 6: To check the status of partition, enter the following command
detail partition
Step 7: If you see the partition is not active, enter the following command and activate it.
active
Step 8: Once executed, exit Diskpart tool and check if the issue is resolved.
Method 3: Enable I/O APIC & EFI VirtualBox
Another way to fix the issue is to enable I/O APIC & EFI VirtualBox in your device.
Step 1: Close VM machine window and turn OFF the machine
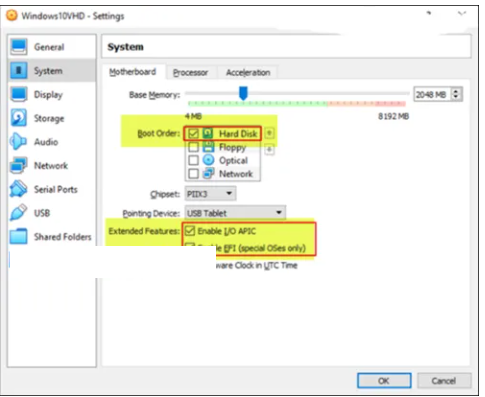
Step 2: Now, go to ‘VM Settings’ and go to ‘System > Motherboard’
Step 3: Under ‘Boot Order’ section, make sure Hard Disk is selected and is the first Boot Device
Step 4: Under ‘Extended Features’ section, select both ‘Enable I/O APIC’ and ‘Enable EFI (special OSes) only’ options, and click ‘Ok’ button to save the changes, and then check if it works for you.
Method 4: Disable Hyper-V on Host machine

Interference of Windows built-in Hyper-V virtualization program could be a reason behind the issue. You can disable Hyper-V feature in your host machine to fix.
Step 1: Press ‘Windows + R’ keys on keyboard, type ‘appwiz.cpl’ in ‘Run’ window and hit ‘Ok’ button to open ‘Programs and Features’ app
Step 2: Click ‘Turn Windows Features ON or OFF’ link, and uncheck the following checkboxes.
- Containers
- Hyper-V
- Virtual Machine Platform
- Windows Hypervisor Platform
- Windows Sandbox
Step 3: Click ‘Ok’ button to save the changes and restart your computer
Step 4: After restart, open ‘Command Prompt as administrator’ using above methods, type the following command and hit ‘Enter’ key to execute.
bcdedit /set hypervisorlaunchtype off
Step 5: Once executed, restart your computer and check if the issue is resolved.
Method 5: Repair guest OS
If the issue is still persist, you can perform guest OS repair to fix the issue.
Step 1: At first, download Windows 10/11 ISO file from Microsoft Official site in your computer
Step 2: Open ‘VirtualBox’ machine settings and go to ‘Storage’ and click ‘1st (+) plus’ button next to ‘Controller’ to add the optical drive
Step 3: Click ‘Add’ in Optical Disk Selector window, find and open ‘Windows.iso’ file
Step 4: Select ‘Windows.iso’ file and click ‘choose’
Step 5: After attaching Windows.iso file in Storage devices, go to ‘System’ and drag ‘Optical’ to the top to boot VM from attached Windows.iso
Step 6: Make sure that Enable UFI option is not selected and then click ‘Ok’ button to save the changes
Step 7: Now, open Virtual Machine and click ‘Next > Repair your computer > Troubleshoot > Startup Repair’, and allow the startup repair to run and depending on the result do the following actions:
If Startup Repair completes successfully, shut down the virtual machine, set the hard disk as a first boot device, and try to start again the virtual machine.
If startup repair couldn’t complete the repair, click ‘Advanced Options > Troubleshoot > Command Prompt’, and execute the following commands one-by-one.
diskpart
select disk 0
list partition
Once executed, make a note of size of system partition from result appeared, type the below command and hit ‘Enter’ key to execute to find out the volume number of System Partition by using its size as reference.
list volume
now execute the following commands. Replace ‘X’ with the volume number of your system partition, ‘Z’ with drive letter
select volume X
assign letter=Z
exit
Once executed, run the following command to repair boot files
bcdboot C:\windows /s Z: /f ALL
Finally, exit command prompt and shutdown virtual machine, set the hard disk as first boot device and start virtual machine, and check if it works for you.
Conclusion
I hope this post helped you on How to fix VirtualBox FATAL: INT18: BOOT FAILURE Error in Windows 10/11 with easy ways. You can read & follow our instructions to do so. That’s all. For any suggestions or queries, please write on comment box below.


