What is ‘STATUS_ACCESS_VIOLATION error’ on Google Chrome in Windows 10?
If you are experiencing ‘STATUS_ACCESS_VIOLATION error’ problem in Google Chrome/Microsoft Edge browser in Windows 10 while trying to access certain WebPages or while browsing the web, then you are in right place for the solution. Here, you will be guided with easy steps/methods to resolve the issue. Let’s starts the discussion.
‘STATUS_ACCESS_VIOLATION’ error: It is common error usually occurred on browser like Google Chrome and Microsoft Edge while surfing the web or trying accessing certain WebPages. This error prevents you from accessing certain WebPages in your browser. There could be several reasons behind this issue including outdated browser, large number of extensions installed in browser, enabled ‘Renderer Code Integrity’ security feature in Chrome browser, and other reasons. Let’s take a look at error massage.
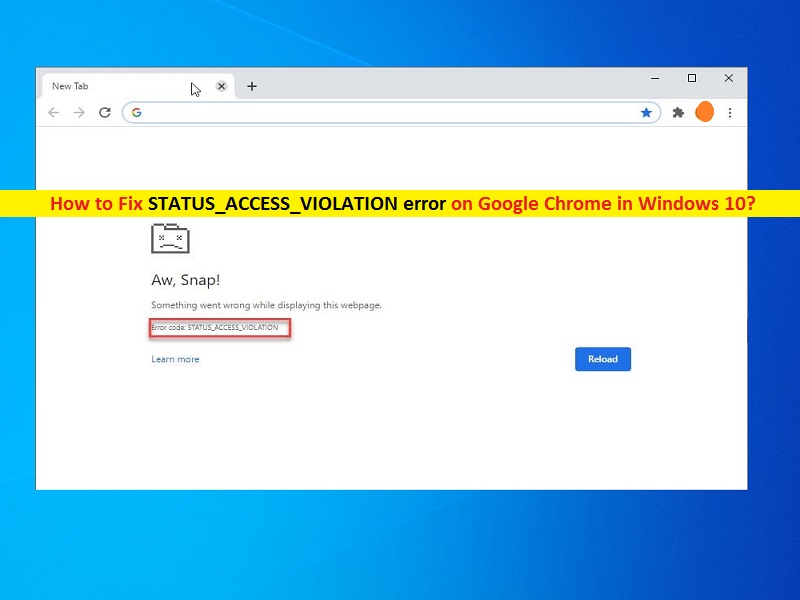
“Aw Snap! Something went wrong while displaying this webpage.
Error Code : STATUS_ACCESS_VIOLATION”
The possible reason behind this error can be unspecified program code registers for memory without any proper authority. It happens on website with advertising or when browser has installed multiple extensions. In such case, you can remove all unnecessary extensions in browser in order to fix the issue. Another possible reason behind this issue can be issue with browser itself. Outdated browser software could be reason behind the issue so you can update your browser in order to fix the issue.
Before troubleshooting the error, you should try reloading/refreshing the WebPages that is causing error, and check if refreshing webpage works for you. If not, then you can follow our instructions to resolve the error in Windows 10 computer. Let’s go for the solution.
How to fix STATUS_ACCESS_VIOLATION error Chrome in Windows 10?
Method 1: Fix ‘STATUS_ACCESS_VIOLATION’ error with ‘PC Repair Tool’
If you are facing this error due to some problems in Windows computer, then you can try to fix the issue with ‘PC Repair Tool’. This software offers you to find and fix BSOD errors, DLL errors, EXE errors, problems with programs/applications, malware or viruses issues, system files or registry issues and other system issues with just few clicks. You can get this tool through button/link below.
Method 2: Download Google Chrome latest version or update Google Chrome
One possible way to fix the issue by updating Google Chrome browser to latest update version or download latest version of Google Chrome.
Download latest version of Google Chrome:
Step 1: Open Internet Explorer or some other browser and visit ‘https://www.google.com/chrome/’ page and download latest Google Chrome setup for Windows 10 in your device
Step 2: Once downloaded, double-click on ‘Downloaded Google Chrome setup file’ and follow on-screen instructions to finish update process.
Step 3: Once installed, retry opening the browser and check if the issue is resolved.
Update Google Chrome:
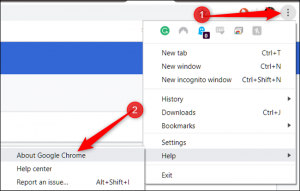
Step 1: Open ‘Google Chrome’ and click on ‘Three-Dots’ icon at top-right corner and select ‘Help > About Google Chrome’
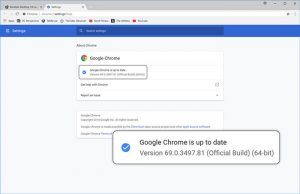
Step 2: This will automatically update Google Chrome to latest version. Make sure your computer is connected to stable internet during update.
Method 3: Rename Browser executable file
Some users reported that this issue can be resolved by renaming browser executable file like chrome.exe for Google Chrome.
Step 1: Find and right-click on Google Chrome icon on desktop and select ‘Option File Location’
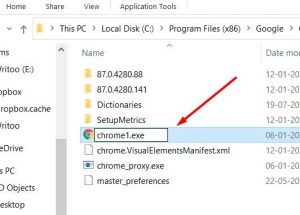
Step 2: Once you are inside installation folder of Google Chrome, find ‘chrome.exe’ file and rename it to anything else like chrome1.exe
Step 3: Once done, restart Chrome browser and check if the issue is resolved.
Method 4: Switch to Stable version of Google Chrome
This issue can be occurred if you are using unstable of Canary Version of Google Chrome in your computer. You can switch to stable version of Chrome in order to fix the issue.
Step 1: Open ‘Control Panel’ in Windows 10 computer and go to ‘Uninstall a Program > Programs & Features’
Step 2: Find and select ‘Google Chrome’ in list of programs, and click ‘Uninstall’ to remove unstable Google Chrome version and after that, restart your computer
Step 3: After restart, open your Internet Explorer browser or some other browser and visit ‘https://www.google.com/chrome/’ page and download and install the latest/stable version of Google Chrome in your computer.
Step 4: Once installed, re-launch Google Chrome and check if the error is resolved.
Method 5: Disable browser extensions
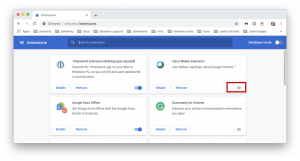
This error can also be occurred due to bad error handling in coding programs and it is possible due to any bad chrome extensions. You can disable all extensions on Google Chrome and then re-enable them one-by-one in order to check which extensions are problematic and remove problematic extensions permanently in order to fix the issue.
Step 1: Open ‘Google Chrome’ browser and click on ‘Three-Dots’ icon at top-right corner and click on ‘More Tools > Extensions’
Step 2: Disable all the extensions one-by-one in the list of extensions
Step 3: Once done, restart your browser and check if you can browse the web or access the webpage without any issue. You can re-enable browser extensions one-by-one but you should make sure browser extension you are enabling is not problematic at all.
Method 6: Try different browser
Sometimes, this error is browser-specific issue means you can try browsing internet or accessing the webpage on some other browser without any issue. If you are facing this error on Chrome, then you can switch to different browser like Chromium, Firefox and others. You can use Firefox browser offers you to import data from Chrome so that you can start working fine without any issue.
Method 7: Disable RendererCodeIntegrity Feature in Windows 10
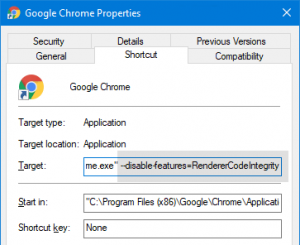
RendererCodeIntegrity is Windows 10 feature designed to prevent unsigned code from being able to change the way Chrome’s pages load. Sometimes, this feature is causing ‘STATUS_ACCESS_VIOLATION error’ or others. You can disable this feature in order to fix the issue.
Step 1: Find and right-click on Google Chrome app icon on desktop and select ‘Properties’
Step 2: In the box labeled ‘Target’ under ‘Shortcut’ or ‘General’ tab, add a space and type ‘-disable-feature=RendererCoeIntegrity’
Step 3: Finally, click on ‘Apply’ and ‘Ok’ to save the changes
Disable RendereCodeIntegrity feature using Registry Editor in Windows 10:
Step 1: Press ‘Windows + R’ keys on keyboard, type ‘regedit’ in the opened ‘Run’ dialog box and hit ‘Ok’ button to open ‘Registry Editor’
Step 2: In ‘Registry Editor’, navigate to following path in left pane
HKEY_LOCAL_MACHINE\SOFTWARE\Policies\Google\Chrome
Step 3: Once you inside correct location, in right-pane, right-click on empty area and select ‘New > DWORD (32-bit) Value’ and name the key to ‘RendererCodeIntegrityEnabled’
Step 4: Double-click on newly created key to edit, set its value to ‘0’ and click ‘OK’ button to save the changes
Step 5: Once done, restart your Google Chrome browser and check if the issue is resolved.
Method 8: Check faculty RAM by Windows Memory Diagnostic Tool
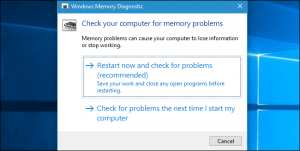
One possible way to fix the issue is to run Windows Memory Diagnostic Tool to perform memory test to detect faculty RAM.
Step 1: Type ‘Windows Memory Diagnostic’ tool in Windows Search Box and open it from results appear
Step 2: In the opened window, click on ‘Restart now and check for problems’. This will restart your computer and start scanning for RAM test.
Step 3: Once done, restart your computer and restart Google chrome and check if the issue is resolved.
Step 4: After scan finished by Windows Memory Diagnostic Tool, you will be see test results that will explained whether your RAM is problematic or not. If the test results don’t appear, type ‘Event Viewer’ in Windows search box and open it from results appear
Step 5: In ‘Event Viewer’ app, in left pane, go to ‘Windows Logs > System’ and click on ‘Find’ in right pane. Type ‘MemoryDiagnostic’ in search box in ‘Find’ box and hit ‘Find Next’ button. This will show results relating to MemoryDiagnostic scan results.
Method 9: Set Google Chrome to run with administrator permission
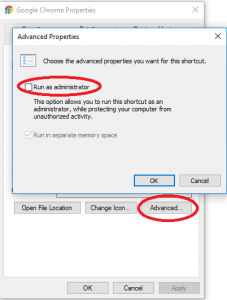
This issue can be occurred if Google Chrome is not allowed to run with administrator permission. You can provide administrator permission to Google Chrome in order to fix the issue.
Step 1: Find and right-click on Google Chrome app icon on desktop and select ‘Properties’
Step 2: In Properties window, click on Shortcut tab and click on ‘Advanced’ button
Step 3: Now, check ‘Run as Administrator’ checkbox in ‘Advanced Properties’ window and hit ‘Ok’ to save the changes
Step 4: Once done, restart Google Chrome via shortcut and check if the issue is resolved.
Method 10: Disable Google Chrome Sandbox
Sandbox environment is testing and staging platform that doesn’t allow the code being tested to make changes to existing code and database. However, this feature can cause sometime error like STATUS_ACCESS_VIOLATION error. So, you can disable this feature in order to fix the issue.
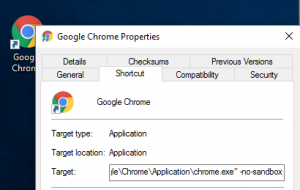
Step 1: Right-click on Google chrome app shortcut on desktop and select ‘Properties’
Step 2: In ‘Properties’ window, go to ‘Shortcut’ tab, under ‘Target’ section, type ‘Space’ and then type ‘-no-sandbox’ without quote after the path.
Step 3: Finally, click on ‘Apply’ and ‘OK’ button to save the changes and then restart Google Chrome browser, and check if the issue is resolved.
Conclusion
I am sure this post helped you on How to fix STATUS_ACCESS_VIOLATION error on Google chrome in windows 10 with several easy steps/methods. You can read & follow our instructions to do so. That’s all. For any suggestions or queries, please write on comment box below.


