What is ‘Reboot and select proper Boot Device error’ in Windows 10/8/7?
If you are facing ‘Reboot and select proper Boot Device error’ problem while trying to start Windows PC/laptop and you are unable to access Windows desktop, then you are in right place for the solution. Here, you will be guided with easy steps/methods to resolve the issue. Let’s starts the discussion.
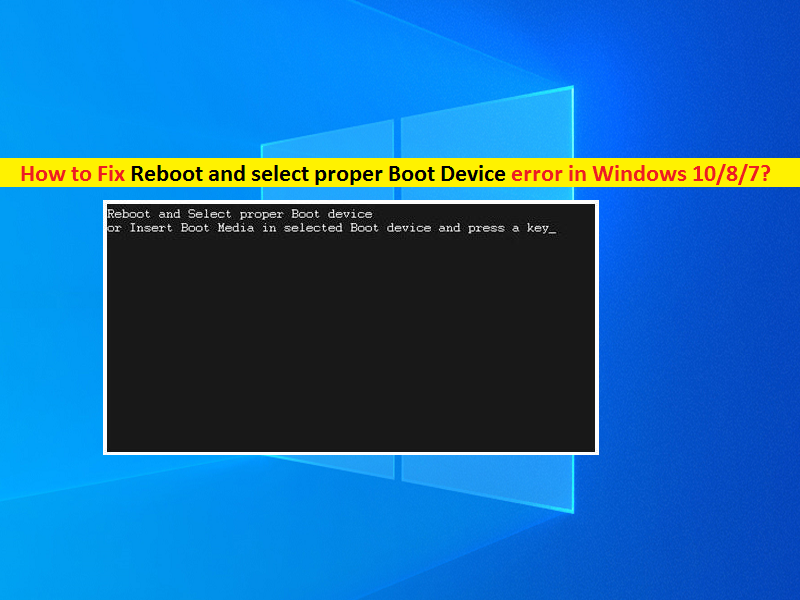
‘Reboot and select proper Boot Device’ error: It is common Windows problem usually appears on Black Screen before Windows Startup. This issue indicates you need to select proper boot device to boot up your device. This error is usually appeared on all Microsoft Windows OS version including Windows XP, 7, 8, and Windows 10 OS based devices. Let’s take a look at error message.
“Reboot and Select proper Boot device
Or Insert Boot Media in selected boot device and press a key_”
This Black Screen error prevents you from booting into your Windows Operating System or from doing anything at all for that matter. There could be several reasons behind this issue including corrupted system files, corrupted hard disk system image and drives. This issue indicates your computer’s basic Input /Output System or BIOS can’t find the boot device that contains your operating system. The error screen also instructs you to restart your computer and then select correct boot device to boot your computer.
This issue can also be appeared due to issue with your computer hardware like having a boot disk that is damaged or has failed, or having faculty cable, damaged SATA slot or dead hard drive. In such case, you need to fix hardware issue in order to resolve this error. Let’s go for the solution.
How to fix Reboot and select proper Boot Device error in Windows 10/8/7 computer?
Method 1: Check your hard disk power cable
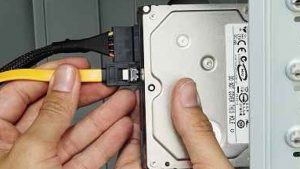
You should make sure there is no issue with hard disk connection to your motherboard and check if hard disk power cable is in working condition and is connected properly. To do so, you need to open CPU case and check the power cable of hard disk. If the power cable is damaged, frayed or connected improperly, it is likely that you hard disk is not being detected by the computer.
To fix the issue, you need to remove the power cable of hard disk from computer and test the cable on another computer. If the issue is still persist on other computer, then you need to replace power cable with new one. Attach the correct hard disk power cable properly and then turn ON your computer and check if the issue is resolved.
Method 2: Clean your RAM
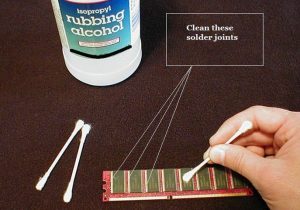
This issue can be occurred if RAM hasn’t been cleaned or removed since you got your computer. To clean RAM memory, you need to open CPU case and remove RAM from the its slot. Make sure your computer is turned OFF during cleaning RAM process and you have unlock the clamps that keep RAM in place before removing the RAM means you need to remove RAM safely. Now, clean any dust on RAM with soft cloth and then reposition them back into their slots. After that, close CPU case and turn ON of your computer and check if the issue is resolved.
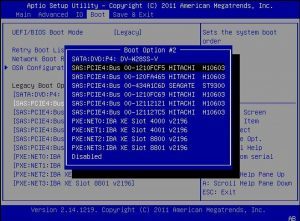
Method 3: Check if your boot device is detected in BIOS mode
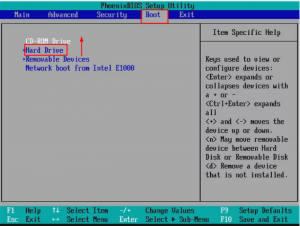
This issue can be occurred if your boot device is not detected in BIOS mode. You can check if boot device is detected in BIOS with our instructions.
Step 1: Restart your computer and press ‘F2’, ‘DELETE’ key or other supported key to enter into BIOS mode. This key to enter into BIOS may vary according to motherboard.
Step 2: Once you are inside BIOS mode, go to ‘Boot’ tab or similar tab and check if your boot device is showing the list of devices. If you disk you want to start Windows 10/8/7 from is not first boot device, then set it as first boot device. If the Windows installation medium doesn’t enjoy boot priority, then set CD-ROM or removable device as first boot device.
Step 3: If you are unable to see you to hard disk or boot device in the list of devices, then shutdown your computer and connect hard disk drive to another SATA slot or b, use the another SATA cable to connect your hard disk drive to another SATA slot in your motherboard
Step 4: Once done, restart your computer in BIOS mode and check if your hard drive is detected. If detected, select your first boot device to hard disk and then save the changes and exit BIOS. After that, restart your computer and check if the issue is resolved.
Method 4: Check your boot device Boot Order in BIOS mode
This issue can also be occurred due to incorrect boot sequence is selected in BIOS setting. You need to check and correct the boot order in order to fix the issue.
Step 1: Enter into ‘BIOS’ mode using above method and go to ‘Boot’, ‘Startup’ or similar tab. If you can’t locate boot sequence, try ‘Advanced BIOS Features’ to find it there.
Step 2: Once you are inside the screen where you can see boot sequence list, select your boot device like hard disk as ‘First boot Device’ from list. You can change your boot order by using arrow key on you can simply drag and drop to change boot order in newer BIOS system.
Step 3: Once you have properly select your boot device as first boot device in BIOS, save the changes and exit BIOS settings to restart your computer. Check if it works for you.
Method 5: Disable/enable Legacy Boot in BIOS
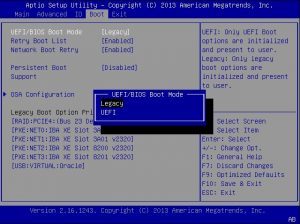
One possible way to fix the issue is to disable/enable legacy boot feature in BIOS mode in your computer. If this feature is enabled, you need to disabled it and if it is disabled, then enable it, and check if it works for you.
Step 1: Enter into BIOS mode using above method.
Step 2: Find Legacy Boot Option in all tabs/settings in BIOS and once found, enable this feature if it is disabled. If it is enabled, disable it
Step 3: Once done, save the changes and exit BIOS, restart your computer and check if it works for you.
Method 6: Set BIOS to Load optimal defaults
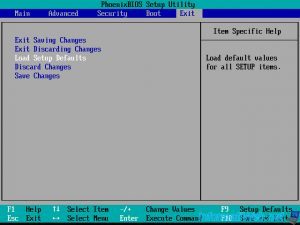
If the issue is still persist, then you can try to fix the issue by loading optimal defaults in BIOS. To do so, you need to restart your computer and enter into BIOS mode and find the option that allows you to ‘Load Optimal Defaults’. Load the defaults and restart, and check if it works for you.
Method 7: Activate an inactive partition using Command Prompt
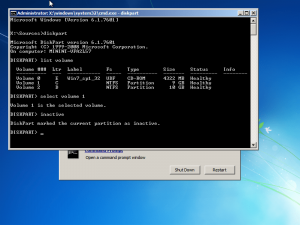
This issue can also be occurred if the primary hard drive partition on your boot disk is no longer set to be active. You can set your primary hard drive partition as active in order to fix the issue. To do so, you will need a Windows Installation Media disk or removable disk for this process and you will need to set it as priority boot media in BIOS.
Step 1: Restart your computer several times until you see Repair, Restore or Recover your computer option screen. Make sure bootable drive that contains Windows Installation media is inserted into computer.
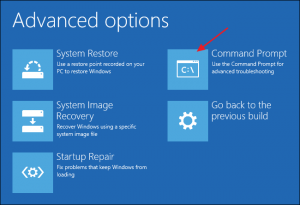
Step 2: Once appeared, click any of these and you will be either a ‘System Recovery Options’ on Windows 7 or ‘Troubleshoot screen’ on Windows 10/8
Step 3: Select ‘Command Prompt’ option from list and executes some codes/commands.
Step 4: Type ‘diskpart’ and hit ‘Enter’ key to execute
Step 5: Type ‘list disk’ and hit ‘Enter’ key to get the list of disks installed on computer
Step 6: Type ‘Select disk 0’ and hit ‘Enter’ key. Here you need to replace ‘0’ with your inactive partition
Step 7: Now, type ‘list partition 1’ and hit ‘Enter’ key. here, select the inactive partition or replace ‘1’ with it
Step 8: Type ‘active’ and hit ‘Enter’ key to active. This will tell you that partition has been made active
Step 9: After that, exit Command Prompt and restart your computer and check if the issue is resolved.
Method 8: Fix Windows Boot Files
This issue can also be occurred due to corruption in Windows boot files. You can repair Windows boot files in order to fix the issue.
Step 1: Insert a CD/DVD or removable disk that contains Windows Installation media, into computer, and boot your computer from the inserted disk
Step 2: Once Windows Setup screen is appeared, click on ‘Repair your computer’ instead of clicking ‘Install Now’ button to enter into Windows Recovery Environment
Step 3: Go to ‘Command Prompt’ through Windows Recovery Environment and type following commands one-by-one and hit ‘Enter’ key after each to execute.
For Legacy BIOS users:
bootrec /fixmbr
bootrec /fixboot
bootrec /rebuildBCD
For UEFI users:
bcdboot C:\windows
Step 4: Once executed, close Command Prompt and restart your computer and check if the issue is resolved.
Fix Windows PC Issues with PC Repair Tool [Recommended Solution]
‘PC Repair Tool’ is easy & quick way to find and fix BSOD errors, DLL errors, EXE errors, problems with programs/applications, malware or viruses issues, system files or registry issues, and other system issues with just few clicks. You can get this tool through button/link below.
Conclusion
I am sure this post helped you on How to fix Reboot and select proper Boot Device error in Windows 10 with several easy steps/methods. You can read & follow our instructions to do so. That’s all. For any suggestions or queries, please write on comment box below.


