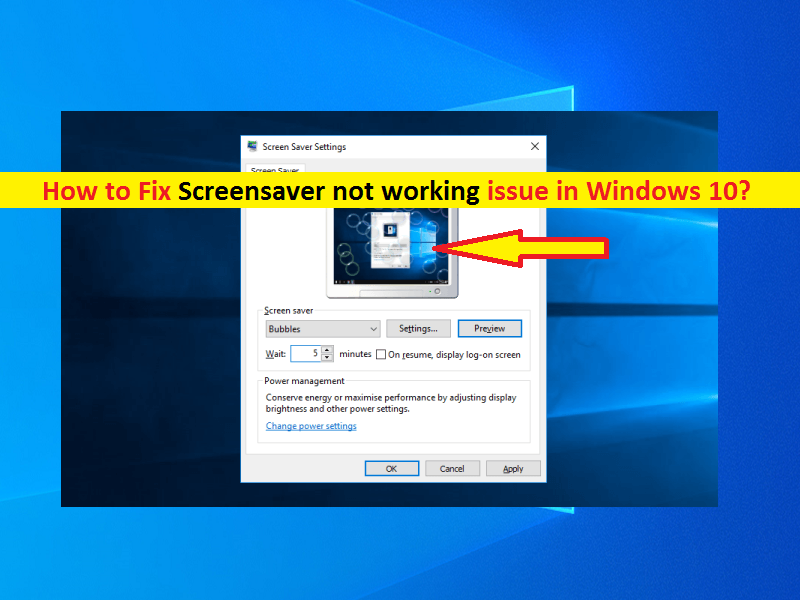
What is ‘Screensaver not working’ issue in Windows 10?
In this post, we are going to discuss on “How to fix Screensaver not working Windows 10”. You will be guided here with easy steps/methods to do so. Let’s starts the discussion.
‘Screensaver’ Windows 10: Screensaver is program related to Microsoft Windows offers to blank the screen or fills with moving images or patterns when the computer has been idle for long time. In other words, when you leave the computer for long time, then Screensaver feature will work at that time until you move your mouse or press any key on keyboard. Screensavers are often set up to offer basic layer of security, by requiring a password to re-access the device.
As screensavers are generally expected to activate when you are aware from your Windows computer, many screensavers can be configured to ask you for a password before permitting you to resume the work in Windows computer. However, several users reported that they faced ‘Screensaver not working Windows 10’ issue even when they have set a screensaver object/image in Screensaver settings in Windows 10 computer.
This issue indicates you are unable to see Screensaver object/image that you have set to enable automatically after certain time interval when you are not activate on computer. Usually, you think Screensaver will work when you are not active on computer for long time and computer is still turned ON. Sometimes, you might face ‘Screensaver not working’ issue and experience Screensaver you have set is not working when you leave the computer.
The possible reason behind Screensaver not working issue can be outdated Windows OS or problematic Windows update installed, outdated or corrupted system drivers, issue with recently hardware attached/connected to computer, problem with Screensaver settings and others. Let’s go for the solution.
How to fix Screensaver not working Windows 10?
Method 1: Fix ‘Screensaver not working’ issue with ‘PC Repair Tool’
‘PC Repair Tool’ is easy & quick way to find and fix BSOD errors, EXE errors, DLL errors, problems with programs/applications, malware or viruses issues, system files or registry issues, and other system issues with just few clicks.
Method 2: Activate Screensaver in Windows 10
This issue can be occurred if Screensaver is not activated in Windows 10. You can activate it in Windows 10 in order to fix the issue.
Step 1: Open ‘Settings’ App in Windows 10 and go to ‘Personalization > Lock Screen’
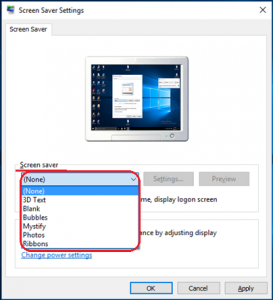
Step 2: In right pane, click on ‘Screen Saver Settings’ link. In the opened window, under ‘Screen Saver’ tab, click the dropdown under ‘Screen Saver’ and select the screen saver you want to use
Step 3: Now, under ‘Wait’ option, choose the number of minutes of inactivity before the screen saver becomes active, and tick ‘On resume, display the logon screen’ option to lock your PC automatically when screensaver becomes active.
Step 4: Finally, click ‘Apply’ and ‘OK’ button to save the changes, and check if it works for you.
Method 3: Update Windows 10 OS
Updating Windows 10 OS to latest version can resolve any issue in computer.
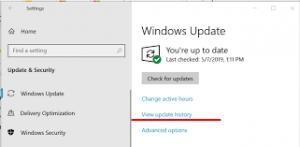
Step 1: Open ‘Settings’ App in Windows 10 and go to ‘Update & Security > Windows Update’ and click ‘Check for updates’ button
Step 2: Download and install all available or pending updates in computer and once done, restart your computer to see the changes and check if it works of you.
Method 4: Update Windows 10 drivers
Outdated or corrupted device drivers in Windows 10 could be reason behind the issue. You can update all necessary device drivers to latest update version in order to fix the issue.
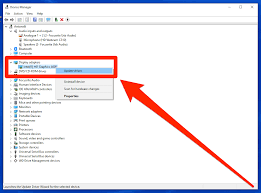
Step 1: Open ‘Device Manager’ via Windows Search and expand each category one-by-one in order to find the outdated/corrupted device driver.
Step 2: Right-click on device with Yellow Exclamation Mark, and select ‘Update Driver’. Follow on-screen instructions to finish update process. Repeat the same steps to update all other necessary drivers. Once done, restart your computer.
Download or reinstall Windows 10 drivers update [Automatically]
You can also update your all windows drivers with ‘Automatic Driver Update Tool’. You can get this tool through button/link below.
Method 5: Check Screensaver settings in Windows 10
This issue can be occurred if Screensaver setting is not enabled or configured properly in Windows computer. You can check and re-configure screensaver setting in order to fix the issue.
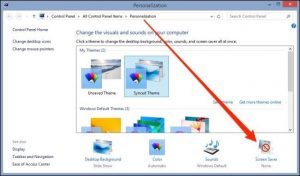
Step 1: Open ‘Control Panel’ in Windows 10 and go to ‘Appearance and Personalization’ and click ‘Change Screensaver’ under ‘Personalization’ section.
Step 2: If you investigate, it is not enabled properly, then you can follow ‘Method 2’ to re-configure it and check if it works for you.
Method 6: Clean your mouse sensor and mouse pad
If you find that your screensaver won’t go away when you move your mouse, which is what triggers your computer to wake up, then check that your mouse sensor and mouse pad are clean. You can clean mouse sensor and mouse pad in order to fix the issue.
Method 7: Reset Power Plan to default
One possible way to fix the issue is to reset Power Plan in ‘Power Management’ settings in Windows 10.
Step 1: Type ‘Power’ in Windows search box and open ‘Choose Power Plan’ from results appear
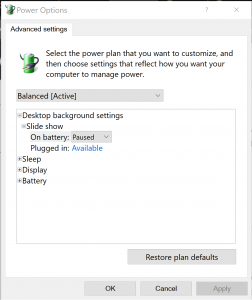
Step 2: In the opened window, select ‘Change plan settings’ link next to your selected power plan and go to ‘Change Advanced Power’ settings
Step 3: In the opened window, select ‘Reset Plan Defaults’ and finish the process. Once done, please check if the issue is resolved.
Method 8: Run ‘Power’ troubleshooter in Windows 10

Windows 10 built-in ‘Power’ troubleshooter can resolve this issue. Let’s try.
Step 1: Open ‘Settings’ app in Windows 10 and go to ‘Update & Security > Troubleshoot > Additional troubleshooter’
Step 2: Find and select ‘Power’ troubleshooter, and hit ‘Run the troubleshooter’. Follow on-screen instructions to finish the troubleshooting process. Once done, restart your computer and check if it works for you.
Method 9: Run SFC Scan and DISM scan in Windows 10

You can run SFC scan to repair system files and run DISM scan to repair hard disk system image in order to fix Screensaver not working issue.
Step 1: Press ‘Windows + X’ keys on keyboard and select ‘Command Prompt as Admin’
Step 2: Type the following commands one-by-one and hit ‘Enter’ key after each to execute.
Dism /Online /Cleanup-Image /CheckHealth
Dism /Online /Cleanup-Image /ScanHealth
Dism /Online /Cleanup-Image /RestoreHealth
sfc/scannow
Step 3: Once executed, restart your computer and check if the issue is resolved.
Conclusion
I am sure this post helped you on How to fix Screensaver not working Windows 10 with several easy steps/methods. You can read & follow our instructions to do so. That’s all. For any suggestions or queries, please write on comment box below.


