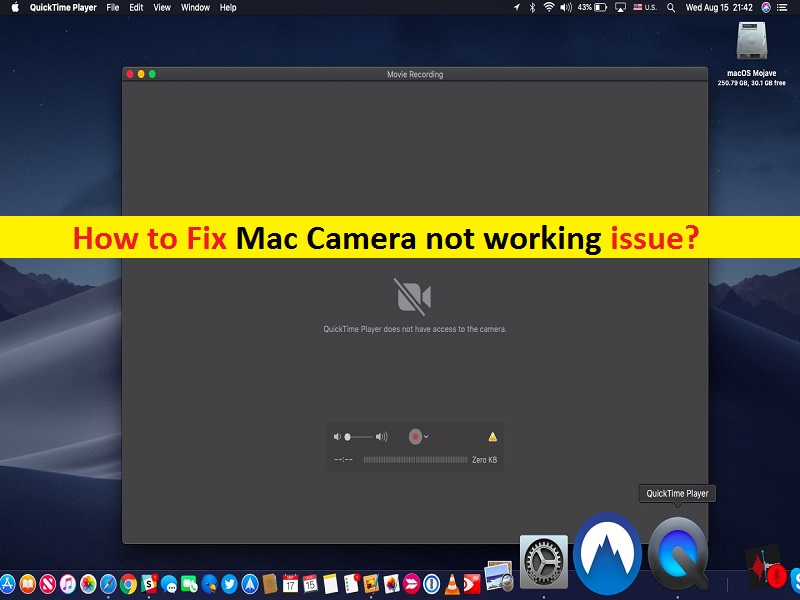
What is ‘Webcam/Camera not working’ issue on Mac?
If you are facing ‘Mac Camera not working’ issue and you are unable to use webcam (external or build-in webcam) in your Mac computer, then you are in right place for the solution. Here, you will be guided with easy steps/methods to resolve the issue. Let’s starts the discussion.
‘Webcam/camera not working’ on Mac: It is common Mac problem considered camera issue. This issue indicates you are unable to use webcam/camera (External webcam or build-in webcam) in your Apple MacBooks or desktop Mac means camera is unavailable in macOS and you are unable use Mac Camera anymore. There could be several reasons behind camera not working on Mac issue including webcam/camera permissions setting on Mac, camera lens is interfered or covered by something that’s why your camera is unable to show anything on screen.
Another possible reason behind this issue can be the interference of some other applications or background processes running on Mac. Also, this issue can also be occurred on specific application like Apple Camera App. In such case, you should at first make sure the issue is not limit to specific application means if you are not able access camera in specific application on Mac. If it is true and it is specific application- camera problem, then you need to fix the issue with such specific application.
However, if you are unable to access webcam entirely on Mac, then you should at first check if camera device is properly connected to computer and no object is interfere its connection, and also check if camera is enabled in your Mac. In sort, you should make sure camera permission settings on Mac and check if it is enabled entirely. It is possible to resolve the issue with our instructions. Let’s go for the solution.
How to fix Mac Camera not working issue?
Method 1: Restart your Mac

This issue can be occurred if your camera is being used by some other camera applications and it is hard for you to detect which application is using actually. In such case, you can just restart your Mac computer. Restarting computer will close all opened applications and also those applications using camera. After restart, retry accessing webcam in Mac and check if it works for you. To restart your Mac, click on ‘Apple’ menu, click ‘Restart’ option.
Method 2: Check if anything is covering camera lens
One possible reason behind this issue can be the interference of some objects that is covering camera lens that’s why you are seeing black screen while try using camera on Mac. In such case, you can remove anything that is covering webcam lens in order to remove distractions, and check if it works for you.
Method 3: Check Webcam/camera permission on Mac
You are unable to access Webcam/camera on Mac possibly due to camera permission settings. Make sure your Mac camera permission settings allow you to access webcam. If not, you can provide camera permission to specific app that is causing camera error or to entire Mac computer to access your camera.
Allow app to access your webcam on Mac:
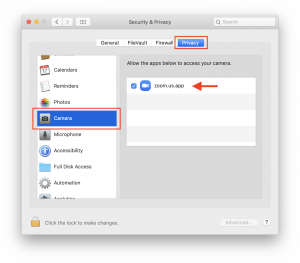
Step 1: Click on ‘Apple’ menu and select ‘System Preferences’ and click ‘Security and Privacy > Camera’
Step 2: Now, in right pane, under ‘Allow the apps below to access your camera’ section, tick the checkboxes relating to application you want allow them to access webcam. Deselected checkboxes on app under camera permission settings will not allow the app to access the camera.
Step 3: If you want to make change in camera permission setting, then you need to click ‘Lock’ button that says ‘Click the lock to make changes’, then you can enable or disable camera for apps. Once you have enabled camera, retry accessing the camera on Mac and check if it works for you.
Method 4: Kill VDCAssistant and AppleCameraAssistant processes on Mac
VDCAssistant and AppleCameraAssistant processes perform webcam tasks that run in the background on Mac. If any of these processes stop running properly or processes crashes, then you wouldn’t be able to access camera or can cause camera related issues. You can force close these process and then restart it in order to fix the issue.
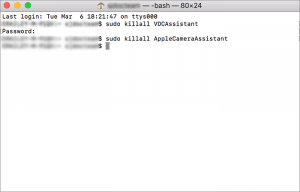
Step 1: Type ‘Terminal’ in Spotlight and hit ‘Search’, open ‘Terminal’ from search results.
Step 2: In ‘Terminal’ window, type the following command and hit ‘Enter’ or ‘Return’ key to execute
sudo killall VDCAssistant;sudo killall AppleCameraAssistant
Step 3: Type your admin password to authenticate and once done, retry accessing webcam/camera on Mac and check if it works for you. MacOS should re-launch or restart any processes your webcam relies on to function.
Method 5: Uninstall and then reinstall app that causing webcam/camera problem
If this camera problem is limit to specific application and you are unable to use webcam in this app, then you can uninstall the problematic and then reinstall it in order to fix the issue.
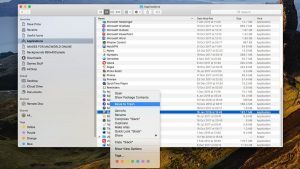
To uninstall app on Mac, you need to go to ‘Applications’ folder on Mac and drag the problematic app that is causing camera problem, to ‘Trash’ Folder icon in Dock. Or you can also uninstall the app just by selecting the app in Applications Folder and press ‘Command + Delete’ keys on keyboard
Now, download and reinstall the app that was causing issue, and re-launch the app and check if it works for you. Make sure you are downloading/installing latest and compatible version of app. Also, you can follow ‘Method 3’ to allow this app to access your camera if required.
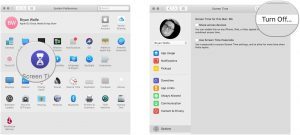
Method 6: Check your Screen Time Permissions
Screen Time is essential feature in MacOS designed to help you monitor how you use your Mac. It also helps how MacOS handle parental controls which can include limiting access to webcam and any apps that use it. In other words, you should make sure Screen Time feature on Mac is not restricting you from accessing webcam. If yes, enable it from there.
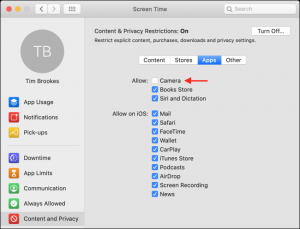
To check if Screen Time restrictions are the issue, click on ‘Apple’ Menu and select ‘System Preferences’ and click on ‘Screen Time’. Now, go to ‘Conant and Privacy > Camera’ and check ‘Camera’ option is enabled under the ‘Apps’ tab in right pane. If not, you can change settings and tick the checkbox next to ‘Camera’ option and retry accessing webcam.
Method 7: Check if your Mac is able to detect your webcam [Internal webcam]
This issue can be occurred if your Mac is unable to detect webcam/camera device. In such case, you can check if your Mac computer is detecting webcam properly. To do so, you need to click on ‘Apple’ menu and select ‘About’ and go to ‘System Report’ and select ‘Camera’ in left pane. In right pane, if you see your Mac build-in webcam in the list with bunch of numbers and model IDs, then it is sure your Mac is detecting your build-in webcam. You can also check it under ‘USB’ section and check if your webcam is appeared in the list. If not listed there, then a webcam hardware problem or physical damage might be caused it to stop working. In such case, you can contact webcam or Mac service center or technician to repair it or you can purchase a new external webcam in order to fix the issue.
Method 8: Perform System Management Controller Reset on Mac
If the issue is still persist, then you can try to fix the issue by performing System Management Controller Reset operation on Mac. SMC (System Management Controller) is responsible for low-level settings, like fans and LEDs and it might also impact your internal webcam.
Reset SMC on Mac Desktop:
Step 1: Turn OFF your Mac and unplug the power cable and wait to about 15 seconds
Step 2: After that, plug the power cord back it and turn ON your Mac. The SMC is now reset and check if camera issue is resolved on Mac.
Method 9: Fix Mac Camera not working [External Webcam]
If you are unable to fix the issue on Mac using any of the methods mentioned above, then you can try external webcam. If you are using USB external webcam, you should make sure it is properly plugged-in. Also, make sure there is no issue with camera USB port on Mac. If you are connecting USB webcam via USB hub, make sure USB hub is not problematic and is working on Mac. You can also use ‘Method 7’ in order to check if your Mac is detecting your external webcam or not. And also make sure your external webcam is enabled on Mac.
Conclusion
I am sure this post helped you on How to fix Mac Camera not working issue with several easy steps/methods. You can read & follow our instructions to do so. That’s all. For any suggestions or queries, please write on comment box below.