
If you are using Windows operating system for some time then you can understand the importance of icon present there. Many of these icons are system shortcuts for doing task and are per built in the system like This PC, Control Panel, Recycle Bin and others. Many users are now reporting gray x on desktop icons on Windows 10.
This issue is not very concerning so you do not need to panic. This can happen for couple of reasons like:
- Disruption with cloud applications.
- Incorrect Power Settings.
- Icon Cache is corrupted.
Even though this is not a threat if limited to some icons but can pose a bigger system instability issue if left unchecked. Therefore we have listed all the possible methods and solutions below.
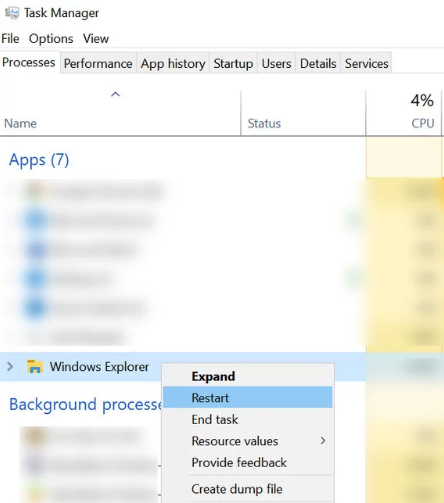
FIX 1: Restart Windows Explorer
The most basic and simplest method you can try first to fix the issue by restarting the Explorer as it handle the icon department. To do so, follow these steps:
- Right click on taskbar on your desktop.
- Select Task Manager from the options.
- Now go to processes in Task Manager and find Windows Explorer.
- Right-click on it and choose restart option.
- Wait for it to restart and check if the issue persists.
FIX 2: Change Power Settings
Using incorrect power settings can disable network related operations such as cloud and related services and could be the reason behind the problem. To fix this you have to change the power settings on your network card by following the steps mentioned below:
- Right click on Start menu from the taskbar.
- Now select Device Manager from the list.
- Navigate to Network adapters.
- Right click on your Network Card and choose Properties.
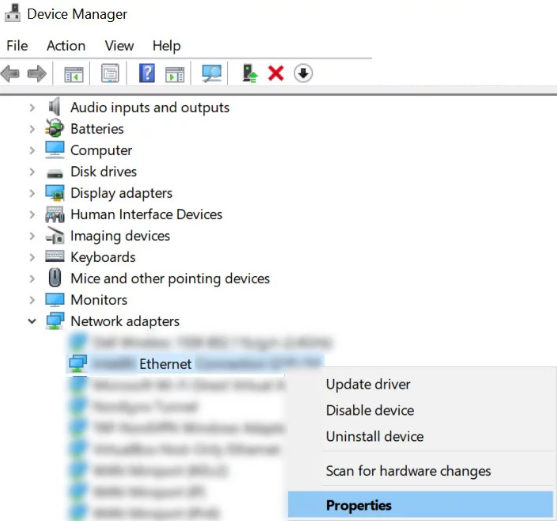
- In properties go to Power Management tab.
- Find Allow the computer to turn off this device to save power and un-tick the box.
- Click Apply then OK.
FIX 3: Disable and Enable Sync on OneDrive
As mentioned above the issue might be related to interference with cloud service, so to rectify you can try disabling and then re- enabling the sync to see if the problem is solved. To disable, follow the given instructions:
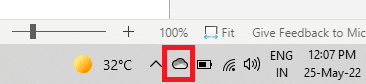
- Go to your system tray and find OneDrive icon.
- Right-click on it and choose Help & Settings.
- Now select Pause Syncing and set the time duration.
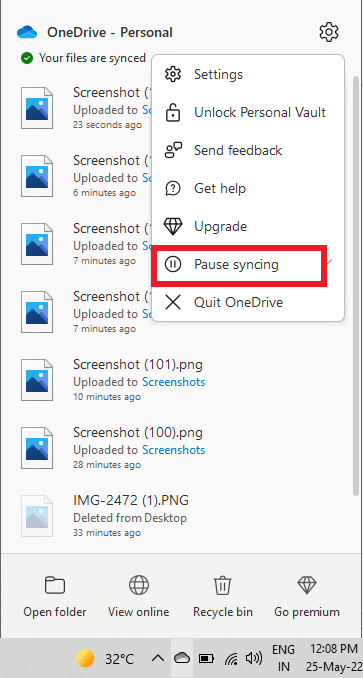
- Now close the window.
- Again open OneDrive and choose Resume Syncing.
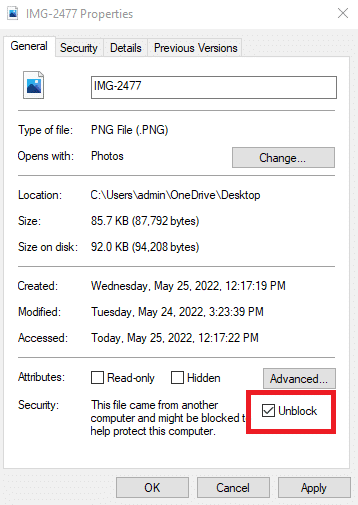
FIX 4: Unblock File with the Issue
- On your desktop, right-click on the icon with “Gray X”.
- Select Properties option.
- Go to General tab and find the Security section.
- Unchecked the Unblock box.
- Click Apply then OK.
FIX 5: Remove Inheritance
If the issue isn’t fixed with the above method then the problem might lie with the inheritance settings. To change or to disable inheritance, do these steps:
- Go to your desktop and right click on the “Gray X” marked file.
- Now open Properties and move to Security tab.
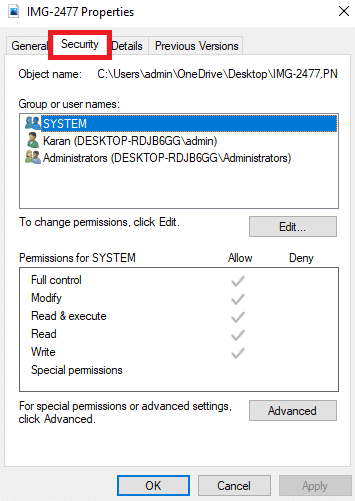
- Select advanced button.
- In Advanced settings, click on Disable Inheritance.
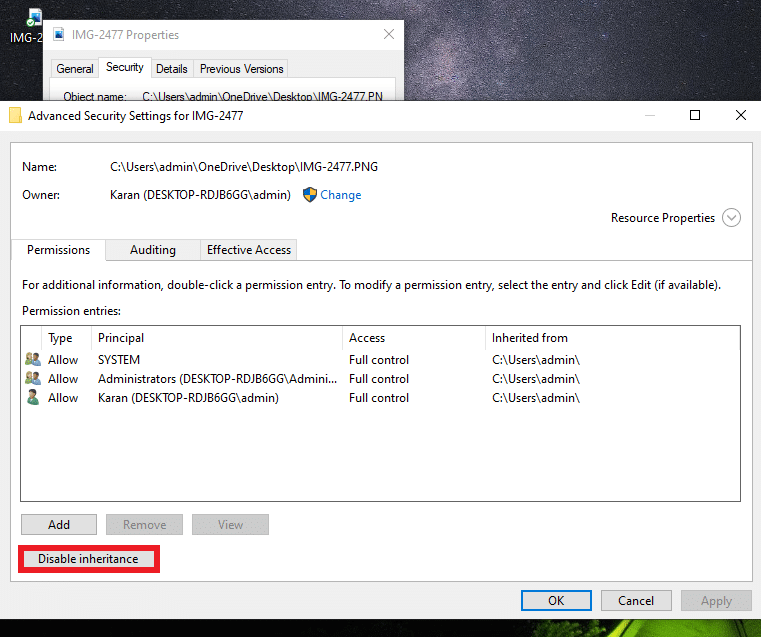
- Choose Remove all inherited permission from this object.
FIX 6: Delete Icon Cache
As reported by many users, one of the reasons behind the issue was the damaged or corrupted icon cache. Deleting Icon cache folder could resolve the issue. To do so, do this:
- Open RUN dialogue box by pressing Win + R key simultaneously.
- Type %LocalAppData% and press enter.
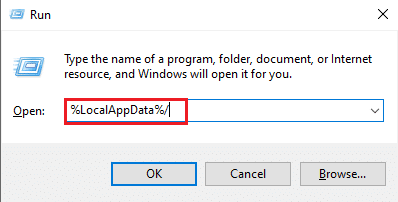
- Find the cache folder and delete it.
- Restart your computer after it is done.
FIX 7: Modify Registry Entries
Changing the registry values could possibly solve the issue. To change the value, follow the steps given below:
NOTE – Always make a backup of your registry files before changing thing just to be sure if anything goes wrong, they are an important part of the system and could cause system to malfunction.
- In Search bar, type regedit and press Enter.
- Now right click on Registry Editor from the best match.
- Select Run as administrator.
- Move to the path given below.
- Computer\HKEY_LOCAL_MACHINE\Software\Microsoft\Windows\CurrentVersion\Explorer.
- Right click on the Explorer and select New then click Key.
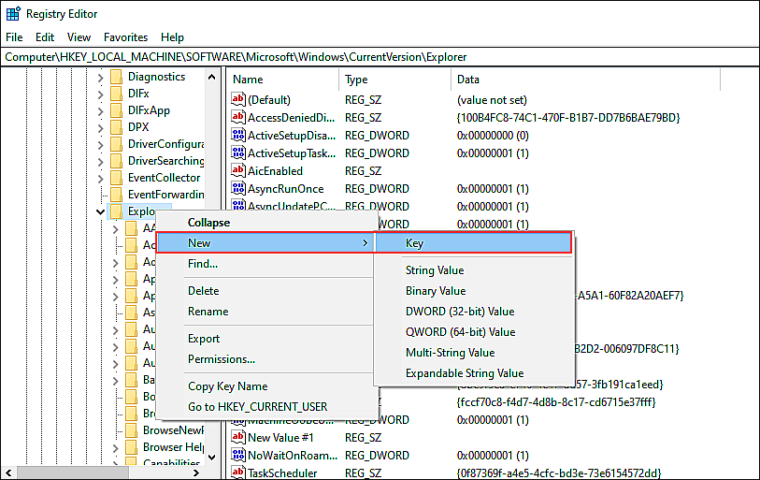
- Name the new key as Shell Icons.
- First click on New Key and then right click anywhere.
- Choose New and click String Value.
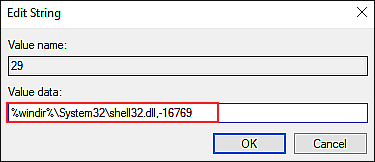
- Double click on it and name it as Shell Icon.
- Now set the value to %windir%\System32\shell32.dll,-16769 and select
- After the process is complete, restart your computer to save the changes.
- Check if the issue is still there.
Windows Registry is a complex tool even for advance users. Tinkering with registry files might leave your system invulnerable to losing or damaging your registry entries especially when regular user is doing it. For that reason, we would suggest you to use PC Repair Tool as it will scan your whole system looking for these errors and fix them automatically.
Conclusion
Even though Gray X on desktop icons on Windows 10 might not have a big impact on your regular working but it sure can be a hindrance to it. If you want to resolve this issue then we have listed all the fixes and method available, so you can resolve without any worry.


