Internet plays a crucial role in our lives. It’s a global network connecting millions of private, public, academic, business and government networks. It enables the sharing of information and communication across vast countries. And in order to access and view content on the internet we need a software application that is “browser.”
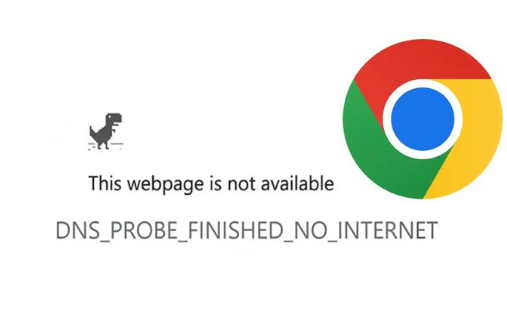
And while talking about browser we cannot forget Google Chrome. It’s one of the globally accepted and most reliable browsers. But sometimes this outstanding browser fails to work as intended. Time and again users report errors while accessing this browser. One instance of such errors is “DNS_PROBE_FINISHED_NO_INTERNET Error.” The full error message reads as:
This webpage is not available
DNS_PROBE_FINISHED_NO_INTERNET
Check your Internet connection
Check any cables and reboot any routers, modems, or other network devices you may be using.
Allow Chrome to access the network in your firewall or antivirus settings.
If it is already listed as a program allowed to access the network, try removing it from the list and adding it again.
It’s pertinent to mention it’s a connectivity error that might occur on any Windows version while using Google Chrome. When this error occurs it restricts the users from accessing any kind of web pages. In simple words, you will not be able to use the internet until you fix the issue.
Basically, this error specifies that your browser could not find the DNS Server required to direct you to the website you are attempting to visit on your network.
Talking about the causes that triggers the error, then following are the culprits:
#. Interference of Antivirus preventing browser from accessing the internet
#. Misconfiguration with DNS Settings
#. Corrupted Chrome Cache
#. Obsolete Network Drives
These were some of the factors responsible for throwing the error. But fortunately you can resolve the error using the below mention guidelines:
Try these Solutions for DNS_PROBE_FINISHED_NO_INTERNET Error
Method 1: Run the Network Adapter Troubleshooter
In the first method we suggest you to use the Network Adapter troubleshooter, to proceed use the following:
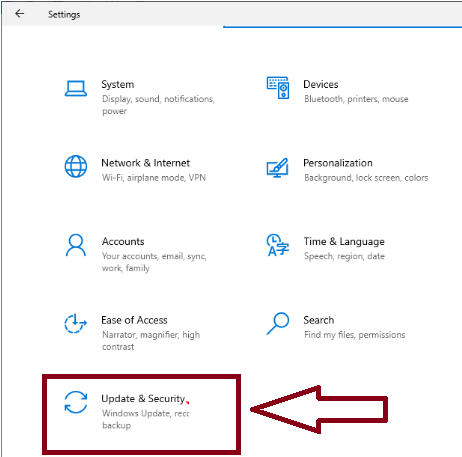
Step 1: Press Windows + I keys to open Settings app and select Update & Security
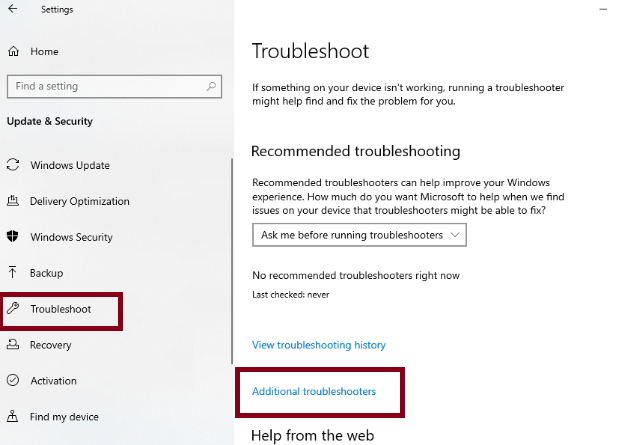
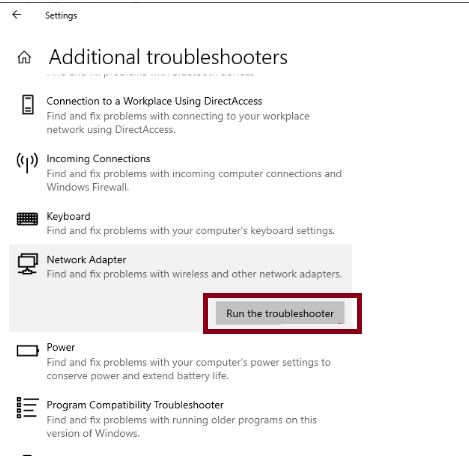
Step 2: Select the Troubleshoot option in the left pane and click Additional troubleshooters
Step 3: Then choose Network Adapter and click Run the troubleshooter
Method 2: Turn Off Firewall temporarily
Disabling the Windows Firewall or third party Firewall software may also fix the error. Sometimes these security software may create nuisance for the users as it interferes while performing certain tasks on Windows. So ensure to disable your Antivirus Software for some time.
Method 3: Change Router and DNS Server Settings
In this method you are suggested to change the Router and DNS Settings, to do so follow the below mention guidelines:
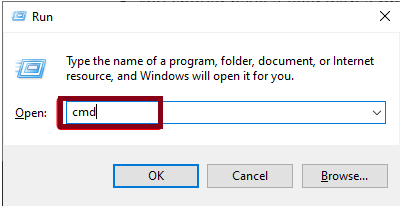
Step 1: Press Windows + R keys to open the Run utility box > In the prompted box, type in cmd and press Enter key:
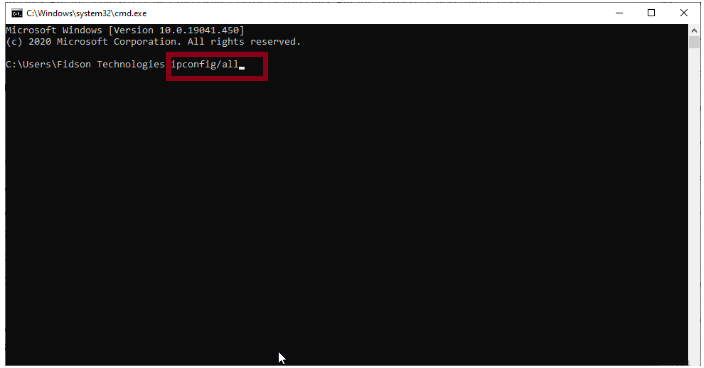
Step 2: Type the command below and press Enter key:
ipconfig/all
Step 3: Search for the name of the network adapter you are using.
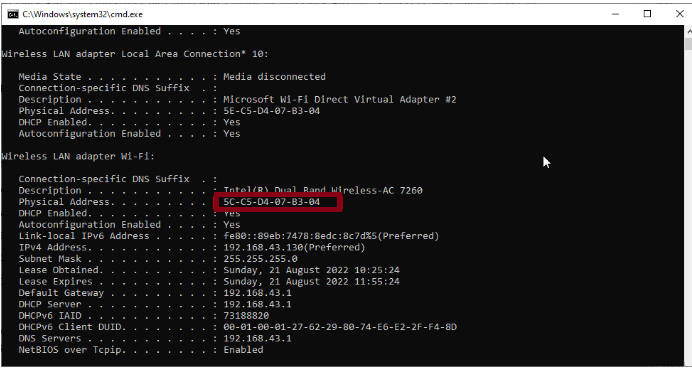
Step 4: You should have a field with a physical address under your network adapter with the code below or something similar next to it.
78-DD-08-F1-DF-B0
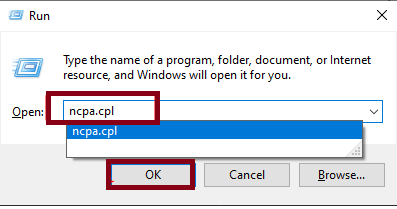
Step 5: Then press Windows key + R keys to open Run utility box > then type in ncpa.cpl and click OK button
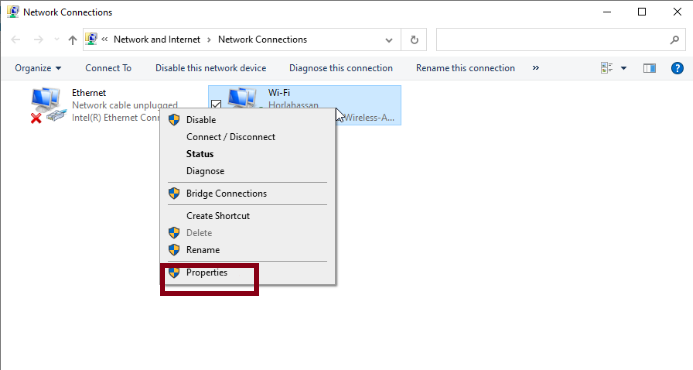
Step 6: Right-click on your Network Adapter and select Properties
Step 7: Click the Configure…. button > then click Advanced tab at the top and select Network Address
Step 8: Then type the code you found in Step 4 into the Value field > Click OK button and Restart your device
If this error fails to resolve the error, you need to change your Router DNS too. After Restarting your PC, see if the error resolved or not.
Method 4: Change DNS Server Settings
In this method you are suggested to change the DNS Server Settings, to do so use the following guidelines:
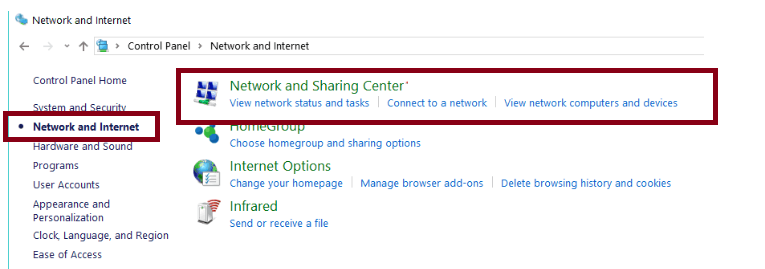
Step 1: Press Windows keys & X keys and select Control Panel > Choose Network and Internet in the left pane
Step 2: Select Network and Sharing Center
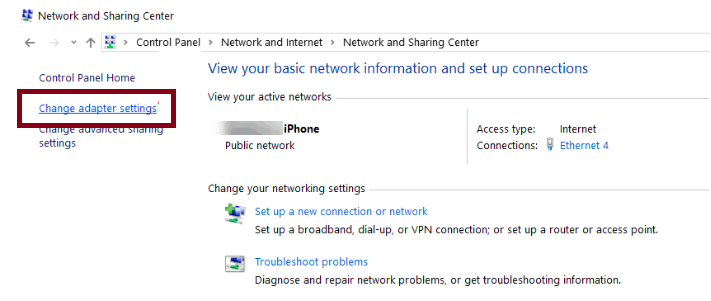
Step 3: Select the Change adapter settings option
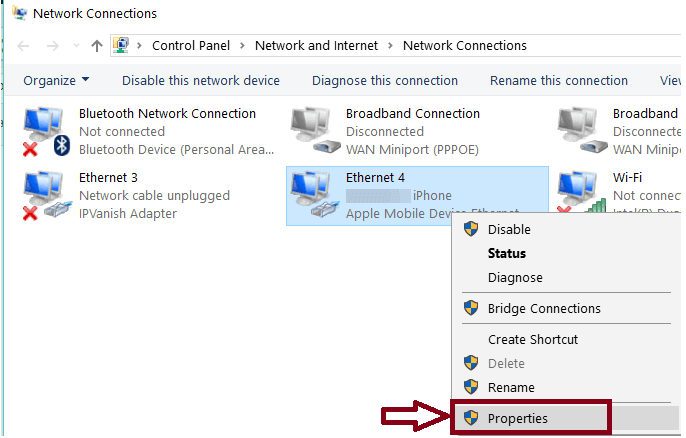
Step 4: Right-click on the adapter you are using and select Properties
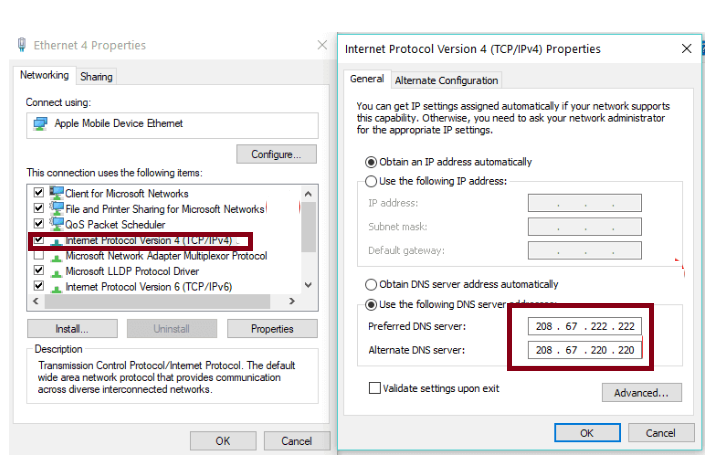
Step 5: Click on the Internet Protocol Version 4 (TCP/IPv4) option > then tick the radio button for Use the Following DNS server address in the newly opened properties Window
Step 6: Now copy and paste the value below into the Preferred DNS server field:
208.67.222.222
Step 7: In the Alternative DNS Server field, copy and paste the value below:
208.67.220.220
Step 8: Check the box next to Validate Settings upon exit and click OK button
Method 5: Clear Browsing Data
You are likely to face the above mention error if you have corrupted browsing data, in order to clear the data, use the following:
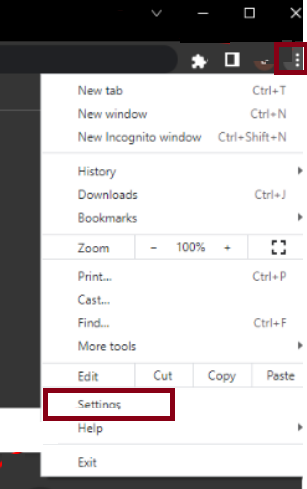
Step 1: Launch Chrome and click the menu button > Select the Settings option
Step 2: Choose Privacy & Security on the left pane
Step 3: Now click the Clear browsing data option
Step 4: Click the dropdown next to Time range and select All time.
Step 5: Check the boxes for Cookies and other site data and Cached files and images
Step 6: Lastly, click the Clear data button

Step 7: Once done then Restart your PC and see if the issue resolved or not
Method 6: Update drivers manually
Obsolete drivers are major reasons for getting stuck with the error. So ensure to update drivers to the latest version. To do so follow the below mention guidelines:
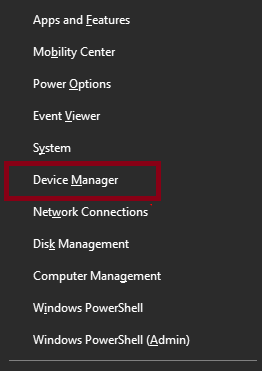
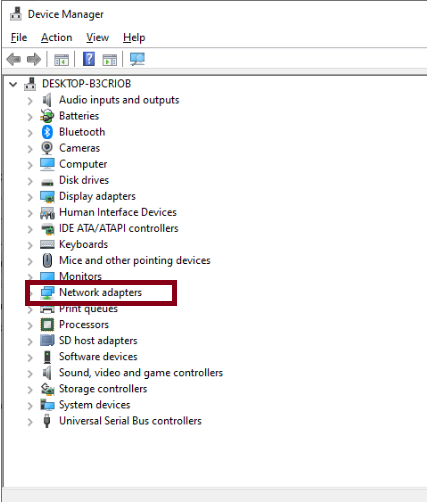
Step 1: Press Windows + X keys and select the Device Manager option
Step 2: Double-click on the Network Adapters option to expand it
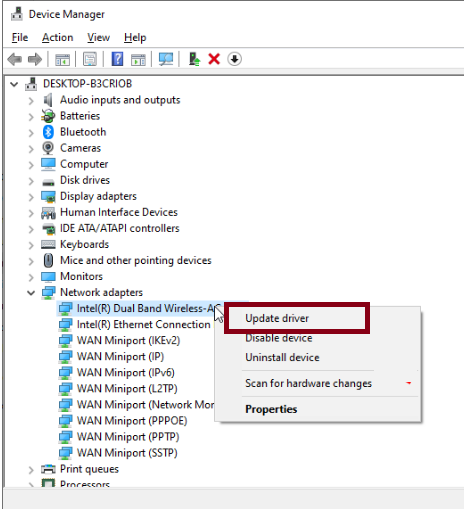
Step 3: Right-click on your Network Adapter and select Update Driver
Step 4: Choose the Search Automatically for drivers option
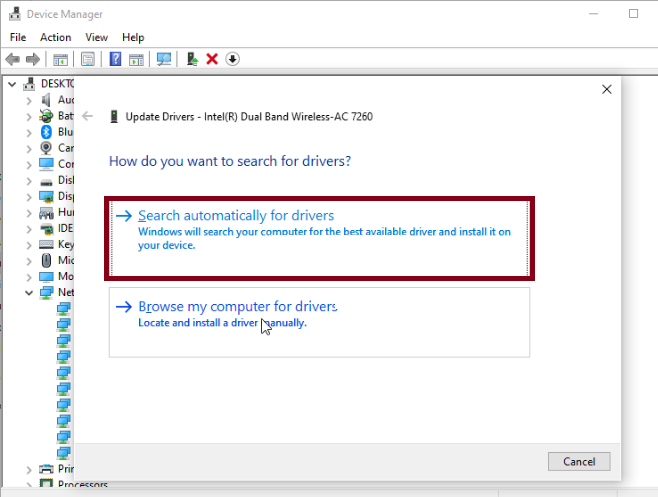
Step 5: Finally wait for the search to complete and install any available update
Method 7: Flush DNS
Flushing DNS is another effective measure to deal with the above mention error. In order to get started with this solution, use the following:
Step 1: Launch Command Prompt as administrator > Enter the following command and press Enter key after each:
ipconfig /flushdns
ipconfig /registerdns
ipconfig /release
ipconfig /renew
NETSH winsock reset catalog
NETSH int ipv4 reset reset.log
NETSH int ipv6 reset reset.log
Exit
Method 8: Update or Reinstall Chrome
Sometimes due to outdated Chrome version, you start facing errors while using it, so in such case, it is suggested to update or reinstall Chrome.
Here’s how:
Step 1: Open Chrome > In the top right, click on the three vertical dots button to open Menu
Step 2: Go to Help > About Google Chrome
Step 3: Google Chrome automatically detects if there’s an update available > If Yes, follow the on-screen instructions to finish the update > If No, delete Chrome and reinstall it
Final Thoughts!
Here we conclude the article; we have mentioned all the possible methods to fix the DNS_PROBE_FINISHED_NO_INTERNET Error. Now its your turn to follow our suggestions. Best of luck with the fixes.