What is ‘Dcom error 10016’ in Windows 10?
In this post, we are going to discuss on “How to Fix Dcom error 10016 Windows 10”. You will be guided with easy steps/methods. You can read & follow our instructions to resolve the issue. Let’s starts the discussion.
‘Dcom – Distributed Component Object Model’: DCOM is integral aspect of networked communication on Windows OS based devices. It is proprietary Microsoft technology that whirs into action every time an application makes connection to the internet. When we talk about traditional COM, it can only access information on the same Windows machine while DCOM can access data on remote servers.
For example, there are many websites/domains and services use the scripts that access a remote server and when your Windows 10 computer makes a request using a script or otherwise, DCOM transfers the request to the specific request object. However, several users reported they faced ‘Dcom error 10016 Windows 10’ or ‘Dcom error 10016’ error on their Windows 10 computer when an application or service attempts to use DCOM but doesn’t have proper permissions.
When Windows Event Viewer utility software in your Windows 10 computer in order to check the actual cause of system issue or application/service issues, you may notice ‘Dcom error 10016’ in Event Viewer App that indicates something went wrong in your computer that’s why you are facing the error. However, in most times, DCOM errors won’t affect your computer other than clogging up your Event Viewer.
As mentioned, this issue is occurred possibly due to lack of user permissions when application/service tries to start DCOM server. Another reason behind the issue can be any serious damage to your Windows operating system that might be annoying to deal with it all the time. In such case, you can provide all required permission to the application/service that is causing error in order to fix the issue. Let’s go for the solution.
How to fix Dcom error 10016 Windows 10?
Method 1: Fix ‘Dcom error 10016’ with ‘PC Repair Tool’
‘PC Repair Tool’ is easy & quick way to find and fix BSOD errors, DLL errors, EXE errors, problems with programs/applications, malware or viruses issues, system files or registry issues, and other system issues with just few clicks.
Method 2: Delete the registry keys
Step 1: Press ‘Windows + R’ keys on keyboard, type ‘regedit’ in ‘Run’ window and hit ‘Ok’ button to open ‘Registry Editor’ and navigate to following path
HKEY_LOCAL_MACHINE\SOFTWARE\Microsoft\Ole
Step 2: Find and delete the following keys
- DefaultAccessPermission
- DefaultLaunch
- PermissionMachineAccessRestriction
- MachineLaunchRestriction
Step 3: Once done, save the changes and restart your computer and after restart, please check if the issue is resolved.
Method 3: Enable sufficient permissions
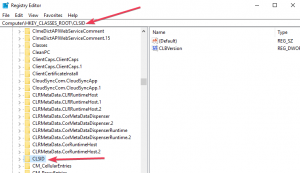
Step 1: Open ‘Registry Editor’ using above method and go to following path
HKEY_CLASSES_ROOT\CLSID
Step 2: Expand ‘CLSID’ folder that has same CLSID you get in error
Step 3: Right-click and select the folder
Step 4: You will be able to see the ‘Owner’ at top of window and you need to change the owner to ‘Administrative Group’. You have to select ‘Replace al child object permissions entries’ that are available at bottom of owner window
Step 5: Click on ‘Ok’ and ‘Yes’ button in Windows Security window. Click ‘Add’ button, type ‘Everyone’ in available field and hit ‘OK’ button in previous permissions window
Step 6: You will see a list of users at top of ‘Main Permissions Window’, select ‘Everyone’ under ‘User’s list’ and select allow to give ‘Full Control’ to user at bottom
Step 7: Click ‘OK’ to apply ‘Full Control’ and save the changes. Now, go to following path in Registry Editor
HKEY_LOCAL_MACHINE\Software\ClassesAppID
Step 8: Select the folder having ‘APPID’ similar to error message, right-click it. Repeat the step 4 to step 7 to allow sufficient permissions to respective app.
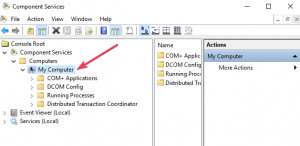
Step 9: A registry key will be visible that is going to have a similar name to that of service causing error. Open ‘Control Panel’ and go to ‘Administrative Tools’ via search in Control Panel and select ‘Component Services’
Step 10: Go to ‘Computer > My Computer’, right-click on the issue casing service and select ‘Properties’
Step 11: In ‘Properties’ window, click ‘Security’ tab, select ‘Customize’ on ‘Launch and Activation Permissions’, ‘Access Permissions’ and ‘Configuration Permissions’ category
Step 12: Click ‘Edit’ on ‘Launch and Activation Permissions’, find ‘System’ under lists of users and click ‘Add’ button if you are not able to locate it
Step 13: Now, you will be able to select ‘System’ under users’ list in current window. Find ‘Local Launch’ and ‘Local Activation’ and select ‘Allow’
Step 14: Click on ‘Ok’ button to save the changes and repeat the same steps for access permissions and configuration as well. Once done, please check if the issue is resolved.
Conclusion
I hope this post helped you on How to fix Dcom error 10016 Windows 10 with several easy steps/methods. You can read & follow our instructions to do so. That’s all. For any suggestions or queries, please write on comment box below.


