
Tips to fix Audio Service crashing in Windows 11:
In this article, we are going to discuss on How to fix Audio Service crashing in Windows 11, Audio Service stopping in Windows 11. You will be guided with easy steps/methods to resolve the issue. Let’s starts the discussion.
‘Audio Service stopping in Windows 11’: It is common Windows Problem considered as Windows Audio service issue. When you run Playing Audio troubleshooter or hardware & devices troubleshooer in order to check why you are experiencing no sound issue through the speakers/headphones in your computer, you may receive ‘Audio services not responding’ error as result once troubleshooting finished.
If you are constantly facing Audio Service stopping in Windows 11 problem and looking for the fix on the web, then you are in right-place for solution. One possible way to fix the issue is to check and re-enable Windows Audio Service in computer. Another way to fix the issue is to update sound card driver to latest & compatible version in computer and then check if it works. Let’s go for the solution.
How to fix Audio Service crashing in Windows 11?
Method 1: Fix Audio Service stopping in Windows 11 with ‘PC Repair Tool’
‘PC Repair Tool’ is easy & quick way to find and fix BSOD errors, DLL errors, EXE errors, problems with programs/applications, malware or viruses infections in computer, system files or registry issues, and other system issues with just few clicks.
Method 2: Enable Windows Audio Service
Step 1: Open ‘Services’ app in Windows PC via Windows Search Box
Step 2: Find and double-click ‘Windows Audio’ service to open its Properties. Select ‘Automatic’ option from ‘Startup Type’ dropdown, and hit ‘Start’ button under ‘Service Status’ section, then hit ‘Apply > Ok’ button to save the changes.
Step 3: Repeat the same steps to enable ‘Windows Audio Endpoint Builder’ service.
Method 3: Run Localservice and network service commands

Step 1: Type ‘cmd’ in Windows Search Box and press ‘SHIFT + ENTER’ keys on keyboard to open ‘Command Prompt as Administrator’
Step 2: Type the following command and hit ‘Enter’ key to execute.
net localgroup Administrators /add networkservice
Step 3: Once executed, restart your computer and check if the issue is resolved.
Method 4: Make sure Audio relating services are running
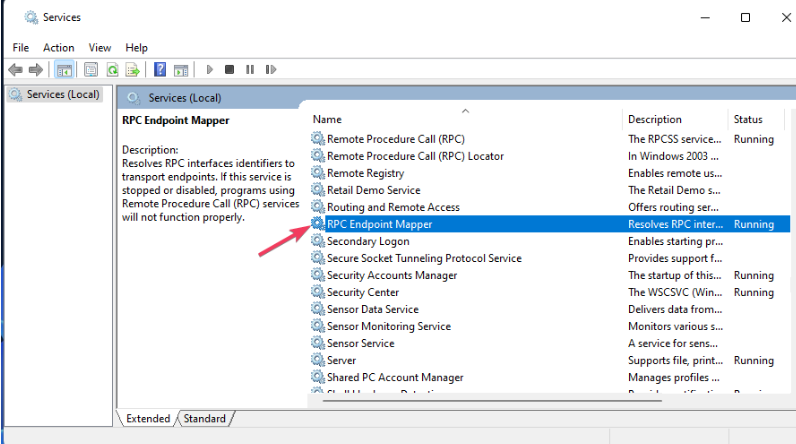
Step 1: Open ‘Services’ app in Windows PC via Windows Search Box and look for following services
- RPC Endpoint Mapper
- DCOM Server Process Launcher
- Remote Procedure Call (RPC)
Step 2: Double-click on above services one-by-one to open its Properties. Select ‘Automatic’ from ‘Startup Type’ dropdown and hit ‘Start’ button under ‘Service Status’ section, and hit ‘Apply > Ok’ button to save the changes. Once done, restart your computer and check if the issue is resolved.
Method 5: Update sound card drivers
Updating sound card driver to latest & compatible version can resolve the issue.
Step 1: Open ‘Device Manager’ in Windows PC via Windows Search Box and expand ‘Sound, video and game controllers’ category
Step 2: Right-click on your sound card driver and select ‘Update Driver’, and follow on-screen instructions to finish installation and once updated, restart your computer and check if the issue is resolved.
Download or reinstall sound card driver update in Windows 11/10 [Automatically]
You can also try to update all Windows drivers including sound card driver using Automatic Driver Update Tool. You can get this tool through button/link below.
Conclusion
I am sure this article helped you on How to Audio Service crashing in Windows 11, Audio Service stopping in Windows 11 with easy ways. You can read & follow our instructions to do so. That’s all. For any suggestions or queries, please write on comment box below.


