A touchscreen is a type of input that enable the users to interact with the displayed information on the screen with just the touch of finger and not needing any type of addition accessories like mouse, keyboard or touchpad. Touchscreens are mostly used on handheld devices such as smartphones or tablets but with the advancement now it is also available on desktop monitor and laptop display.
Microsoft has added the ability to use the touchscreen on supported windows operating system devices with the functionality already inbuilt into the user interface. To experience the future you decided to buy a touchscreen capable windows device and now want to know How to enable/disable Touch Screen in Windows 11. We have listed the methods and steps on how to do so:
How to Enable Touch Screen
- Go to Search bar from Windows Start
- Type Device Manager and press Enter.
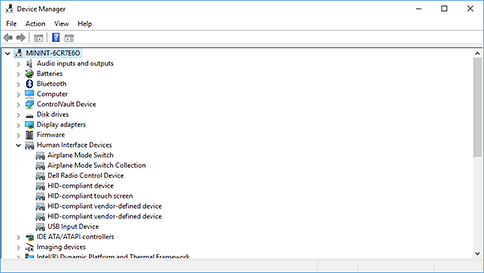
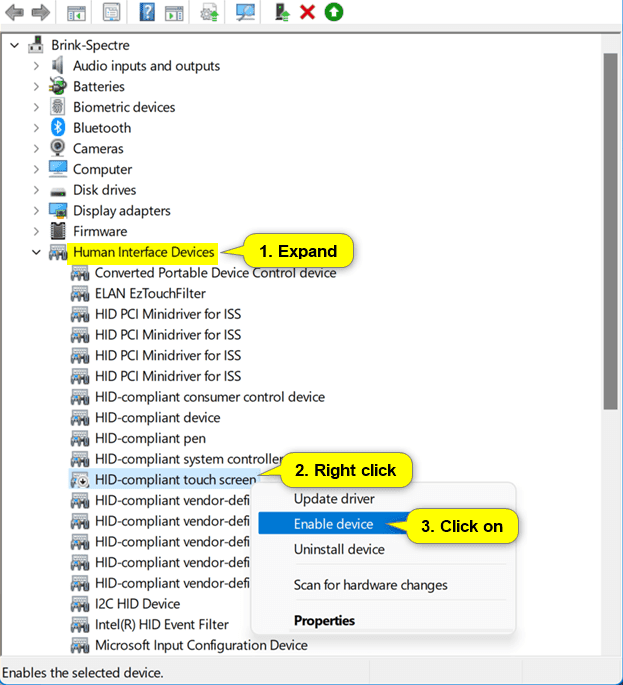
- From the list of devices, find Human Interface Devices.
- Expand by clicking on it.
- Now select HID-complaint touch screen.
- If you are not able to see the option in the list then your device either don’t have touch screen or have compatibility issues.
- Click on Action from top menu.
- Choose Enable device.
- From the list, select the second HID-complaint touch screen.
- Choose Action then select Enable Device.
- Your Windows 11 is now available to use with touch screen.
These steps are applicable on all Windows Operating System supported devices whether it be a computer or laptop. If you touch screen and cannot seem to find or enable it, then we suggest you to contact your supplier or manufacturer of the device to find and fix the issue within.
How to Disable Touch Screen
Now if you decide to disable the touch screen and use the computer or laptop normally using keyboard or mouse then, there are various different methods to disable touch screen on Windows 11 operating system. We have listed those methods with instructions below.
Disable Via Device Manager
- Press Win + R key simultaneously to open RUN dialogue box.
- Type devmgmt.msc and press Enter.
- In Device Manager Window, find HID-complaint touch screen.
- Now right click on it and select Disable Device.
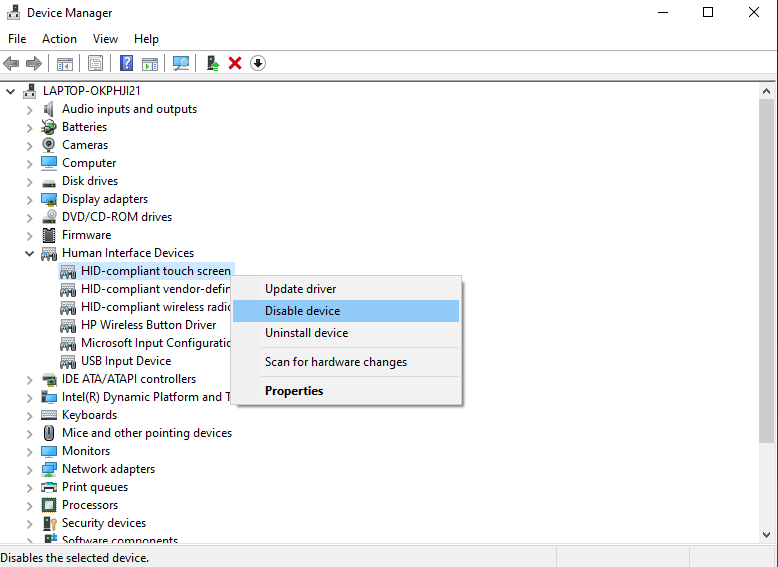
- If there is a second HID-complained touch screen, then disable it as well.
- If prompted, click on yes to confirm.
- Restart your computer and your touch screen will be disabled.
Disable Via Windows Terminal
- Press Ctrl and X key on your keyboard to open Power User Menu.
- In the given list select Windows Terminal (Admin).
- If User Account Control prompts then choose YES.
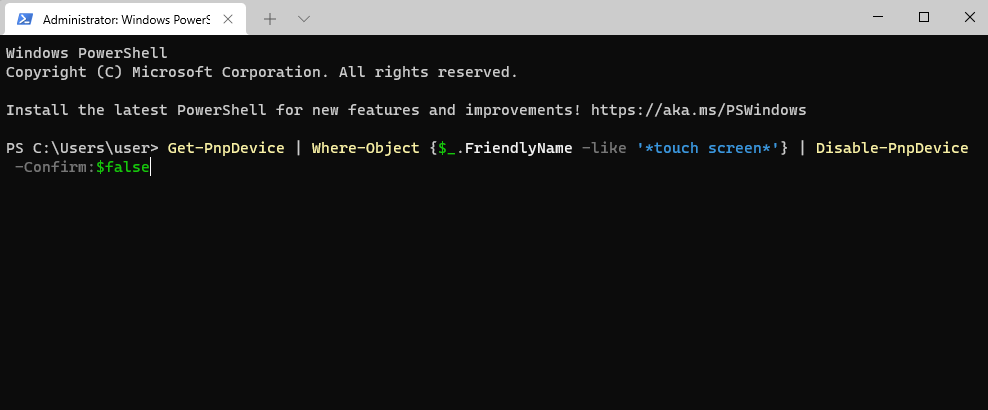
- In Windows Terminal Window type the following command and press Enter key.
- Get-PnpDevices | Where-Object {$_.FriendlyName –like ‘touch screen’} | Disable-PnpDevice –Confirm:$false
- Your touch screen is now completely disabled.
Disable Via Registry Editor
If you are not an experienced user then avoid this method because messing with Windows Registry Entries can create some serious system instability. Also make a backup if you decide to proceed with this method to restore if anything goes wrong. Below are the required steps for doing so:
- Press and hold Win + R key to open Run dialogue box.
- Type regedit and press Enter key.
- Navigate to the following path given below.
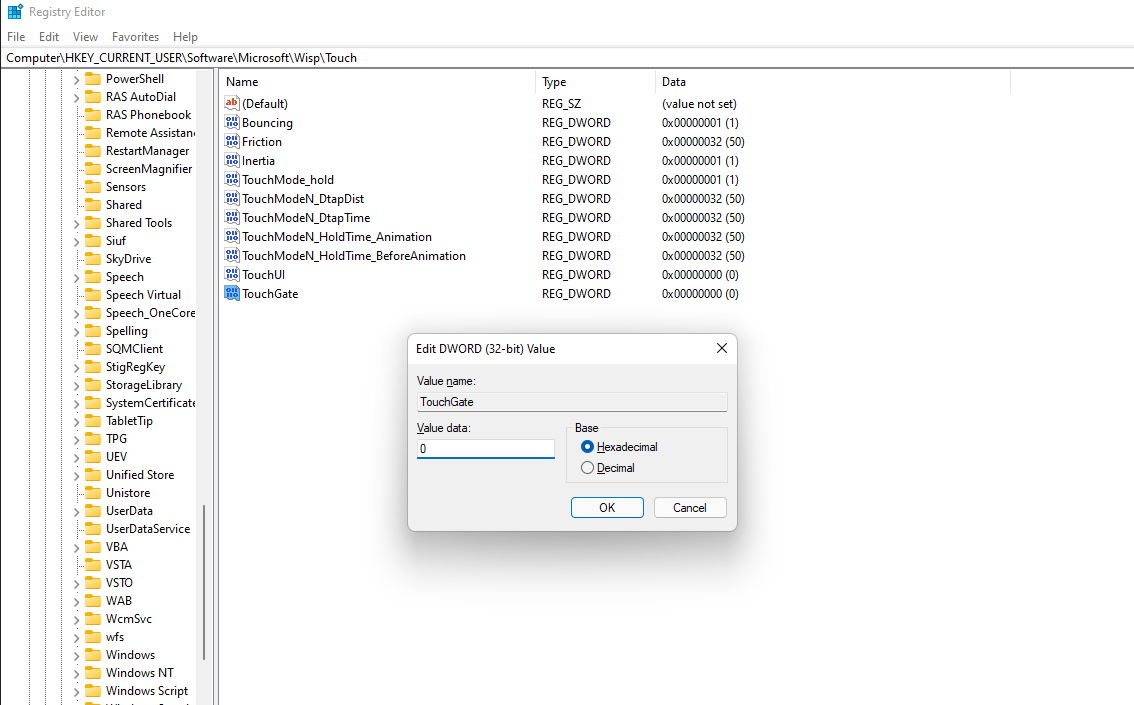
- HKEY_CURRENT_USER\Software\Microsoft\Wisp\Touch\
- Now right click on the blank right side.
- Choose New and select DWORD (32-bit) Value.
- Rename it to TouchGate and set the value to “0”.
- Press OK to confirm.
- Restart your computer to save the changes that has been made.
- And if you decide to enable it again in the future then change this value to “1”.
Conclusion
Touch screen is a very versatile feature that is both productive and cool to experience and use it. Now if you decide to add this feature to your daily usage and want to know how to enable/disable Touch Screen in Windows 11 then don’t worry we have you covered, Follow the method with the given instruction to do so with ease.