
Tips to Update BIOS Acer Swift 3:
If you are looking for ways to Update BIOS Acer Swift 3, then you are in right-place for this. Here, you are provided with easy steps/methods to perform BIOS Acer Swift 3 update in your device. Let’s starts the discussion.
‘What BIOS Acer Swift 3’? Why to update Acer Swift 3 BIOS?
BIOS stand for Basic Input Output System. BIOS is set of programs written into ROM chip on computer’s motherboard. BIOS stores the most basic input and output programs of computer, power-on-self-test programs (POST), and system self-starting programs. It can access the system settings specific information from CMOS. The main function of BIOS is to provide the bottom-layer and direct hardware settings and control of computer and also providers some system parameters to operating system.
Updating BIOS to latest & compatible version in your computer can fix bugs and issues in your PC/laptop and optimize performance, improve PC hardware compatibility, security and stability. If you are facing some hardware compatibility issues possibly due to incorrect BIOS configuration or due to outdated/corrupted BIOS, then BIOS update to latest & compatible version can be one of the best solutions toward resolving the issue.
Depending on your PC/laptop motherboard’s manufacturer model, BIOS update must be performed on device accordingly. For example, if you have Acer laptop of Swift series i.e., Acer Swift 3 laptop, then you need to perform BIOS update for Acer Swift 3 laptop accordingly. Before performing updates, you should check your PC model and BIOS version, because you will need to download and install BIOS version accordingly. Let’s go for the steps to update.
How to Update BIOS Acer Swift 3?
Step 1: Type ‘System Information’ in Windows Search Box and open it from results appear. Check the PC model (like Swift SF314-52) and BIOS version. You can also check them by using ‘Acer Care Center’ program built-in Acer PC.
Step 2: Now, open your browser and visit Acer official site, and choose ‘Support > Drivers and Manuals’
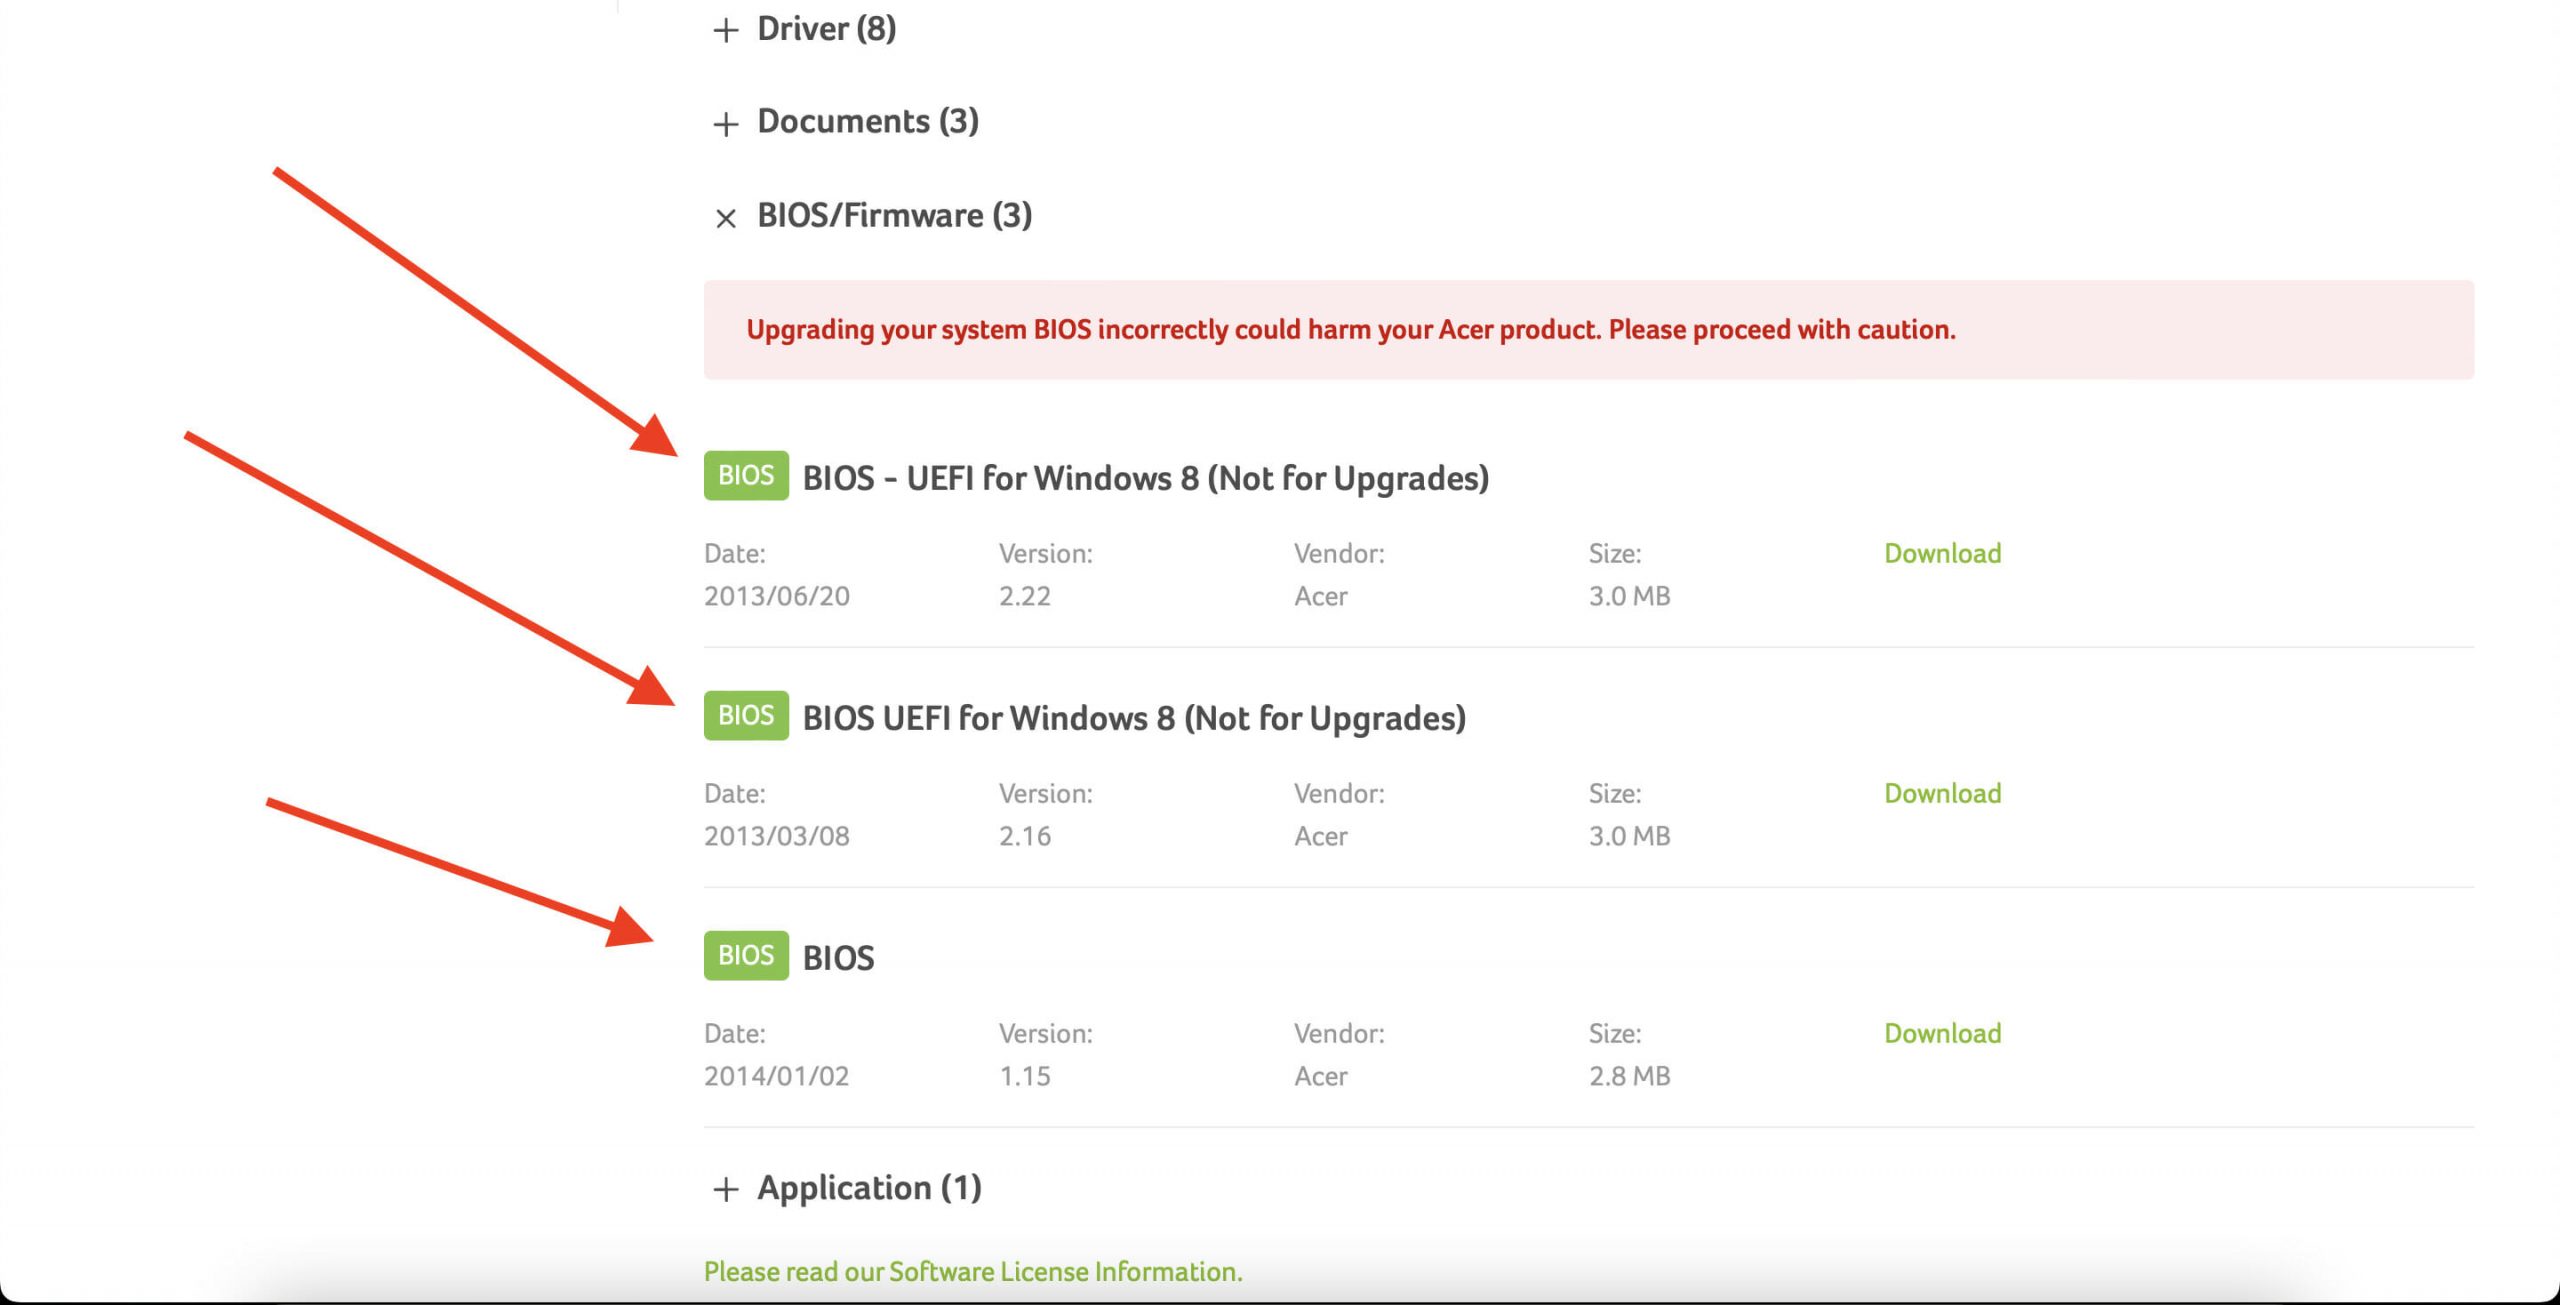
Step 3: Select PC, Category, Series and Model, and expand ‘BIOS/Firmware’
Step 4: Download the latest BIOS version and extract the BIOS folder.
Step 5: Please keep the AC adapter connected to PC lets the PC shutdown suddenly during BIOS update and a sudden shutdown may damage the BIOS and make PC unbootable.
Step 6: Now, double-click on BIOS setup file and follow on-screen instructions to finish update. The PC will restart to update BIOS.
How to Update BIOS Acer Swift 3? [Without booting into PC]
Step 1: Make sure you have checked the PC model on label attached at bottom panel of PC
Step 2: Download the latest BIOS version suitable for PC model
Step 3: Extract BIOS folder to get executable BIOS file
Step 4: Format USB drives to FAT32 file system and then use it to make a bootable USB drive
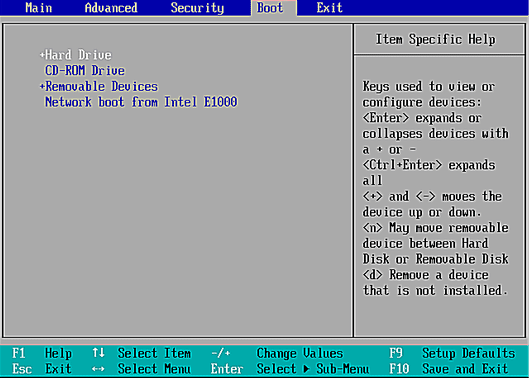
Step 5: Copy the BIOS file into USB drive, connect USB drive to your Acer PC need to update BIOS and restart your Acer device, when booting initiates, press ‘F2’ at ‘Splash screen’ to go into BIOS settings
Step 6: Once you are in BIOS menu, select ‘Boot’ menu and move the USB HDD to top of list and then press ‘F10‘ to save and exit BIOS
Step 7: Your Acer device should now boot from USB stick and in new OS, run BIOS file to update BIOS.
Fix Windows PC issues with ‘PC Repair Tool’:
‘PC Repair Tool’ is easy & quick way to find and fix BSOD errors, DLL errors, EXE errors, problems with programs/applications, malware or viruses infections in computer, system files or registry issues, and other system issues with just few clicks.
Conclusion
I hope this post helped you on How to Update BIOS Acer Swift 3. You should make sure to download the latest & compatible BIOS version from Acer official site depending on your Acer device model and then perform updates. That’s all. For any suggestions or queries, please write on comment box below.


