Tips to fix DNS server issue in Windows 10
In this post, we are going to discuss on “How to resolve DNS issues Windows 10”. You will be guided here with easy steps/methods to resolve the issue. Let’s starts the discussion.
‘DNS (Domain Name System)’: DNS is hierarchal and decentralized naming systems for computers, services and other resources connected to the internet or private network. DNS translates more readily memorized domain names to the numerical IP addresses needed for locating and identifying computer services and devices with underlying network protocols. DNS delegates the responsibility of assigning domain names and mapping those names to internet resources by designating authoritative name servers for each domain.
DNS plays important role in world of internet and if you want to access internet in your Windows 10 computer then make sure DNS/DNS server is working properly and there is no issue with DNS server at all. DNS issues in Windows 10 can cause No Internet problem or internet related issues. Several users reported about DNS server issues/errors that restrict them from using internet.
Some common DNS Server issues/errors on Windows 10:
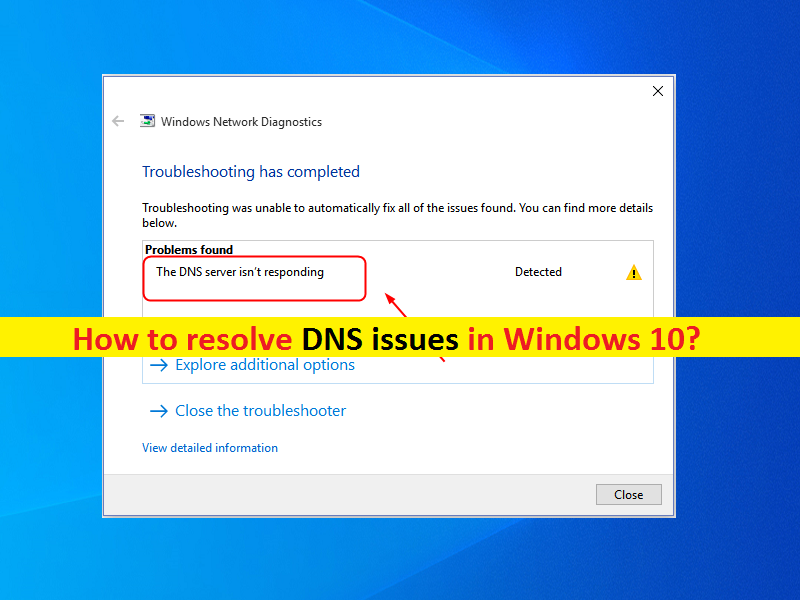
- DNS server not responding
- DNS_PROBE_FINISHED_NXDOMAIN
- DNS_PROBE_FINISHED_NO_INTERNET
- DNS_PROBE_FINISHED_BAD_CONFIG
- Your DNS server might be unavailable
These DNS server issues/errors usually occurred on Windows 10 computer while trying to access internet. The possible reason behind this issue can be corrupted DNS cache in your computer, outdated/corrupted network adapter driver, outdated Windows OS, issue with Power Options settings in your computer, and other reasons. Let’s go for the solution.
How to resolve DNS issues Windows 10?
Method 1: Fix DNS issues with ‘PC Repair Tool’
‘PC Repair Tool’ is easy & quick way to find and fix BSOD errors, DLL errors, problems with programs/applications, malware or viruses issues, system files or registry issues, and other system issues with just few clicks. You can get this tool through button/link below.
Method 2: Flush DNS Cache and Reset Winsock in Windows 10
One possible way to fix the issue is to flush DNS cache and reset Winsock using command prompt.
Step 1: Press ‘Windows + X’ keys on keyboard and select ‘Command Prompt as Administrator’
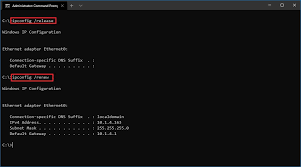
Step 2: Type the following commands one-by-one and hit ‘Enter’ key to execute
ipconfig /flushdns
ipconfig /registerdns
ipconfig /release
ipconfig /renew
NETSH winsock reset catalog
NETSH int ipv4 reset reset.log
NETSH int ipv6 reset reset.log
Exit
Step 3: Once executed, restart your computer and check if DNS server issues/errors resolved.
Method 3: Modify Power Options Settings in Windows 10
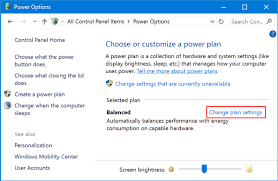
Step 1: Open ‘Control Panel’ in Windows 10 via Windows Search and go to ‘System and Security > Power Options > Go to your current power plan > Change Plan Settings > Change Advanced Power Settings’
Step 2: In the opened window, click on ‘Wireless Adapter Settings’ to expand the section and click ‘Power Saving Mode’
Step 3: Now, set ‘Maximum performance’ on both ‘On Battery’ and ‘Plug-in’ and then hit ‘Apply’ and ‘Ok’ button to save the changes. Check if it works for you.
Method 4: Try Google Public DNS server
You can modify DNS server in Windows 10 to Google Public DNS server in order to fix the issue.
Step 1: Open ‘Control Panel’ in Windows 10 and go to ‘Network and Internet Connections > Change Adapter Settings’, right-click on your network (active network) and select ‘Properties’
Step 2: In ‘Properties’ window, select ‘Internet Protocol Version 4 (TCP/IPv4)’ and click ‘Properties’
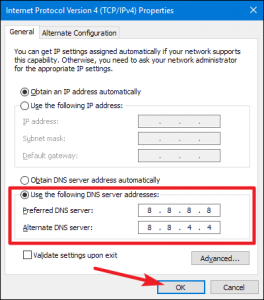
Step 3: In ‘Properties’ window of TCP/IPv4, select ‘Use the following DNS server addresses’ option, enter ‘8.8.8.8’ and ‘8.8.4.4’ in Preferred DNS server and Alternate DNS server field
Step 4: Finally, click ‘OK’, ‘Apply’ and ‘OK’ button to save the changes
Method 5: Disable P2P (Peer-to-Peer) feature of Windows Update
P2P (Peer-to-Peer) is new feature of Windows 10 update offers to download Windows update just once and share this update with all computers connected to local network You can disable this feature in order to fix DNS server issues/errors.
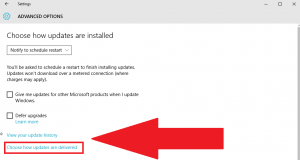
Step 1: Open ‘Settings’ App in Windows 10 via Windows Search and go to ‘Update & Security > Windows Update > Advanced Options > Choose who updates are delivered’
Step 2: Select ‘PCs on my local network’ option and disable ‘Updates from more than one place’ option. Once done, close ‘Settings’ app and check if the DNS issue is resolved.
Method 6: Update or reinstall Network Adapter driver in Windows 10
This issue can be occurred due to corrupted/outdated Network Adapter Driver in your computer. You can uninstall and then reinstall network driver, or perform network driver update in order to fix the issue.
Reinstall Network Driver in Windows 10:
Step 1: Open ‘Device Manager’ in Windows 10 via Windows Search and expand ‘Network Adapters’ category
Step 2: Right-click on your network adapter, and select ‘Uninstall’. Follow on-screen instructions to finish uninstall and after that, restart your computer
Step 3: Restarting computer will automatically reinstall the missing driver in computer.
Update Network Adapter Driver in Windows 10:
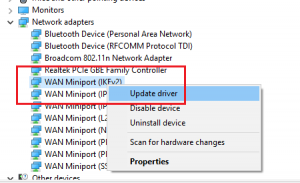
Step 1: Open ‘Device Manager’ and expand ‘Network Adapters’ category
Step 2: Right-click on network adapter, and select ‘Update Driver’ and follow on-screen instructions to finish update. Or you can also download and install the latest network driver according to your network adapter model and operating system version like Windows 32-bit or 64-bit from your network adapter manufacturer official site.
Download or reinstall network adapter driver update in Windows 10 [Automatically]
You can also try to update all Windows drivers including network drivers with ‘Automatic Driver Update Tool’. You can get this tool through button/link below.
Method 7: Enable Microsoft LLDP Protocol Driver in Windows 10
In Windows 10, you should make sure Microsoft LLDP Protocol Driver is activated/enabled for connection if you don’t want DNS server issues.
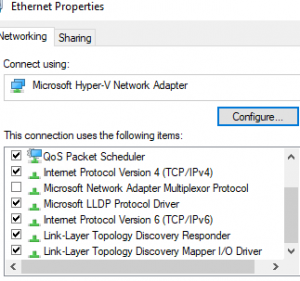
Step 1: Open ‘Control Panel’ and go to ‘System and Security > Network Connections’, right-click on your network connection and select ‘Properties’
Step 2: In ‘Properties’ window, find and check ‘Microsoft LLDP Protocol Driver’ checkbox if is not checked to enable it and then hit ‘OK’ button
Method 8: Perform Clean Boot in Windows 10
This issue can be resolved by performing Clean Boot in computer. This way, you can start Windows computer with limited services/software and startup items.
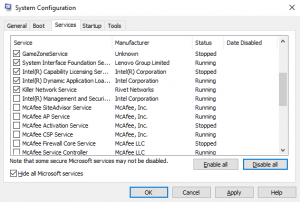
Step 1: Press ‘Windows + R’ keys on keyboard, type ‘msconfig’ in the opened ‘Run’ window and hit ‘OK’ button to open ‘System Configuration’ window
Step 2: In the opened window, click on ‘Services’ tab, select ‘Hide all Microsoft Services’ checkbox and hit ‘Disable All’ button, and then hit ‘Apply’ button
Step 3: Now, click on ‘Startup’ tab, click ‘Open Task Manager’. In Task Manager, select each application one-by-one and hit ‘Disable’ to disable them and then close Task Manager
Step 4: Once done, back to ‘System Configuration’ window, and click ‘Apply’ and ‘Ok’ button to save the changes and restart your computer and check if it works for you.
Conclusion
I am sure this post helped you on How to resolve DNS issues Windows 10 with several easy steps/methods. You can read & follow our instructions to do so. That’s all. For any suggestions or queries, please write on comment box below.


