Tips to Remove system requirements not met watermark in Windows 11:
In this article, we are going to discuss on How to Remove system requirements not met watermark Windows 11. You will be guided with easy steps/methods to do so. Let’s starts the discussion.
‘System requirements not met watermark’ in Windows 11:
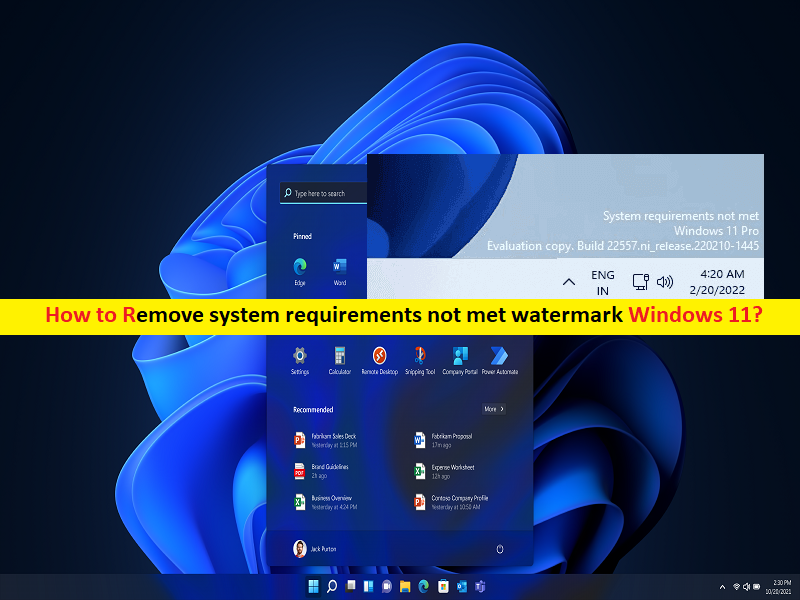
Microsoft announced Windows 11 with strict hardware requirements. Many tools showed up to install Windows 11 even with no TPM module on board. It is also known to have worked on MacBook, its security module. While Microsoft has allowed it because there is no post check, then Microsoft Windows team will soon start adding warning to such PCs using a watermark that says ‘System requirements not met Windows 11’.
The warning message appeared in watermark as ‘System Requirements Not Met Build No 12345’ along with this, the message is also shown on the System section of the settings. If you are facing the same and looking for ways to remove ‘System requirements not met watermark Windows 11’, then you are in right-place for this. Here, you are provided with easy ways to perform this task. Let’s go for the solution.
How to Remove system requirements not met watermark Windows 11?
Method 1: Remove system requirements not met watermark Windows 11 using Registry Editor
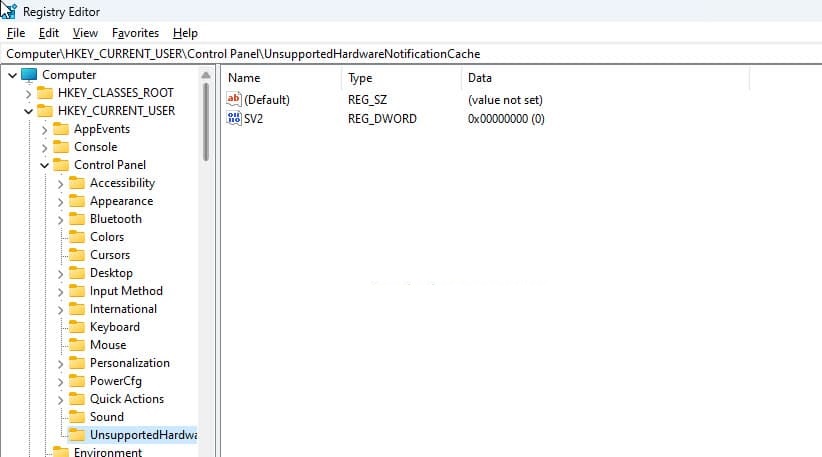
Step 1: Press ‘Windows + R’ keys on keyboard, type ‘regedit’ in ‘Run’ window and hit ‘Ok’ button to open ‘Registry Editor’ app, and navigate to following path in left pane
HKEY_CURRENT_USER\Control Panel\UnsupportedHardwareNotificationCache
Step 2: Right-click ‘SV2 DWORD’ value and select ‘Modify’, set ‘0’ into value data field, and then hit ‘Ok’ button to save the changes. Close Registry Editor and restart your PC to apply the changes. Once restart, Windows 11 will not show the unsupported hardware watermark anymore.
Method 2: Create UnsupportedHardwareNotificationCache key, if not created and then proceed
Step 1: Open ‘Registry Editor’ app in Windows PC and navigate to following path
HKEY_CURRENT_USER\Control Panel
Step 2: Rename the key as ‘UnsupportedHardwareNotificationCache’, right-click on new key and select ‘New >DWORD (32-64 bit) value’, and name the value to ‘SV2’
Step 3: Double-click on newly created SV2 value to edit, set its value data to ‘2’ and hit ‘Ok’ button to save the changes, and check if it works for you.
Fix Windows PC issues with ‘PC Repair Tool’:
‘PC Repair Tool’ is easy & quick way to find and fix BSOD errors, DLL errors, EXE errors, problems with programs/applications, malware or viruses infections in computer, system files or registry issues, and other issues with just few clicks.
Conclusion
I am sure this post helped you on How to Remove system requirements not met watermark Windows 11. You can read & follow our instructions to do so. That’s all. For any suggestions or queries, please write on comment box below.


