Tips to make Discord Channel read only in Windows PC:
In this post, we are going to discuss on “How to make Discord Channel read only in Windows PC”. You will be guided with easy steps/methods to do so. Let’s starts the discussion.
‘Discord’: Discord is Instant Messaging, VoIP (Voice over Internet Protocol) and digital distribution platform. This service offers you to commutate with voice & video calls, text messaging, media and files in private chats or as part of communities called ‘Servers’. Discord service is available for Microsoft Windows, MacOS, Linux, iOS, iPadOS, Android and web browsers. As of 2021, Discord service has over 350 million registered users and over 150 million monthly active users.
‘Channels in Discord’: Channels are the essential part of any Discord server. Discord Channel is where members interact with each other and most likely where you will share important information with your community. However, the contents of channels are not just text or voice. You can use text channels to share your favourite music, video, share cure pet photos, or upload files and documents. Channels play the most important part in any server.
It is quite easy & simple to create or make Discord Channel Read Only on your Discord server in your Windows PC. There are many permissions that you can disable for members on your Discord server. You should make sure you have created a role of moderators to allow them to message in channel. Let’s go for the solution.
How to make Discord Channel read only in any Discord Server in Windows PC?
Step 1: In Windows PC, open ‘Discord Client’ app and go to Discord server where you want to create a read-only channel
Step 2: Click on ‘Sever Name’ at top-right corner and select ‘Create Channel’ option. Click ‘Plus (+)’ sign to create a channel in that specific category if you have multiple categorises on server.
Step 3: Now, select ‘Text Channel’ in channel type and provide a ‘Name’ for the channel and then click ‘Create Channel’ option to create new channel
Step 4: Now, move the mouse over the new channel name and click ‘Edit Channel’ icon for that specific channel
Step 5: In the opened page, select ‘Permissions’ and expand ‘Advanced Permissions’ option. Select ‘Everyone’ role or any other role you provide to your members and then disable ‘Send Messages’ permission for that role. Finally, click ‘Save Changes’ to apply the new settings
Step 6: After that, the members of your server will not be able to send any message in this channel. You can add admin/moderators roles and allow them to send messages in this channel. Only Moderators can send messages and members will have a read-only channel
Step 7: You should make sure you also disable new thread feature for members’ role. Otherwise, they can still create a message in the threads. Also, you can enable or disable the emoticons in this specific channel
How to create and add moderator role in Read-Only Discord Channel?
This way, you can create a role that will be allowed to post in read-only channel. Moderators and admin should be added to this role so only they can message in read-only channel.
Step 1: Open Discord Client in Windows PC and go to your Discord server
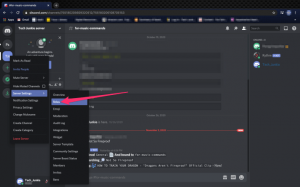
Step 2: Click on ‘Server Name’ at top-left corner and select ‘Server Settings’ option
Step 3: Click ‘Roles’ option in left pane and click ’Create Role’
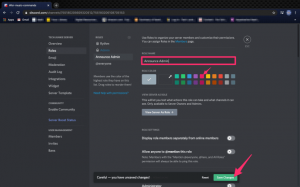
Step 4: Provide the name and color for the role, or you can change the role priority among other roles by moving it up and down in role list. You can right-click on users, and select ‘Roles > Select Role to provide them to role’
Step 5: Now, go to ‘Read-Only Channel’ and click ‘Edit Channel’ icon
Step 6: Select ‘Permissions’ option and then in ‘Advanced Permissions’, click ‘Plus (+)’ icon for ‘Roles/Members’. Select the newly created role to add
Step 7: After that, select the role and change ‘Send Message’ to ‘Allow’. You should make sure this role is above the members’ role in Role Settings
Step 8: Once done, only this role can message and all other members can view the channel as read-only.
Conclusion
I am sure this post helped you on How to make Discord Channel read only with several easy steps/methods. You can read & follow our instructions to do so. That’s all. For any suggestions or queries, please write on comment box below.


