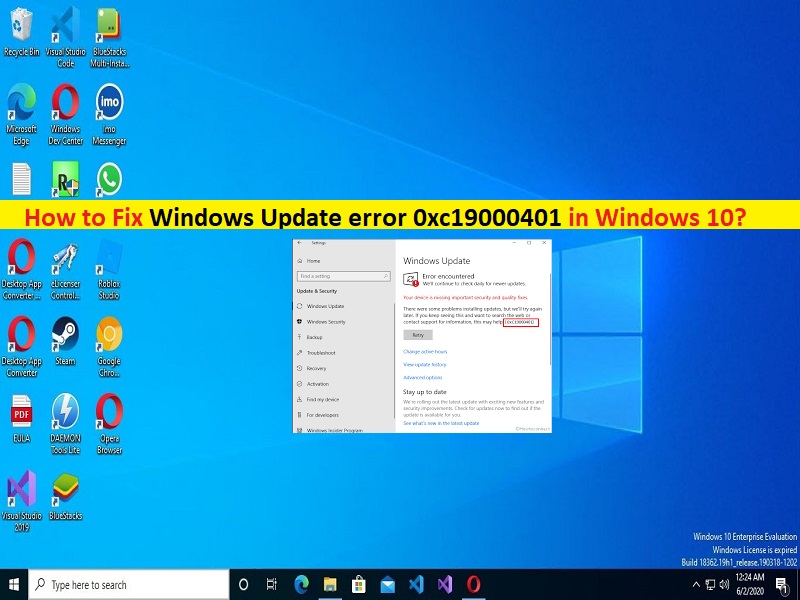
What ‘Windows Update error 0xc19000401’ in Windows 10?
In this article, we are going to discuss on How to fix Windows Update error 0xc19000401 in Windows 10. You will be guided with easy steps/methods to resolve the issue. Let’s starts the discussion.
‘Windows Update error 0xc19000401’: Microsoft regular releases updates or patch update for Microsoft operating system in order to fix all know bugs or issues in Windows computer and add several new enhancements and performance improvements features to Windows OS. It is quite simple to install latest patch update, cumulative updates, or other updates in computer using built-in Settings app. However, several users reported they faced Windows Update error 0xc19000401 when tried to download & install latest Windows update in computer through Settings App.
There could be several reasons behind the issue including poor internet connection, issue with Windows update services, corrupted system files or registry, or system image, interference of third-party antivirus/firewall program, problematic hardware device attached, and other Windows issues. You should make sure you have stable internet connection/WiFi and there is no issue with internet connection at all.
You can reset/restart your network device like router/WiFi device in order to fix internet connection problem, and check if it works for you. You can try to fix the issue by repairing the corruption in system files, registry or in system image in computer. It is possible to fix the issue with our instructions. Let’s go for the solution.
How to fix Windows Update error 0xc19000401 in Windows 10?
Method 1: Fix Windows Update error 0xc19000401 with ‘PC Repair Tool’
‘PC Repair Tool’ is easy & quick way to find and fix BSOD errors, DLL errors, EXE errors, problems with programs/applications, malware or viruses issues, system files or registry issues, and other system issues with just few clicks.
Method 2: Run Windows Update troubleshooter
Windows built-in Windows Update troubleshooter can resolve the issue. Let’s try.
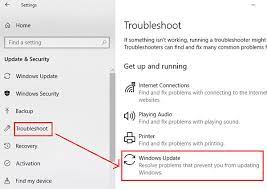
Step 1: Open ‘Settings’ App in Windows PC via Windows Search Box and go to ‘Update & Security > Troubleshoot > Additional Troubleshooters’
Step 2: Find and select ‘Windows Update’ troubleshooter, and click ‘Run the troubleshooter’ button and follow on-screen instructions to finish troubleshooting and once finished, check if the issue is resolved.
Method 3: Reset Internet connection
Step 1: Type ‘cmd’ in Windows Search Box and press ‘SHIFT + ENTER’ keys on keyboard to open ‘Command Prompt as Administrator’
Step 2: Type the following commands one-by-one and hit ‘Enter’ key after each line to execute.
ipconfig /flushdns
ipconfig /registerdns
ipconfig /release
ipconfig /renew
netsh winsock reset
Step 3: Once executed, restart your computer and check if the issue is resolved.
Method 4: Reset Windows Update components
You can also try to fix the issue by resetting Windows Update Components via Command Prompt in computer.
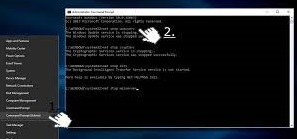
Step 1: Open ‘Command Prompt as Administrator’ using above method
Step 2: Type the following commands one-by-one and hit ‘Enter’ key after each to execute.
net stop wuauserv
net stop cryptSvc
net stop bits
net stop msiserver
Step 3: Now, open ‘File Explorer’ in Windows PC and go to following folders/path and delete the contents inside these folders.
C:\\Windows\\System32\\catroot2
C:\\Windows\\SoftwareDistribution
Step 4: Now, execute the following commands in Command Prompt
net start wuauserv
net start cryptSvc
net start bits
net start msiserver
Step 5: Once executed, restart your computer and check if the issue is resolved.
Method 5: Run SFC scan and DISM scan
Step 1: Open ‘Command Prompt as Administrator’ using above method, type the following commands one-by-one and hit ‘Enter’ key after each to execute.
sfc /scannow
DISM /Online /Cleanup-Image /CheckHealth
DISM /Online /Cleanup-Image /ScanHealth
DISM /Online /Cleanup-Image /RestoreHealth
Step 2: Once executed, restart your computer and check if the error is resolved.
Method 6: Enable relevant Windows Update services
You can also try to fix the issue by enabling all relevant Windows update services in computer.
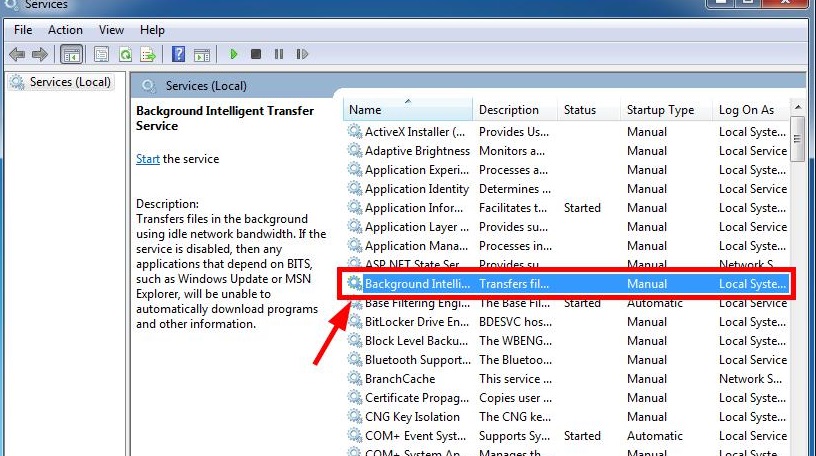
Step 1: Open ‘Services’ app in Windows PC via Windows Search Box
Step 2: Find and double-click on ‘Background Intelligent Transfer Service (BITS)’ service to open its Properties.
Step 3: Select ‘Automatic’ option from ‘Startup Type’ dropdown, and hit ‘Start’ button under ‘Services Status’, and then hit ‘Apply > Ok’ button to save the changes. Repeat the same step for Windows Update service.
Step 4: Once done, restart your computer and check if the issue is resolved.
Method 7: Disable third-party antivirus/firewall program
This issue can be occurred due to interference of third-party antivirus/firewall program in computer. You can disable third-party antivirus/firewall program in computer in order to fix the issue.
Method 8: Repair or reinstall Windows 10 OS using Windows 10 Installation Media USB
If the issue is still persist, you can try to fix the issue by using Windows Installation Media USB/DVD and repair your Windows OS, and check if it works for you. If not, then you can use the same Windows Installation Media USB to perform clean Windows OS installation in computer in order to fix the issue.
Conclusion
I am sure this post helped you on How to fix Windows Update error 0xc19000401 in Windows 10 with several easy steps/methods. You can read & follow our instructions to do so. That’s all. For any suggestions or queries, please write on comment box below.


