What is ‘Windows update error 0x800700a1’ in Windows 10?
If you are facing Windows update error 0x800700a1 in Windows 10 when you try to update Windows 10 OS to latest version in computer, then you are in right-place for the solution. Here, you are provided with easy steps/methods to resolve the issue. Let’s starts the discussion.
‘Windows update error 0x800700a1’ in Windows 10:
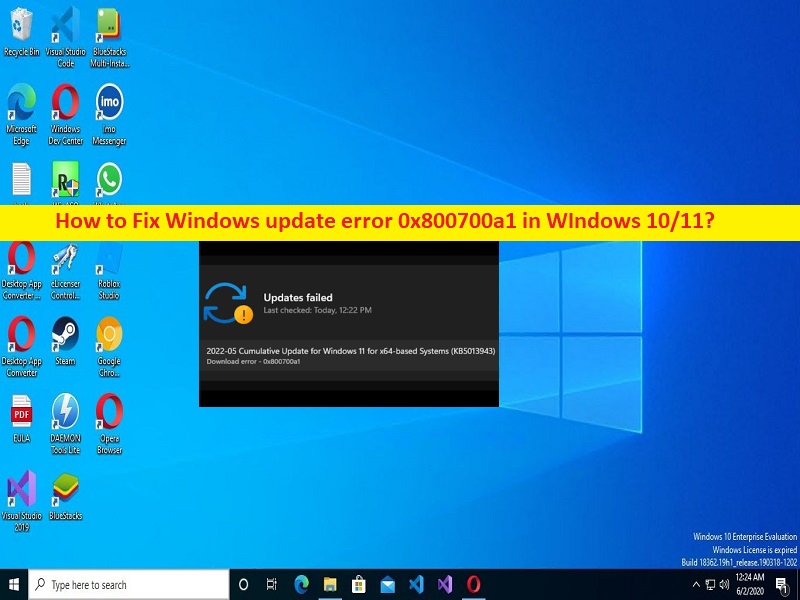
It is common Windows Problem considered as Windows Update error. This error is appeared usually when Windows update fails to complete in your Windows 10 computer. This error indicates you are unable finish Windows update operation in computer for some reasons. The error is appeared with message saying ‘Windows Update Standalone Installer. Installer encountered an error: 0x800700a1. The specified path is invalid’.
There could be several reasons behind the issue including the corruption in Windows update components, corruption in system files or registry or in system image, problematic software installed or faculty hardware attached into computer, malware or viruses infections in computer, and other system issues. Sometimes, this type of issue is occurred due to some temporary issue in your computer.
You can just restart your computer in order to fix the temporary issue and resolve this error. This issue can also be occurred due to poor internet connection and speed. You should make sure you have stable internet connection and speed if you don’t want to face this type of issue. It is possible to fix the issue with our instructions. Let’s go for the solution.
How to fix Windows update error 0x800700a1 in Windows 10?
Method 1: Fix Windows update error 0x800700a1 with ‘PC Repair Tool’
‘PC Repair Tool’ is easy & quick way to find and fix BSOD errors, DLL errors, EXE errors, problems with programs/applications, malware or viruses infections in computer, system files or registry issues, and other system issues with just few clicks.
Method 2: Run Windows Update troubleshooter
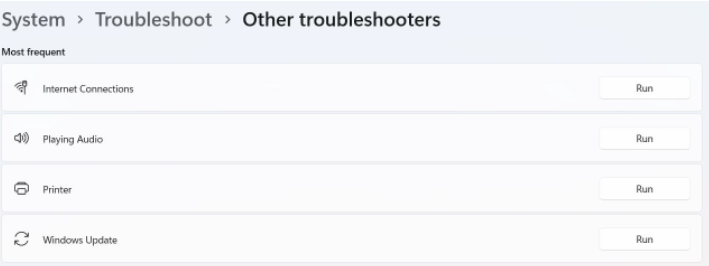
Windows built-in Windows Update troubleshooter can resolve the issue.
Step 1: Open ‘Settings’ app in Windows PC via Windows Search Box and go to ‘Update & Security > Troubleshoot > Additional Troubleshooters’
Step 2: Find and select ‘Windows Update’ troubleshooter, and click ‘Run the troubleshooter’ and follow on-screen instructions to finish troubleshooting and once finished, check if the issue is resolved.
Method 3: Run SFC scan and DISM scan
You can run SFC Scan and DISM scan to repair corruption in system files and system image in order to fix the issue.
Step 1: Type ‘cmd’ in Windows Search Box and press ‘SHIFT + ENTER’ keys on keyboard to open ‘Command Prompt as Administrator’
Step 2: Type the following commands one-by-one and hit ‘Enter’ key after each to execute.
sfc /scannow
DISM /Online /Cleanup-Image /CheckHealth
DISM /Online /Cleanup-Image /ScanHealth
DISM /Online /Cleanup-Image /RestoreHealth
Step 3: Once executed, restart your computer and check if the issue is resolved.
Method 4: Reset Windows Update Components’
Corruption in Windows Update components could be a reason behind the issue. You can reset Windows Update components in computer.
Step 1: Open ‘Command Prompt as Administrator’ using above method
Step 2: Type the following commands one-by-one and hit ‘Enter’ key to execute.
net stop wuauserv
net stop cryptSvc
net stop bits
net stop msiserver
Step 3: Once executed, open ‘File Explorer’ in Windows PC and navigate to following folders and delete all contents inside them
C:\\Windows\\System32\\catroot2
C:\\Windows\\SoftwareDistribution
Step 4: Now, execute the following commands in Command Prompt
net start wuauserv
net start cryptSvc
net start bits
net start msiserver
Step 5: Once executed, restart your computer and check if the issue is resolved.
Method 5: Restart Windows Update Services
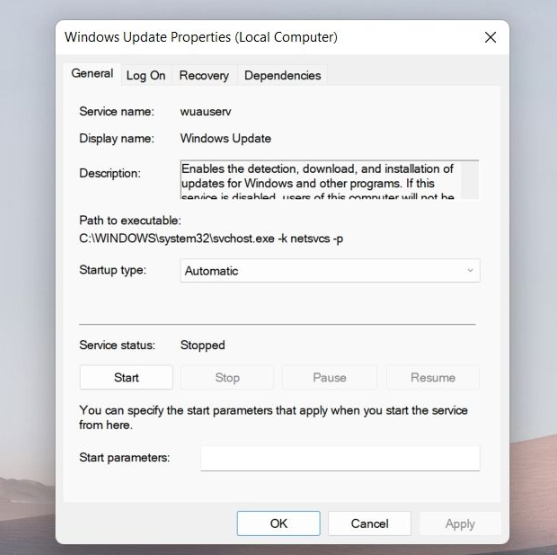
Step 1: Open ‘Services’ app in Windows PC via Windows Search Box
Step 2: Find and double-click ‘Windows Update’ service to open its Properties. Select ‘Automatic’ option from ‘Startup Type’ and hit ‘Start’ button under ‘Service Status’ section and then hit ‘Ok’ button to save the changes.
Step 3: Repeat the same process for Background Intelligent Transfer Service, Cryptographic Service, and Windows Update Medic Service, and once done, restart your computer and check if the issue is resolved.
Method 6: Disconnect all unnecessary peripherals
This issue can be occurred due to hardware issue. You can disconnect all peripherals from computer and start/restart your computer, and check if it works. If works, then you can reconnect each peripherals to computer in order to check which hardware is problematic and then remove the problematic one permanently.
Method 7: Check System date & time
Step 1: Open ‘Settings’ app in Windows PC via Windows Search Box and go to ‘Time & Language > Date & Time’
Step 2: Click ‘Change’ next to ‘Set the date and time manually’ option, enter the correct date & time and click ‘Change’
Step 3: Once done, restart your computer and check if the issue is resolved.
Method 8: Perform Clean Boot

If the issue is still persist, you can perform clean boot in computer in order to fix.
Step 1: Open ‘System Configuration’ app in Windows PC via Windows Search Box
Step 2: Click ‘General’ tab, check ‘Load system services’ option
Step 3: Click ‘Services’ tab, check ‘Hide all Microsoft services’ checkbox and hit ‘Disable All’ button
Step 4: Now, click ‘Startup’ tab, and click ‘Open Task Manger’, right-click on each startup items and select ‘Disable’ to disable them and then close Task Manager
Step 5: Finally, click ‘Apply >Ok’ button on System Configuration app to save the changes and once done, restart your computer and check if the issue is resolved.
Conclusion
I am sure this post helped you on How to fix Windows update error 0x800700a1 in Windows 10/11 with easy ways. You can read & follow our instructions to do so. That’s all. For any suggestions or queries, please write on comment box below.


