What is ‘Windows Update error 0x8000ffff’ in Windows 10/8.1?
If you are facing Windows Update error 0x8000ffff in Windows 10/8.1 computer while trying to update Windows OS to latest version, then you are in right-place for the solution. Here, you are provided with easy steps/methods to resolve the issue. Let’s starts the discussion.
‘Windows Update error 0x8000ffff’: Microsoft regular release updates or security patches for Microsoft Windows operating system to fix all known issues, add several new features, and add performance enhancements. It is quite is simple and easy to download & install Windows update in computer via Windows 10’s Settings App. However, several Windows 10 users reported they faced Windows Update error 0x8000ffff when the update fails the install in computer.
This error specifies that the System gets unable to communicate with Windows update/Windows Store Servers. There could be several reasons behind the issue including the malfunction with Microsoft App Servers, corrupted system files or system image, incorrect system date & time, malware or viruses infections in computer, disabled VSS (Volume Shadow Copy Service), incorrect system settings and other issues.
On other hand, this error code – Error 0x8000ffff is appeared not only when you try to update Windows OS, but also when you try to create System restore point, after system restore, downloading/installing a new app, and installing the update from Windows Update Center. It is possible to resolve the issue with our instructions. Let’s go for the solution.
How to fix Windows Update error 0x8000ffff in Windows 10?
Method 1: Fix Windows Update error 0x8000ffff with ‘PC Repair Tool’
‘PC Repair Tool’ is easy & quick way to find and fix BSOD errors, DLL errors, EXE errors, problems with programs/applications, malware or viruses infections in computer, system files or registry issues, and other system issues with just few clicks.
Method 2: Run SFC scan and DISM scan
You can run SFC scan and DISM scan in computer to repair corruption in system files and system image in computer to fix the issue.
Step 1: Type ‘cmd’ in Windows Search Box and press ‘SHIFT + ENTER’ keys on keyboard to open ‘Command Prompt as Administrator’
Step 2: Type the following commands and hit ‘Enter’ key after each to execute.
sfc /scannow
DISM /Online /Cleanup-Image /RestoreHealth/
Step 3: Once executed, restart your computer and check if the issue is resolved.
Method 3: Check and correct System Date & Time
Incorrect system date & time could a reason behind the issue. You can correct system date & time in order to fix.
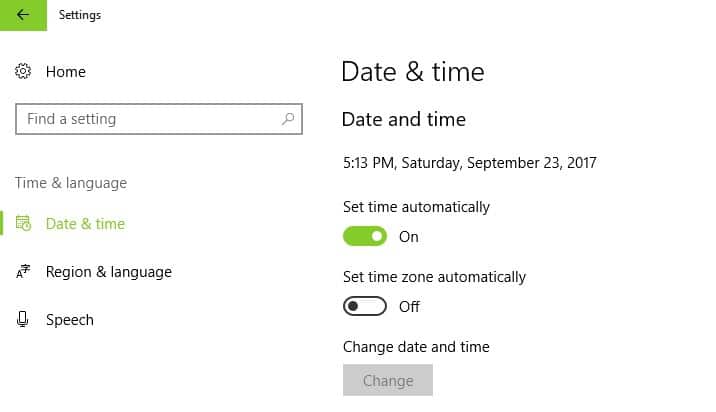
Step 1: Right-click on ‘Clock’ icon present in bottom-right corner in Taskbar and select ‘Adjust date/time’
Step 2: Find ‘Set Time Automatically’ option and turn it OFF. After few seconds, turn it ON again. Once done, check if it works for you.
Method 4: Update Device Drivers
Updating all necessary device drivers to latest & compatible version can resolve the issue. You can update all Windows drivers including graphics card driver, and all other device drivers using Automatic Driver Update Tool. You can get this tool through button/link below.
Method 5: Reset Microsoft Store cache
Clearing/resetting Microsoft Store cache in computer can resolve the issue.
Step 1: Press ‘Windows + R’ keys on keyboard, type ‘wsreset.exe’ in ‘Run’ window and hit ‘Ok’ button to perform Microsoft Store cache reset.
Step 2: Wait to finish resetting and once done, check if the issue is resolved.
Method 6: Boot your computer in Safe Mode with networking
You can also try to fix the issue by booting your computer in safe mode with networking.
Step 1: Open ‘Settings’ App in Windows PC via Windows Search Box and go to ‘Update & Security > Recovery > Advanced Startup > Restart Now’
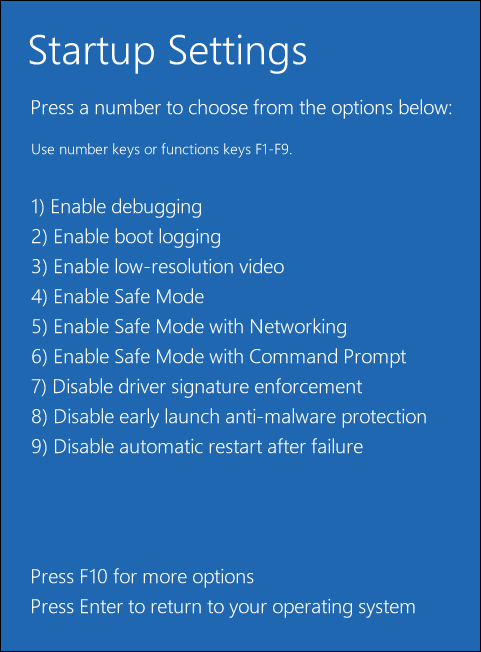
Step 2: After restart, select ‘Troubleshoot > Advanced Options > Startup Settings’ and click ‘Restart’
Step 3: Select ‘Safe Mode with networking’ option from the list. Once done, check if it works for you.
Method 7: Uninstall problematic applications
This issue can be occurred due to interference of some problematic software installed in computer. You can uninstall the problematic applications in order to fix.
Step 1: Go to’ C:$WINDOWS.~BTSourcesPanther’ path in computer. And find and open the file that looks like ‘<array_of_symbols>_APPRAISER_HumanReadable.xml’
Step 2: Open the file in Notepad, find and open the application that have ‘BlockingApplicaiton=True’ assigned to them. These are stopping the installation process.
Step 3: After that, you can try to uninstall all problematic application from computer via Control Panel > Uninstall a Program > Programs & Features section. Once done, check if it works for you.
Method 8: Re-configure Windows Store
One possible to fix the issue is to re-configure Windows Store in computer.
Step 1: Right-click on ‘Start Menu’ and select ‘Windows PowerShell (Admin)’
Step 2: Type the following the command and hit ‘Enter’ key to execute.
powershell-ExecutionPolicy Unrestricted Add-AppxPackage-DisableDevelopmentMode-Register Env:SystemRoot\WinStore\AppxManifest.xml
Step 3: Restart your computer and check if the issue is resolved.
Method 9: Create a new user account in Windows PC
This issue can be occurred due to some issue with user account in computer. You can create a new user account in computer and then sign-in with it in order to fix.
Step 1: Open ‘Settings’ App and go to ‘Accounts > Family & other people’, and select ‘Add someone else to this PC’
Step 2: Choose ‘I don’t have this person’s sign-in information’ option > Add a user without a Microsoft Account, and enter a desired username and then click ‘Next’ button to create a user account
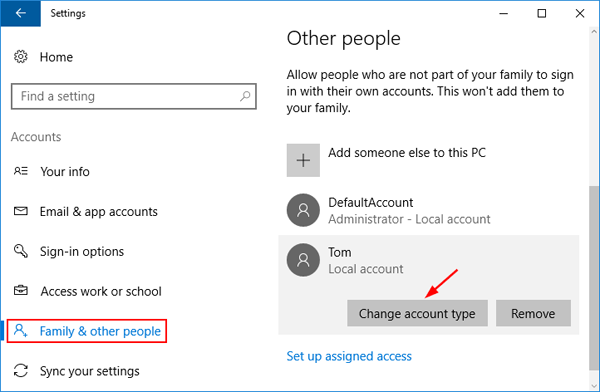
Step 3: Now, open ‘Settings’ App again and go to ‘Family and other people’, under ‘Other People’ section, select your new user account and click ‘Change Account Type’ button
Step 4: Choose ‘Administrator’ as ‘account type’ and click ‘Ok’ button. Once done, restart your computer and sign-in with newly created account and check if it works.
Method 10: Activate Volume Shadow Copy Service
Another way to fix the issue is to activate Volume Shadow Copy Service in computer.
Step 1: Open ‘Services’ app in Windows PC via Windows Search Box
Step 2: Find and double-click on ‘Volume Shadow Copy’ service to open its Properties. Select ‘Automatic’ from ‘Startup Type’ dropdown, and hit ‘Ok’ button to save the changes.
Step 3: Once done, restart your computer and check if the issue is resolved.
Method 11: Fix Windows Update error 0x8000ffff using Registry Editor
Step 1: Open ‘Registry Editor’ app in Windows PC via Windows Search Box and navigate to following path
HKEY_LOCAL_MACHINE\COMPONENTS\AdvancedInstallersNeedResolving
HKEY_LOCAL_MACHINE\COMPONENTS\NextQueueEntryIndex
HKEY_LOCAL_MACHINE\COMPONENTS\PendingXmlIdentifier
Step 2: Now, right-click on following keys one-by-one and hit ‘Delete’ option to delete them
AdvancedInstallersNeedResolving
NextQueueEntryIndex
PendingXmlIdentifier
Step 3: Once done, restart your computer and check if the issue is resolved.
Method 12: Run Windows Update troubleshooter
Step 1: Open ‘Settings’ App in Windows PC via Windows Search Box and go to ’Update & Security > Troubleshoot’
Step 2: Find and select ‘Windows Update’ troubleshoot, and click ‘Run the troubleshooter’ button and follow on-screen instructions to finish troubleshooting. Once finished, check if the issue is resolved.
Method 13: Run Windows Store Apps troubleshooter
You can run Windows Store Apps troubleshooter in order to fix.
Step 1: Follow ‘Step 1’ of above method to go to ‘Windows troubleshooter’ window
Step 2: Find and select ‘Windows Store Apps’ troubleshooter, and click ‘Run the troubleshooter’ and follow on-screen instructions to finish troubleshooting. Once done, check if the issue is resolved.
Method 14: Disable Proxy Server
Another possible way to fix the issue is to disable Proxy Server in computer.
Step 1: Press ‘Windows + R’ keys on keyboard, type ‘inetcpl.cpl’ in ‘Run’ window and hit ‘ok’ button
Step 2: Click ‘Connections’ tab and click ‘LAN Settings’ button, uncheck ‘Use proxy server for your LAN’ checkbox, and hit ‘Ok > Apply > Ok’ button to save the changes and check if the issue is resolved.
Conclusion
I am sure this article helped you on How to fix Windows Update error 0x8000ffff in Windows 10 with easy steps/methods. You can read & follow our instructions to do so. That’s all. For any suggestions or queries, please write on comment box below.


