Windows Operating System relies on an array of services and processes to run in an efficient manner. It’s pertinent to mention some services or processes starts running since you put on your PC while some needs human interference to get started.
These services/ processes contribute a lot in the proper functioning of your system. It’s noteworthy to mention each and every task you perform on your PC is managed by these services. Without these services, you won’t be able to perform even simple tasks like connecting to internet.
One instance of such essential services is Windows Installer Service. This service plays a vital role in Windows OS as it helps in installing, maintaining and removing software applications.
This service serves as a link between you and the software you desire to install. To elaborate, when you install a new application, it uses this service to copy to the relevant locations, create registry entries and manage dependencies. So it’s quite obvious without this file, you won’t be able to install any application if this service is not running.
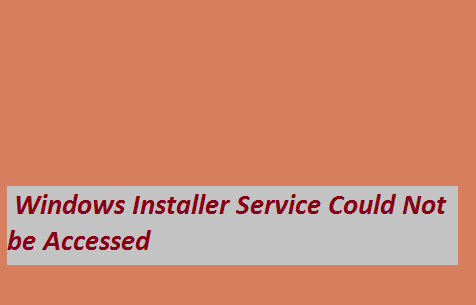
And if there’s something wrong with this service or any factor is disrupting it the user may encounter “Windows Installer Service Could Not be Accessed.” The full error message reads as:
Windows Installer service could not be accessed. This can occur if the Windows Installer is not correctly installed. Contact your personnel for assistance, as shown in following picture:
This annoying error usually occurs while installing new applications. As above discussed, this error simply connotes that Windows Installer Service is either not running or its files are not intact. Apart from this the other possible factors are as follows:
#. Your System is infected with malware
#. Lack of Permissions
#. Interference of third-party software
#. Corrupted System files
#. There is already an earlier version of the application or program installed on your system.
Since we have some basic understanding about the error and its causes, so let’s dive into all the working fixes to resolve the error.
You May Also Read: Windows Shell Common DLL has Stopped Working Error
Try these Solutions for “Windows Installer Service Could Not be Accessed” Error
Method 1: Start the Windows Installer Service Manually
Before proceeding with the complex methods we suggest you to ensure if the Windows Installer Service is running or not.
To do so follow the below mention guidelines:
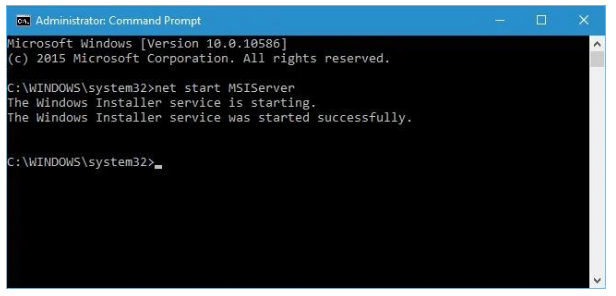
Step 1: Right-click on the Start Menu and choose Command Prompt (Admin) from the menu
Step 2: In the prompted window, type in net start MSIServer and press Enter key to run it
Follow the below mention guidelines to check if the Windows Installer Services is running or not:
Step 1: Open the Start Menu, type Services and open it > Open Windows Installer Services
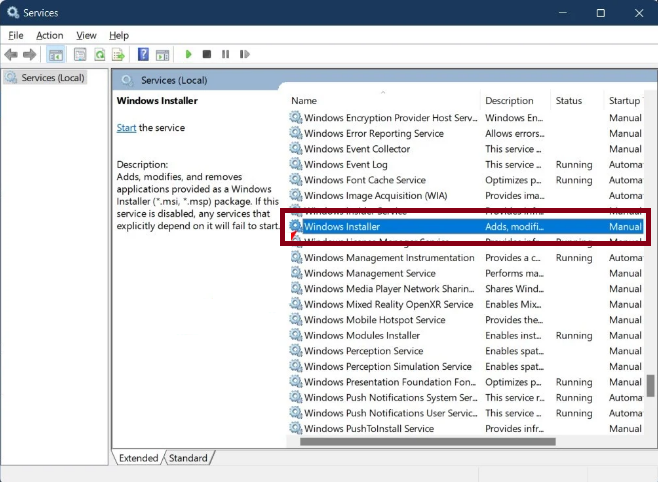
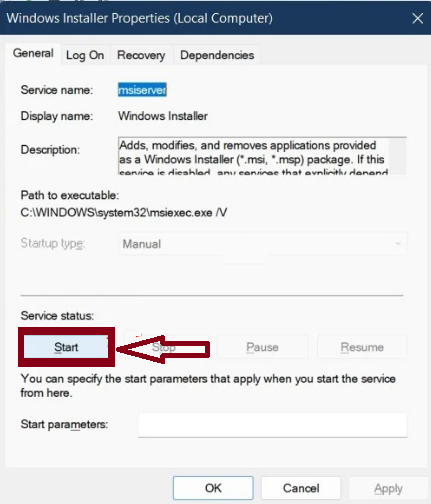
Step 2: Check the Service Status to see if the Windows Installer service is running
Step 3: Now click the Start button to start it if the service is not running
Method 2: Reset the Windows Installer Service Registry
In this method we suggest you to reset the Windows Installer Service Registry, to do so follow the below mention guidelines:
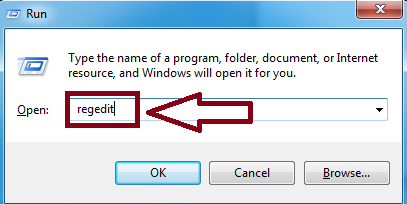
Step 1: Use Windows + R keys to open Run utility box > In the prompted box, type in regedit, and click OK
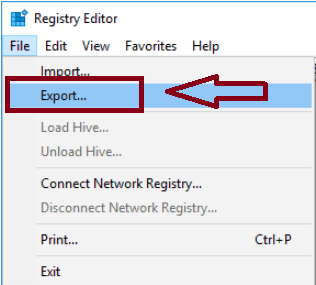
Step 2: Click on File and select Export
Step 3: Select All as Export Range, enter the name of the file and click Save. In case anything gets wrong. You can just run this file and Restore your Registry
Step 4: Once you have created your backup, close Registry Editor
With Registry backup created, you need to create a .reg file and add it to the registry. To do so, follow the below mention steps:
Step 1: Open Notepad > Paste the following text into Notepad
Windows Registry Editor Version 5.00 [HKLM\SYSTEM\CurrentControlSet\services\MSIServer] “DisplayName”=”@%SystemRoot%system32msimsg.dll,-27” “ImagePath”=hex(2):25,00,73,00,79,00,73,00,74,00,65,00,6d,00,72,00,6f,00,6f,00, 74,00,25,00,5c,00,73,00,79,00,73,00,74,00,65,00,6d,00,33,00,32,00,5c,00,6d, 00,73,00,69,00,65,00,78,00,65,00,63,00,20,00,2f,00,56,00,00,00 “Description”=”@%SystemRoot%system32msimsg.dll,-32” “ObjectName”=”LocalSystem” “ErrorControl”=dword:00000001 “Start”=dword:00000003 “Type”=dword:00000010 “DependOnService”=hex(7):72,00,70,00,63,00,73,00,73,00,00,00,00,00 “ServiceSidType”=dword:00000001 “RequiredPrivileges”=hex(7):53,00,65,00,54,00,63,00,62,00,50,00,72,00,69,00,76, 00,69,00,6c,00,65,00,67,00,65,00,00,00,53,00,65,00,43,00,72,00,65,00,61,00, 74,00,65,00,50,00,61,00,67,00,65,00,66,00,69,00,6c,00,65,00,50,00,72,00,69, 00,76,00,69,00,6c,00,65,00,67,00,65,00,00,00,53,00,65,00,4c,00,6f,00,63,00, 6b,00,4d,00,65,00,6d,00,6f,00,72,00,79,00,50,00,72,00,69,00,76,00,69,00,6c, 00,65,00,67,00,65,00,00,00,53,00,65,00,49,00,6e,00,63,00,72,00,65,00,61,00, 73,00,65,00,42,00,61,00,73,00,65,00,50,00,72,00,69,00,6f,00,72,00,69,00,74, 00,79,00,50,00,72,00,69,00,76,00,69,00,6c,00,65,00,67,00,65,00,00,00,53,00, 65,00,43,00,72,00,65,00,61,00,74,00,65,00,50,00,65,00,72,00,6d,00,61,00,6e, 00,65,00,6e,00,74,00,50,00,72,00,69,00,76,00,69,00,6c,00,65,00,67,00,65,00, 00,00,53,00,65,00,41,00,75,00,64,00,69,00,74,00,50,00,72,00,69,00,76,00,69, 00,6c,00,65,00,67,00,65,00,00,00,53,00,65,00,53,00,65,00,63,00,75,00,72,00, 69,00,74,00,79,00,50,00,72,00,69,00,76,00,69,00,6c,00,65,00,67,00,65,00,00, 00,53,00,65,00,43,00,68,00,61,00,6e,00,67,00,65,00,4e,00,6f,00,74,00,69,00, 66,00,79,00,50,00,72,00,69,00,76,00,69,00,6c,00,65,00,67,00,65,00,00,00,53, 00,65,00,50,00,72,00,6f,00,66,00,69,00,6c,00,65,00,53,00,69,00,6e,00,67,00, 6c,00,65,00,50,00,72,00,6f,00,63,00,65,00,73,00,73,00,50,00,72,00,69,00,76, 00,69,00,6c,00,65,00,67,00,65,00,00,00,53,00,65,00,49,00,6d,00,70,00,65,00, 72,00,73,00,6f,00,6e,00,61,00,74,00,65,00,50,00,72,00,69,00,76,00,69,00,6c, 00,65,00,67,00,65,00,00,00,53,00,65,00,43,00,72,00,65,00,61,00,74,00,65,00, 47,00,6c,00,6f,00,62,00,61,00,6c,00,50,00,72,00,69,00,76,00,69,00,6c,00,65, 00,67,00,65,00,00,00,53,00,65,00,41,00,73,00,73,00,69,00,67,00,6e,00,50,00, 72,00,69,00,6d,00,61,00,72,00,79,00,54,00,6f,00,6b,00,65,00,6e,00,50,00,72, 00,69,00,76,00,69,00,6c,00,65,00,67,00,65,00,00,00,53,00,65,00,52,00,65,00, 73,00,74,00,6f,00,72,00,65,00,50,00,72,00,69,00,76,00,69,00,6c,00,65,00,67, 00,65,00,00,00,53,00,65,00,49,00,6e,00,63,00,72,00,65,00,61,00,73,00,65,00, 51,00,75,00,6f,00,74,00,61,00,50,00,72,00,69,00,76,00,69,00,6c,00,65,00,67, 00,65,00,00,00,53,00,65,00,53,00,68,00,75,00,74,00,64,00,6f,00,77,00,6e,00, 50,00,72,00,69,00,76,00,69,00,6c,00,65,00,67,00,65,00,00,00,53,00,65,00,54, 00,61,00,6b,00,65,00,4f,00,77,00,6e,00,65,00,72,00,73,00,68,00,69,00,70,00, 50,00,72,00,69,00,76,00,69,00,6c,00,65,00,67,00,65,00,00,00,53,00,65,00,4c, 00,6f,00,61,00,64,00,44,00,72,00,69,00,76,00,65,00,72,00,50,00,72,00,69,00, 76,00,69,00,6c,00,65,00,67,00,65,00,00,00,00,00 “FailureActions”=hex:84,03,00,00,00,00,00,00,00,00,00,00,03,00,00,00,14,00,00, 00,01,00,00,00,c0,d4,01,00,01,00,00,00,e0,93,04,00,00,00,00,00,00,00,00,00[HKEY_LOCAL_MACHINESYSTEMCurrentControlSetServicesmsiserverEnum] “0”=”RootLEGACY_MSISERVER000″ “Count”=dword:00000001 “NextInstance”=dword:00000001
Step 2: Click File > Select Save As > type the file name as repair.reg and set Save as type to All Files and click Save

Step 3: Then close Notepad > Now locate the repair.reg file, right-click it and choose Run as administrator
Step 4: If prompted, click Yes
Once you have added repair.reg to the registry, try to install the problematic application again and check if the issues resolved or not.
Method 3: Use regsvr32 command
In this method we suggest you to use regsvr32 command, to do so follow the below mention guidelines:
Step 1: Start Command Prompt as an administrator > type the below command and press Enter to run it
regsvr32 c:windowssystem32msi
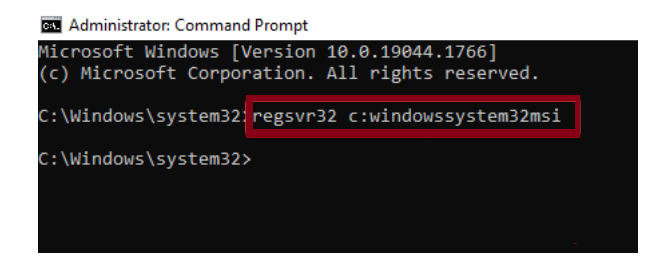
Step 2: Then close the Command Prompt and try to install the problematic application again
Method 4: Update Windows
Updating Windows may also resolve the above mention error, in order to get started with the method use the following:
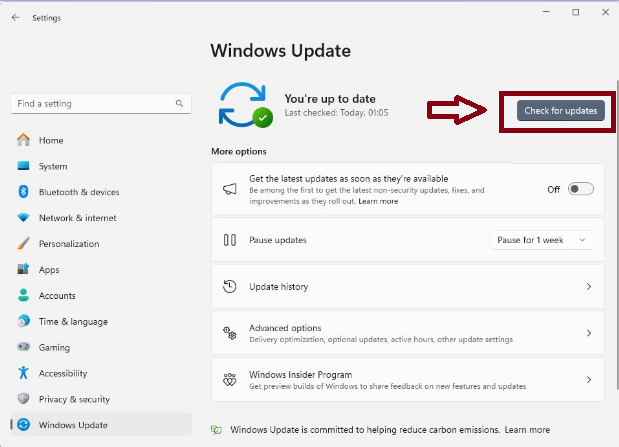
Step 1: In Windows Search type in Updates and press Enter > In the new Window, click Check for Updates
Step 2: If Optional Updates are available install them as well
Step 3: Once all the update processes are finished, restart your device
Method 5: Scan your PC for Malware
Malicious programs may interfere with system services, so you can scan and remove any infections may resolve the issue. To do so follow the below mention guidelines:
Step 1: In the Windows Search bar type in Windows Security and press Enter key > Select Virus & threat protection
Step 2: Choose Scan Options
Step 3: Then select Microsoft Defender Offline Scan and click Scan Now
Step 4: Your PC will immediately reboot and start a deep scan
Method 6: Re-Register Microsoft Installer Service
Re-registering Microsoft Installer Service may also work for you, to do so use the following steps:
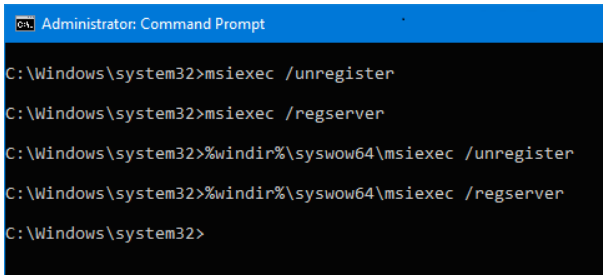
Step 1: Right-click on the Start Menu and select Command Prompt from the menu > If you own a 64-bit version of Windows, enter the following lines and press Enter after each line:
%windir%system32msiexec.exe /unregister
%windir%system32msiexec.exe /regserver
%windir%syswow64msiexec.exe /unregister
%windir%syswow64msiexec.exe /regserver
Step 2: Once you have entered all the lines, close the Command Prompt and Restart your PC
Step 3: If you own a 32-bit version of Windows 10, you need to enter the following commands:
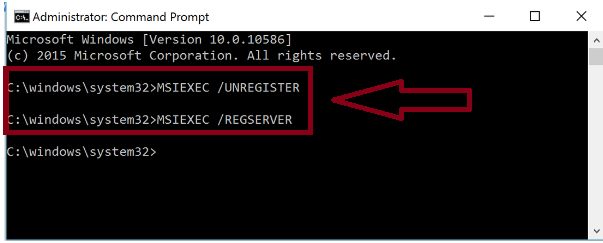
msiexec /unregister
msiexec /regserver
Step 4: Close the Command Prompt & Restart your PC
Method 6: Use SFC and DISM Commands
Running SFC and DISM Commands is also a prominent way to fix the Windows Installer Service Could Not be Accessed. This utility tool will thoroughly scan your system files. To get started with the scanning process, follow the below mention steps:
Step 1: Right-click on the Start Menu and choose Command Prompt (Admin) > type the below mention commands and press Enter key to run it:
sfc /scannow
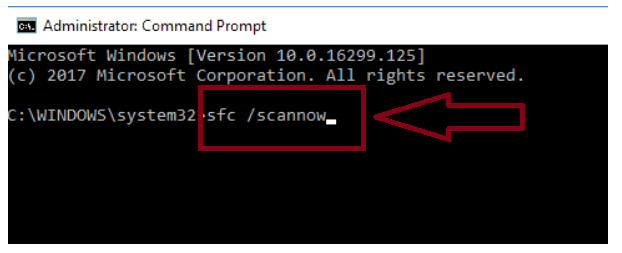
Step 2: SFC Scan will not start > Keep in mind that it will take some time, so hold your patience
Once the scan is finished, check if the issue still exists. If the issue is still there, or if you could not run a SFC Scan, you might have to use a DISM Scan instead. To do so follow the below mention guidelines:
Step 1: Start Command Prompt as an administrator > Run the following command:
DISM /Online /Cleanup-Image /RestoreHealth
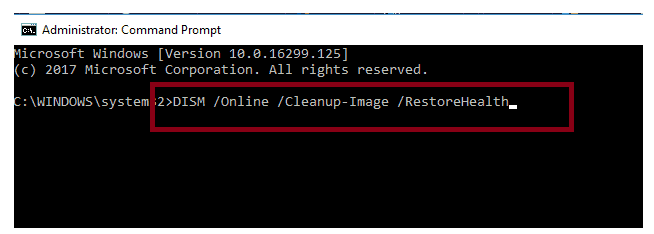
Step 2: The scanning process will not start > Remember that this process can take about 20 minutes or more, so hold your patience.
Alternatively, you can use an automatic PC Repair Tool to scan your system files. This professional tool is capable for scanning your system files and resolving errors originated due to system corruption.
⇑Get PC Repair Tool from Here⇓
Method 7: Run the Program Install and Uninstall Troubleshooter
Running the Program Install and Uninstall Troubleshooter may also resolve the error, to proceed use the following:
Step 1: Open a browser and go to the Troubleshooter download page
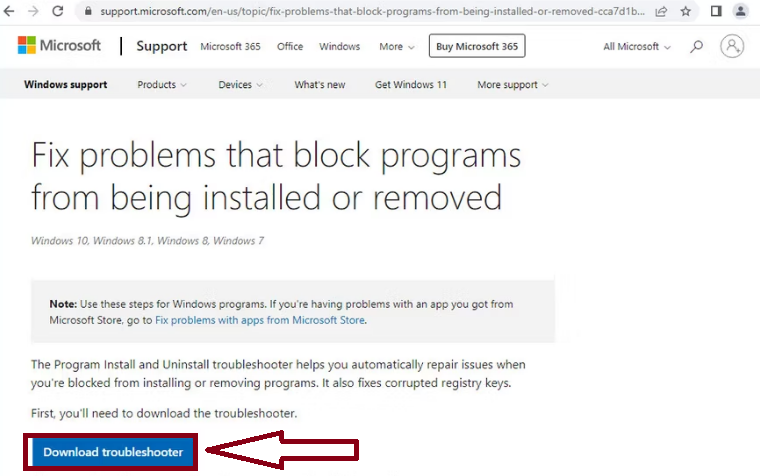
Step 2: Tap on the Download button to start the downloading process > then click on the downloaded file to open & start the installation.
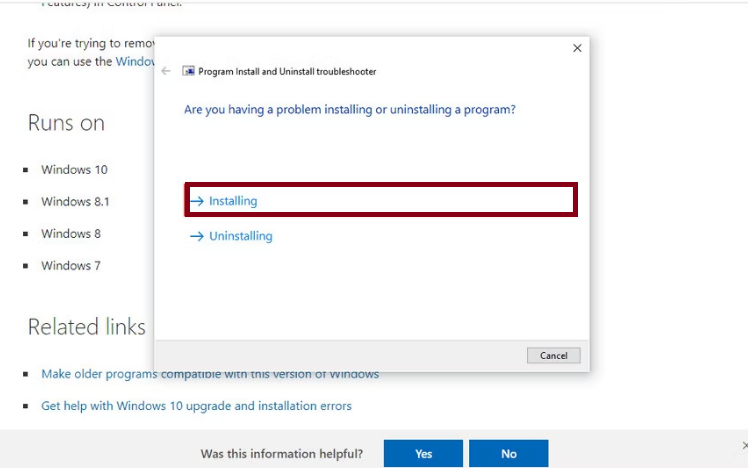
Step 3: Now in the Window that pops-up, click on Next
Step 4: Choose whether you are having issues in installing or uninstalling the program
Step 5: Now select the program that is causing the issue > if it is not on the list, select the Non Listed option
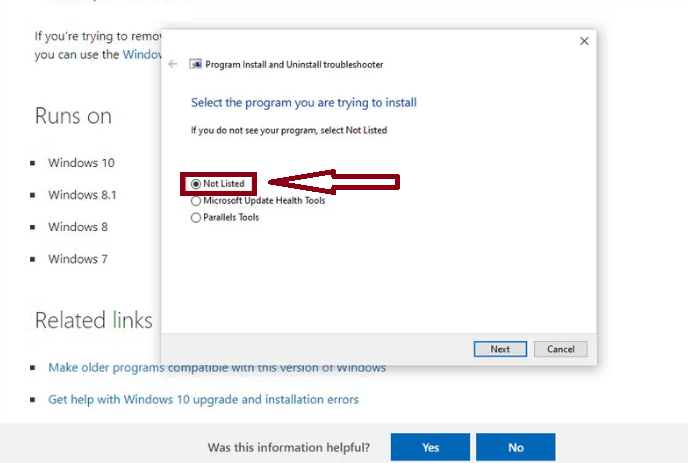
Step 6: Then click on Next
Method 8: Remove the duplicated msiexec file
Several users have claimed that deleting duplicated msiexec file resolved their issue, so it is suggested to do the same.
Here’s how:
Step 1: Navigate to C:\Windows\System32 directory > Search for msiexec file > the file will be 0Kb in size and it won’t have a .exe extension
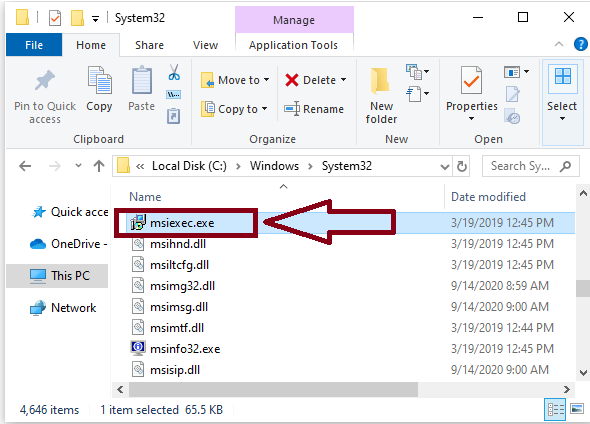
Step 2: Now rename the duplicated msiexec file to msiexec.old> Once done then go to the Services window and Restart the Windows Installer Services
Method 9: Adjust Permissions in the Registry
You are likely to face the above mention error if your registry is incorrect or there is lack of requisite permissions.
Here’s how:
Step 1: In Windows Search type in regedit and press Enter key to open the Registry Editor
Step 2: When UAC shows up, click Yes
Step 3: Go to the following location:
HKEY_LOCAL_MACHINE\SYSTEM\CurrentControlSet\Services\MSIServer
Step 4: Right-click on MSIServer and select Permissions
Step 5: Make Sure the SYSTEM has Full Control and click OK
Method 10: Change Remote Procedure Call Service Settings
If you are still struggling with Windows Installer Service Could Not be Accessed, we suggest you to change Remote Procedure Call Service Settings.
Here’s how:
Step 1: Open the Start Menu, type Services, and open it
Step 2: Then double-click Remote Porcedure Call (RPC)
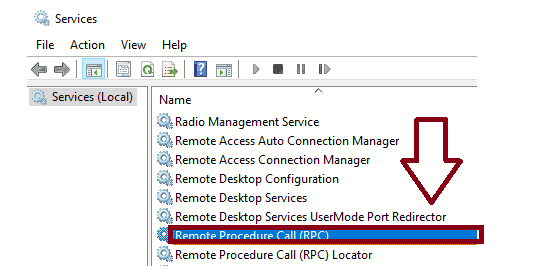
Step 3: Then navigate to Log on tab and select Log on as Local System Account and check to Allow this service to interact with the desktop checkbox
Step 4: Finally Save the changes and Restart your PC
Bottom Line!
Here we conclude the article! We have tried our best to provide all the possible methods to resolve Windows Installer Service Could Not be Accessed Error. Its pertinent mention all the above mentioned are tried and tested. Along with the manual methods we have mentioned an automatic PC Repair Tool. So you can choose either of the ways as per your wish. Thanks for Reading.


