What is ‘Windows Activation error 0x8007267C’ in Windows 10?
If you are experiencing ‘Windows Activation error 0x8007267C’ error while trying to activate Windows 10 computer, then you are in right place for the solution. Here, you will be guided with easy steps/methods to resolve the issue. Let’s starts the discussion.
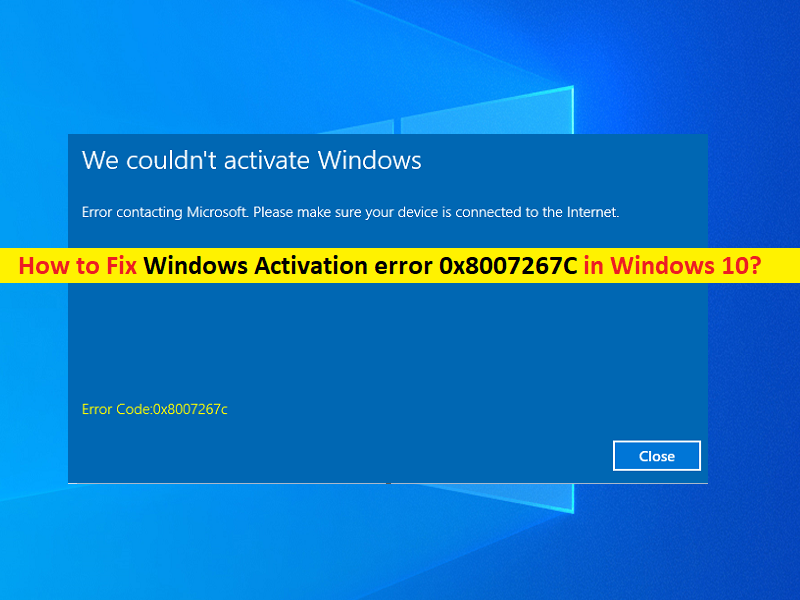
‘Windows Activation error 0x8007267C’: It is common Windows Problem categorised as Windows Activation error. This error is usually appeared when you try to activate your Windows 10 computer. This issue prevents you from activating your Windows 10 computer for some reasons. This error is also appeared after upgradation or fresh install of Windows 10 and each time when you go to enter the license key, you may receive this error. Let’s take a look at error message.
“We couldn’t activate Windows.
Error contacting Microsoft. Please make sure your device is connected to the internet.”
This error codes indicates that:
“Error code 0x8007267C definition:
No DNS servers configured for local system
DNS_ERROR_NO_DNS_SERVERS”
There could be several reasons behind this issue including common Windows 10 activation inconsistency, corrupted DNS cache, bad DNS range, different type of activation is required, and an underlying issue with your license key. The Windows 10 activation error is occurred usually when there is issue with Windows 10 activation itself like common activation inconsistency that your Windows in installation know how to fix automatically. This issue can also be occurred due to corrupted DNS cache in your computer. You can flush your DNS cache in Windows computer in order to fix the issue.
This error can also be occurred due to bad DNS range means your ISPs has assigned you a bad DNS range that activation server rejects. You can switch DNS server to some other DNS server like Google Publish DNS server in order to fix the issue. If you are trying to activate Windows originally migrated from Windows 7/8/8.1, you might need to use SLMGR utility in order to activate it successfully. In some cases, you might need to get contact with Live Microsoft Support agent and ask them to activate license key remotely. Let’s go for the solution.
How to fix Windows Activation error 0x8007267C in Windows 10?
Method 1: Fix ‘Windows Activation error 0x8007267C’ with ‘PC Repair Tool’
‘PC Repair Tool’ is easy & quick way to find and fix BSOD errors, DLL errors, EXE errors, problems with programs/applications, malware or viruses issues, system files or registry issues and other system issues with just few clicks. You can this tool through button/link below.
Method 2: Run ‘Activation’ troubleshooter
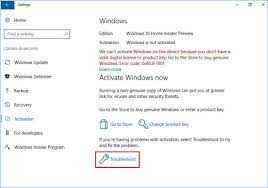
Windows 10 build-in ‘Activation’ troubleshooter can resolve the issue. Let’s try.
Step 1: Open ‘Settings’ App in Windows 10 via Windows Search Box and go to ‘Update & Security > Activation’
Step 2: In right pane, click on ‘Troubleshoot’ button under ‘Activation Windows’ and follow on-screen instructions to finish troubleshooting like click ‘Apply this fix’ after scan completed.
Step 3: Once done, restart your computer and retry activating your Windows 10 computer and check if the error is resolved.
Method 3: Flush DNS cache
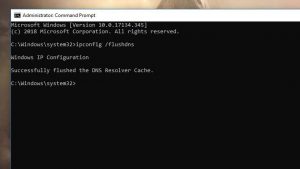
As mentioned, corrupted DNS cache could be one possible reason behind the issue. You can flush DNS cache in order to fix the issue.
Step 1: Type ‘cmd’ in Windows Search Box and hit ‘SHIFT + ENTER’ keys on keyboard to open ‘Command Prompt as Administrator’
Step 2: Type the following command and hit ‘Enter’ key after each line to execute
ipconfig /flushdns
ipconfig /renew
Step 3: Once executed, restart your computer and check if you can activate Windows 10 without any issue.
Method 4: Switch DNS server to Google Public DNS in Windows 10
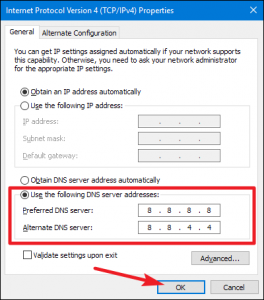
You can modify DNS server in Windows 10 computer in order to fix the issue.
Step 1: Right-click on ‘WiFi/Network’ icon in taskbar or in System Tray, and select ‘Network and Sharing Center’
Step 2: In the opened window, click on ‘Change Adapters settings’, right-click on your network adapter and select ‘Properties’
Step 3: In ‘Properties’ window, select ‘Internet Protocol Version 4 (TCP/IPv4)’ and hit ‘Properties’ button
Step 4: In ‘Properties’ window of TCP/IPv4, under ‘General’ tab, select ‘Use the following DNS server address’ radio option and enter ‘8.8.8.8’ and ‘8.8.4.4’ in ‘Preferred’ and ‘Alternate’ DNS server address field and then hit ‘Apply’ and ‘Ok’ button to save the changes
Step 5: Once done, restart your computer and check if the error is resolved.
Method 5: Using MAK (Multiple Activation Key)
One possible way to fix the issue is to switch to MAK product key to activate your volume license installation.
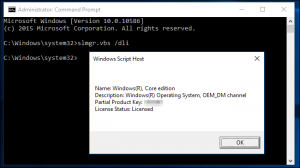
Step 1: Open ‘Command Prompt as Administrator’ using ‘method 3’
Step 2: Type the following commands one-by-one and hit ‘Enter’ key after each to execute
slmgr /ipk *License Key*
slmgr /ato
Step 3: Here, *License Key*is only placeholder for actual license key. You can replace the placeholder with your Windows 10 license key. Once executed, restart your computer and wait for next startup to complete
Method 6: Contact Microsoft Support Agent
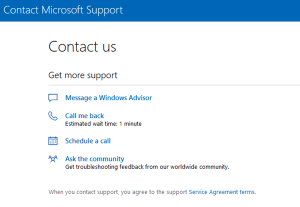
If the issue is still persist, then you can try to resolve the issue and perform Windows 10 activation operation with the help of Microsoft Live Support Agent. To do so, open your browser and visit ‘Microsoft Contact Page Official’ and use Chat Option of ‘Get Help’ app. Hope your problem will be resolved.
Conclusion
I am sure this post helped you on How to fix Windows Activation error 0x8007267C in Windows 10 with several easy steps/methods. You can read & follow our instructions to do so. That’s all. For any suggestions or queries, please write on comment box below.


