
Tips to Fix Windows 11 error code 0xc004c003:
If you are facing Windows 11 error code 0xc004c003 or Windows 11 Activation error code 0xc004c003 when you try to activate Windows OS with OEM Activation Digital Product Key, then you are in right-place for the solution. Here, you are provided with easy steps/methods to resolve the issue. Let’s starts the discussion.
‘Windows 11 error code 0xc004c003 – Windows Activation error’:
It is common Windows Problem considered as Windows Activation error. This error indicates you are unable to finish Windows Activation operation in computer. When you try to activate your Windows operating system with an OEM Activation Digital Product Key, then you may receive Windows 11 Activation error code 0xc004c003 in computer. If you are not aware, Windows Licensing code component in Windows is responsible for accessing the registry hive and verifying the product key.
When the access is denied due to incorrect or invalid access, it may throw Windows 11 Activation error code 0xc004c003 on screen. There could be several reasons behind the issue including problematic Windows update installed in computer, incompatible Windows 11 version license, and other issues. It might possible you have upgraded to Windows 11 Pro edition with Home edition license key that’s why you are receiving Error code 0xc004c003 while activating Windows.
In such case, you can downgrade form Windows 11 Pro to Windows 11 Home version in computer and then try activating the Windows PC with correct version of license key, and check if it works for you. It is possible to resolve the issue with our instructions. Let’s go for the solution.
How to fix Windows 11 error code 0xc004c003 – Windows Activation error?
Method 1: Check your Windows OS version
If you are not aware, Windows 11 is available in multiple editions including Home, Pro and Enterprise. Mouse customer-grade computers come with Home edition installed out of box. Deepening on Windows 11 OS version /edition in computer, the installed OS edition can change. If you perform an in-place upgrade, Windows could automatically detect your existing edition and install the correct edition.
How to Check Windows 11 edition in computer?
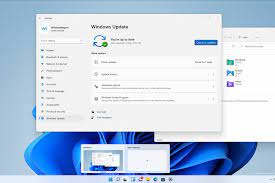
Step 1: Open ‘Settings’ App in Windows PC via Windows Search Box and go to ‘System > About‘
Step 2: In right-pane, scroll down to ‘Windows Specification’ section, locate ‘Edition’ section to view the Windows 11 edition installed on your PC
Method 2: Downgrade from Windows 11 Pro to Windows 11 Home edition
If you have purchased Windows 11 Home license key, and have installed Windows 11 Pro edition, try performing a downgrade. To do so, at first you need to change your registry editor to prepare for downgrade and then run ISO setup file to complete downgrade process.
Change Registry to install Windows 10 Home:
Step 1: Open ‘Registry Editor’ app in Windows PC via Windows Search Box and navigate to following path
Computer\HKEY_LOCAL_MACHINE\SOFTWARE\Microsoft\Windows NT\CurrentVersion
Step 2: Find and double-click on ‘ProductName’ value, type ‘Windows 11 Home Single Language’, and hit ‘Ok’ button to save the changes
Step 3: Double-click on ‘EditionID’ value to edit, type ‘CoreSingleLanguage’ and hit ‘Ok’ to save the changes.
Step 4: Now, navigate to following path in Registry Editor
Computer\HKEY_LOCAL_MACHINE\SOFTWARE\WOW6432Node\Microsoft\Windows NT\CurrentVersion
Step 5: Find and double-click on ‘ProductName’ value to edit, change it to Windows 10 Home and hit ‘Ok’ to save the changes
Step 6: Double-click ‘EditionID’ and change it to ‘CoreSingleLanguage’ and hit ‘Ok’ to save the changes and close Registry Editor.
Downgrade to Windows 11 Home:
Step 1: Open your browser and visit ‘Microsoft Windows 11 Download Page’ official
Step 2: Scroll down to ‘Download Windows 11 Disk Image (ISO)’ section, and click the dropdown and select ‘Windows 11’
Step 3: Click ‘Download’ button, select your language from dropdown and click ‘Confirm’, click ’64-bit Download’. It will start your download for Windows 11 ISO
Step 4: Once downloaded, open the downloads folder, right-click on ISO image and select ‘Mount’
Step 5: Windows will mount the ISO and run the drive folder automatically. If not, click ‘DVD Drive’ icon under ‘This PC’.
Step 6: Inside ISO folder, double-click ‘Setup.exe’ file, click ‘Yes’ for confirmation
Step 7: Click ‘Change how setup downloads the updates’ in Install Windows 11 window
Step 8: Click ‘Now right now > Next’, accept the notices and license terms, ensure ‘Install Windows 11 Home’ and ‘Keep personal files and apps’ option is displayed in ‘Ready to install’ window
Step 9: Click ‘Install’ and follow on-screen instructions to finish installation. Once installed, check if the it works for you.
Method 3: Activate Windows 11 via Command Prompt
One possible way to fix the issue is to activate Windows 11 via Command Prompt.
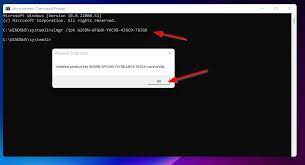
Step 1: Type ‘cmd’ in Windows Search Box and press ‘SHIFT + ENTER’ keys on keyboard to open ‘Command Prompt as Administrator’
Step 2: Type the following command and hit ‘Enter’ key to execute.
slmgr.vbs –rearm
Step 3: Once the success prompt appeared, click ‘Ok’ and then restart your computer. After restart, open the Activation page and check if the issue is resolved.
Method 4: Contact Microsoft to Re-activate Windows after a hardware changes
If you are not ware, when you register your Windows 11 license for the first time, it relates itself with your PC/laptop’s hardware configurations. This helps Microsoft ensure the license is used per the terms of use, and also, you don’t have to manually activate Windows each time after a clean install.
Conclusion
I hope this post helped you on How to fix Windows 11 error code 0xc004c003 – Windows Activation error with easy ways. You can read & follow our instructions to do so. That’s all. For any suggestions or queries, please write on comment box below.


