Tips to fix Windows 10 not syncing time:
In this article, we are going to discuss on How to fix Windows 10 not syncing time. You are provided with easy steps/methods to resolve the issue. Let’s starts the discussion.
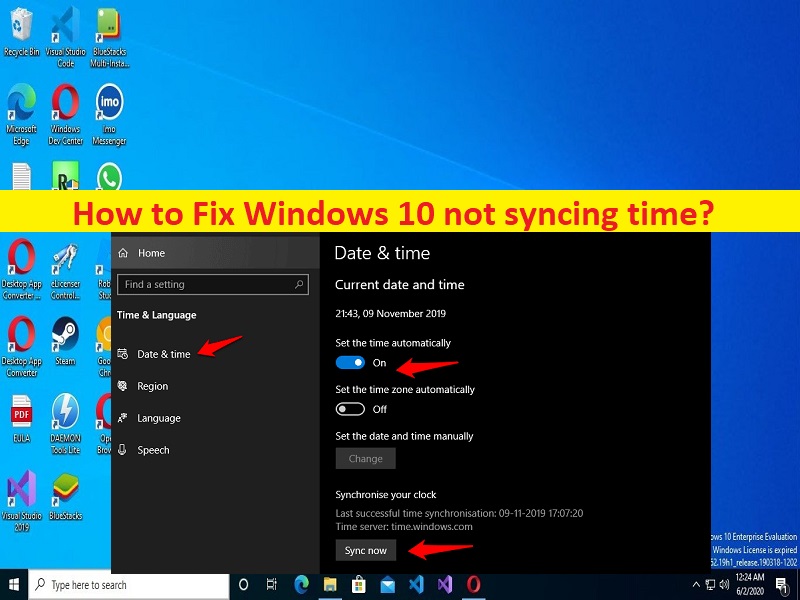
‘Windows 10 not syncing time’:
It is common Windows Problem considered as Windows Time issue or Windows Time not Syncing issue. This issue indicates your Windows 10 computer is displaying wrong time in Taskbar and you are unable to sync your Windows computer’s time. In sort, your Windows computer may not sync to correct time every time you restart your device. In such case, you can manually update the date & time on every restart, or you can fix the issue with our instructions.
The possible reasons behind the issue can be the disabled Time Synchronization task, issue with Time service, issue with internet time server, or with Windows Time service, malware or viruses infections in computer, and other issues. It is possible to fix the issue with our instructions. Let’s go for the solution.
How to fix Windows 10 not syncing time?
Method 1: Fix ‘Windows 10 not syncing time’ with ‘PC Repair Tool’
‘PC Repair Tool’ is easy & quick way to find and fix BSOD errors, DLL errors, EXE errors, problems with programs/applications, malware or viruses infections in computer, system files or registry issues, and other system issues with just few clicks.
Method 2: Enable SynchronizeTime Task
Step 1: Pres ‘Windows + R’ keys on keyboard, type ‘tasksched.msc’ in ‘Run’ window and hit ‘Ok’ button to open ‘Task Scheduler’, and go to following path in left pane
Task Scheduler Library -> Microsoft .> Windows
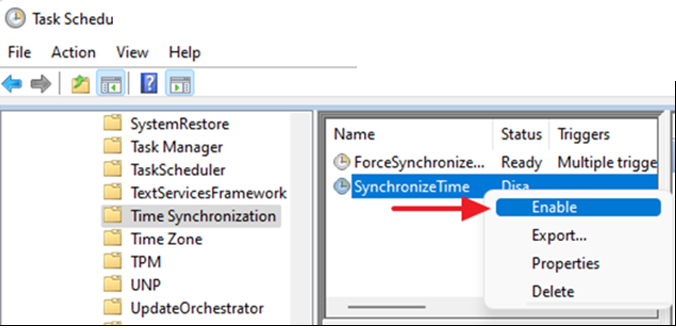
Step 2: Under ‘Windows’, scroll down and select ‘Time Synchronization’
Step 3: In right-pane, under ‘Name’ column, right-click ‘SynchronizeTime’ and click ‘Enable’. Once done, check if the issue is resolved.
Method 3: Restart Windows Time service
Step 1: Open ‘Services’ app in Windows PC via Windows Search Box
Step 2: Find and right-click ‘Windows Time’ service, and select ‘Restart’ if the service is already running. If not, right-click it and select ‘Start’ to start/restart service
Step 3: Once done, check if the issue is resolved.
Method 4: Re-register Windows Time service and Re-sync Time
Step 1: Type ‘cmd’ in Windows Search Box and press ‘SHIFT + ENTER’ keys on keyboard to open ‘Command Prompt as Administrator’
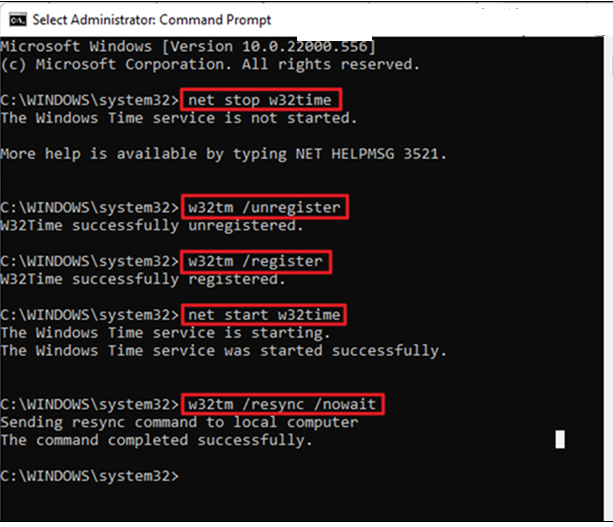
Step 2: Type the following commands and hit ‘Enter’ key after each to execute.
net stop w32time
w32tm /unregister
w32tm /register
net start w32time
w32tm /resync /nowait
Step 3: This will re-register the time service configuration and re-sync the time. Once executed, restart your computer and check if the issue is resolved.
Method 5: Use another internet time server
Step 1: Press ‘Windows + R’ keys on keyboard, type ‘control date/time’ and hit ‘Ok’ button to open ‘Date and Time’ settings
Step 2: At ‘Date and Time’ window, ensure that you have specified the correct Time Zone
Step 3: Select ‘Internet Time’ tab and click ‘Change Settings’
Step 4: Ensure that ‘Synchronize with an internet time server’ is checked and click the dropdown and change the time server, and click ‘Update Now’
Step 5: Once updated, the time on your device will synchronize correctly with the time of region where you are based.
Conclusion
I am sure this article helped you on How to fix Windows 10 not syncing time with easy ways. You can read & follow instructions to do so. That’s all. For any suggestions or queries, please write on comment box below.


