What is ‘Unistack Service Group high disk usage’ issue in Windows 10?
In this post, we are going to discuss on How to fix Unistack Service Group high disk usage issue in Windows 10. You are provided with easy steps/methods to resolve the issue. Let’s starts the discussion.
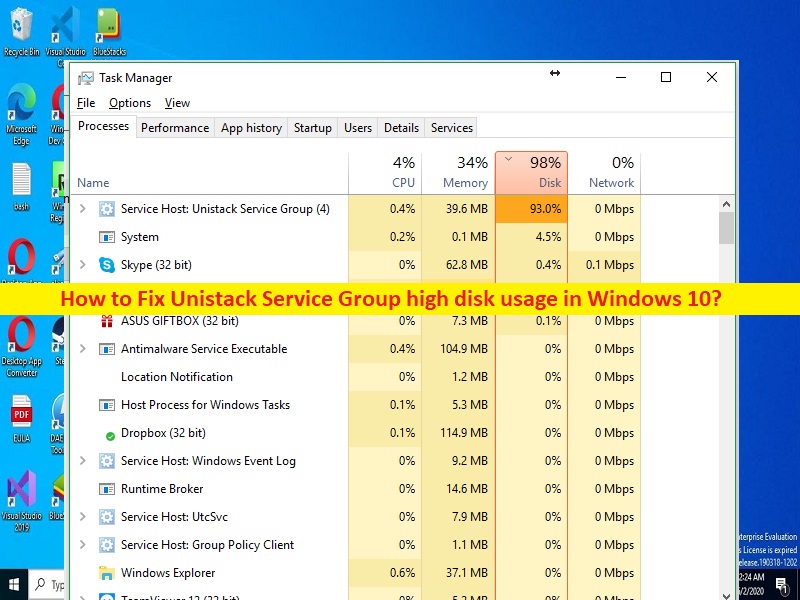
‘Unistack Service Group high disk usage’ issue:
It is common Windows Problem considered as High Disk usage issue. This issue indicates ‘Unistack Service Group’ process/program is draining your CPU/Disk resources in Windows computer. When you open Task Manager app in Windows 10/8/7 computer in order check which program/process is consuming system resources, you may experience ‘Unistack Service Group’ process is showing higher percentage under Disk Usage section in Windows computer.
If you are not aware, Unistack Service is associated with Unistack Service Group (Unistacksvcgroup). It contains service named UniStore service and it is belong to Windows Store. This service is also part of UniStackSvcGroup. The reason why you are noticing this service running and using your resources might have to do something with Store updating your applications. Some users reported they faced this error after a Windows update. It might possible you have installed Windows update incorrectly or update version is not compatible. It is possible to resolve the issue with our instructions. Let’s go for the solution.
How to fix Unistack Service Group high disk usage issue in Windows 10?
Method 1: Fix Unistack Service Group high disk usage issue with ‘PC Repair Tool’
‘PC Repair Tool’ is easy & quick way to find and fix BSOD errors, DLL errors, EXE errors, problems with programs/applications, malware or viruses infections in computer, system files or registry issues, and other system issues with just few clicks.
Method 2: Fix Unistack Service Group high disk usage using Registry Editor

Step 1: Open ‘Registry Editor’ app in Windows PC via Windows Search Box and go to following path in left-pane, or copy & paste the following path in Address bar in Registry Editor, and hit ‘Enter’ key
HKEY_LOCAL_MACHINE\SYSTEM\CurrentControlSet\Services\UnistoreSvc
Step 2: Find and double-click ‘Start’ entry in right-pane to edit, se its value data to ‘4’ and hit ‘Ok’ button to save the changes.
Step 3: Now, in left-pane, click ‘UserDataSvc’ key and then double-click ‘Start’ value in right-pane to edit, set its value data to ‘4’ and hit ‘Ok’ button to save the changes. Once done, restart your computer and check if the issue is resolved.
Method 3: Turn OFF automatic updates for apps
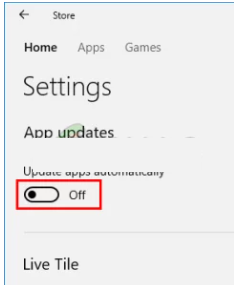
Step 1: Open ‘Windows Store/Microsoft Store’ via Windows Search Box and click ‘Three-Dots’ icon at top-right corner select ‘Settings’ to open settings page
Step 2: Toggle OFF ‘Update apps automatically’ option and save the changes, and once done, check if the issue is resolved.
Method 4: Update Windows OS
Updating Windows OS to latest version can resolve the issue.
Step 1: Open ‘Settings’ app in Windows PC via Windows Search Box and go to ‘Update & Security > Windows Update’ and click ‘Check for updates’ button
Step 2: Download and install all available updates and once updated, restart your computer, and check if the issue is resolved.
Method 5: Delete Content of UniStoreDB folder
Another way to fix the issue is to delete Contents of UniStoreDB folder in computer.
Step 1: Press ‘CTRL + SHIFT + ESC’ keys on keyboard to open ‘Task Manager’ app, right-click the ‘Unistack Service’, and select ‘End Task’ to kill the process. Repeat the same step for all UniStore relating service you might find.
Step 2: Now, open ‘File Explorer’ in Windows PC and go to following path. Here, you need to replace ‘profile_name’ with your actual profile/PC name.
C:\Users\profile_name\AppData\Local\Comms\UnistoreDB
Step 3: Once you are in correct folder, select all items inside the folder and hit ‘Delete’ key on keyboard to delete them. Once done, restart your computer and check if the issue is resolved.
Conclusion
I hope this post helped on How to fix Unistack Service Group high disk usage in Windows 10 with easy ways. You can read & follow our instructions to do so. That’s all. For any suggestions or queries, please write on comment box below.


