What is ‘status_invalid_image_hash’ error in Chrome in Windows 10/8/7 or Windows 11?
In this article, we are going to discuss on How to fix STATUS_INVALID_IMAGE_HASH error, status_invalid_image_hash error in Chrome in Windows 10/8/7 or Windows 11. You will be guided with easy steps/methods to resolve the issue. Let’s starts the discussion.
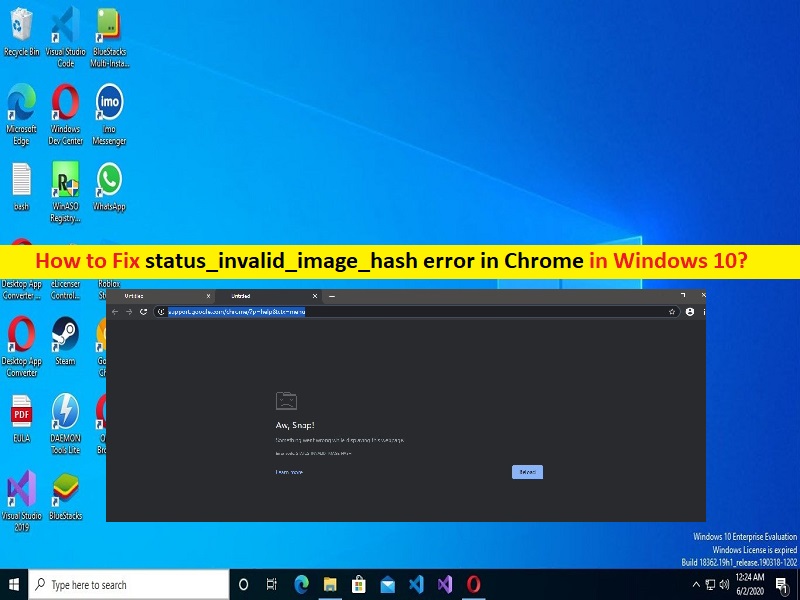
‘STATUS_INVALID_IMAGE_HASH’ error Chrome: It is common Windows Problem considered as Google Chrome error. This error is appeared with message saying ‘Aw, Snap! Something went wrong while displaying this webpage’ with some error codes like STATUS_INVALID_IMAGE_HASH. This error is usually appeared when you try to open/visit a website or while browsing internet on Google Chrome or Edge browser. This issue indicates you are unable to load any WebPages through Google Chrome browser for some reasons.
There could be several reasons behind the issue including corrupted cache of Chrome browser, corrupted/outdated Chrome browser, corruption in system registry or system files, issue with Microsoft Services, and other Windows issues. Another possible reason behind the issue can be the issue with RendererCodeIntegrity feature in Windows 10 computer. This issue can also occurred due to some issue with the website itself that you are trying to access. It is possible to fix the issue with our instructions. Let’s go for the solution.
How to fix status_invalid_image_hash error in Chrome in Windows 10/8/7 or Windows 11?
Method 1: Fix STATUS_INVALID_IMAGE_HASH error with ‘PC Repair Tool’
‘PC Repair Tool’ is easy & quick way to find and fix BSOD errors, DLL errors, EXE errors, problems with programs/applications, malware or viruses issues, system files or registry issues, and other system issues with just few clicks.
Method 2: Disable RendererCodeIntegirty
If you are not aware RenderereCodeIntegrity feature of Windows 10 offers to block suspicious or unsigned code from interfering with browser’s page rendering processes and change the way Chrome loads the web pages you are visiting. However, if you are facing error, you can disable this feature in order to fix.
Step 1: Open ‘Registry Editor’ app in Windows PC via Windows Search Box and navigate to following path
HKEY_LOCAL_MACHINE\SOFTWARE\Policies\Google\Chrome
Step 2: Create a new key in right pane and name it to ‘RendererCodeIntegrityEnabled’ (DWORD). Double-click on created key to edit, set its value data to ‘0’ and hit ‘Ok’ button to save the changes. Once done, restart your computer and check if the issue is resolved.
Method 3: Run Google Chrome in compatibility mode
You can set Google Chrome to run in compatibility mode in computer in order to fix the issue.
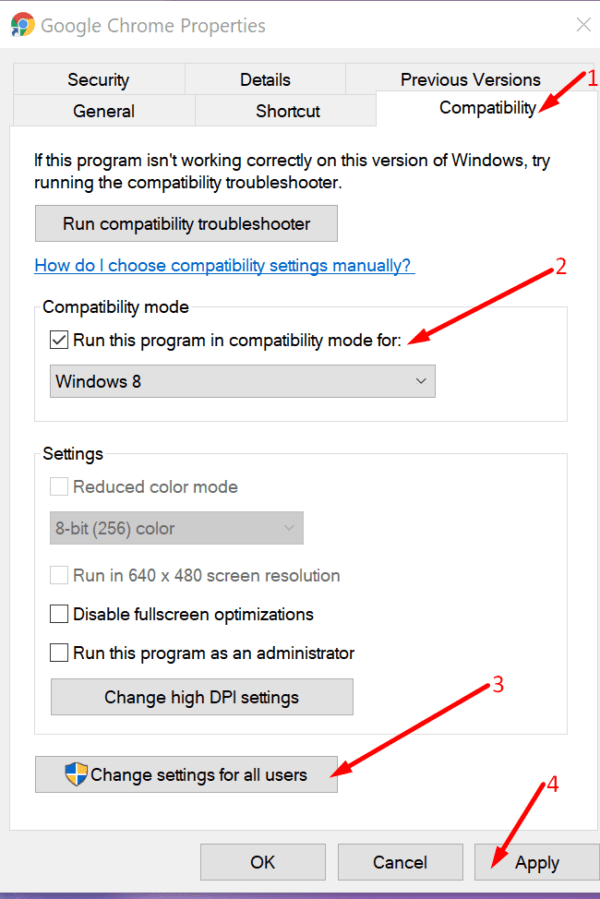
Step 1: Find and right-click on Google Chrome desktop icon and select ‘Properties’
Step 2: Click ‘Compatibility’ tab, check ‘Run this program in compatibility mode for’ and select ‘Windows 8’ or prior one from dropdown, select ‘Change settings for all users’ and hit ‘Apply > Ok’ button to save the changes. Once done, re-launch the Chrome browser and check if the issue is resolved.
Method 4: Use the –no- sandbox command
You can turn OFF Chrome sandbox in order to fix.
Step 1: Find and right-click on ‘Google Chrome’ shortcut, and select ‘Properties’
Step 2: Go to ‘Shortcut’ tab, under ‘Target box’, type ‘-no-sandbox’ and hit ‘Apply > Ok’ button to save the changes. Once done, re-launch Google Chrome and check if the issue is resolved.
Method 5: Disable third-party antivirus/firewall
This issue can be occurred due to interference of third-party antivirus/firewall program installed in computer. You can disable third-party antivirus/firewall program in computer in order to fix the issue and check if disabling third-party antivirus/firewall program resolves the issue.
Method 6: Rename Chrome application folder
Step 1: Open ‘File Explorer’ and go to Chrome Installation folder or go to ‘C:\Program Files (x86)\Google\Chrome\Application’ path
Step 2: Right-click ‘Chrome’ app and rename it to ‘newbrowerapp’. Launch the Chrome again and check if it works.
Method 7: Clear Chrome browser cache
You can clear browser cache in order to fix the corruption in browser cache and fix the issue as well.
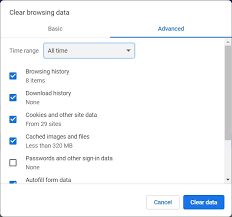
Step 1: Open ‘Google Chrome’ browser and press ‘CTRL + SHIFT + DELETE’ keys on keyboard to open ‘Clear Browsing Data’ tab/page
Step 2: Select ‘All Times’ from ‘Time Range’ dropdown, select all checkboxes relating to cache and cookies, and hit ‘Clear Data’ button and confirm it. Once finished, restart your browser and check if the issue is resolved.
Method 8: Update Computer Policy
Step 1: Type ‘cmd’ in Windows Search Box and press ‘SHIFT + ENTER’ keys on keyboard to open ‘Command Prompt as Administrator’
Step 2: Type ‘gupdate /force’ command and hit ‘Enter’ key to execute. Once executed, restart your computer and check if the issue is resolved.
Method 9: Deactivate and reactivate all Microsoft services
Step 1: Open ‘System Configuration’ app in Windows PC via Windows Search Box and go to ‘Services’ tab, select ‘Hide all Microsoft Services’ checkbox and hit ‘Disable All’ button
Step 2: Hit ‘Apply > Ok’ button to save the changes and then restart your computer. After restart, open ‘System Configuration’ app again, click ‘Services’ tab, and enable all Microsoft Services again. Once done, restart your computer again and check if the issue is resolved.
Conclusion
I am sure this post helped you on How to fix STATUS_INVALID_IMAGE_HASH error, status_invalid_image_hash error in Chrome in Windows 10/8/7 or Windows 11 with several easy steps/methods. You can read & follow our instructions to do so. That’s all. For any suggestions or queries, please write on comment box below.


