Tips to fix Sleep Option missing in Windows 10:
In this article, we are going to discuss on How to fix Sleep Option missing in Windows 10. You will be guided with easy steps/methods to resolve the issue. Let’s starts the discussion.
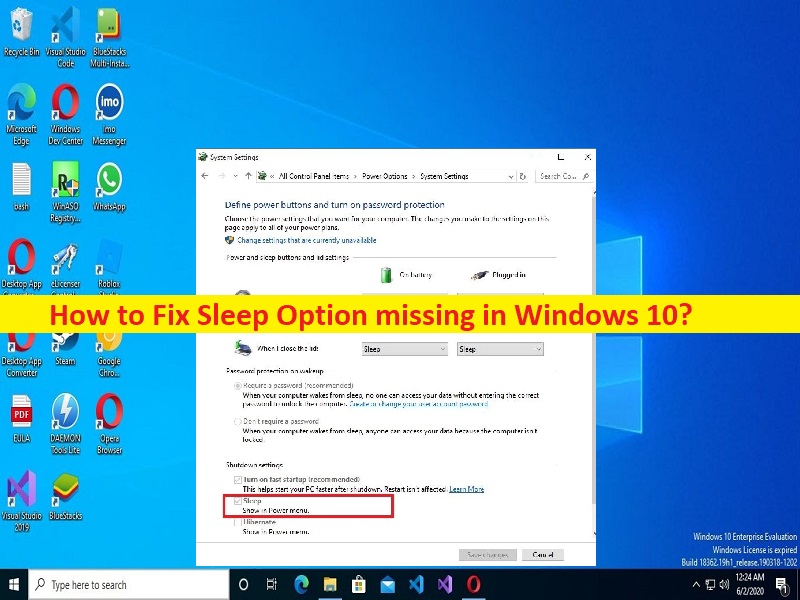
‘Sleep Option missing in Windows 10’:
‘Sleep Option’: Sleep Option or Sleep Mode is power saving mode/state that stops all actions on the computer. Any documents and applications are moved to System memory or RAM and computer goes to a low power state. This is similar to pausing a movie DVD. The computer is still powered ON, but uses low power. Sleep Option is part of Windows 10 OS and allows retains all the last used programs and at the same time consumes less power.
However, several users reported they faced Sleep Option missing in Windows 10 issue when they tried to access Sleep Option in Windows 10 computer. This issue indicates you are unable to find and locate Sleep Option in Start menu in Windows computer for some reasons. The possible reason behind the issue can be the corrupted/outdated graphics card driver, incorrect Sleep Option/ Sleep Mode settings in computer, malware or viruses infections in computer, and other issues. Let’s go for the solution.
How to fix Sleep Option missing in Windows 10?
Method 1: Fix Sleep Option missing in Windows 10 with ‘PC Repair Tool’
‘PC Repair Tool’ is easy & quick way to find and fix BSOD errors, DLL errors, EXE errors, problems with programs/applications, malware or viruses infections in computer, system files or registry issues, and other system issues with just few clicks.
Method 2: Enable Sleep Option/ Sleep Mode via Control Panel
Enabling Sleep Option/ Sleep Mode in computer can resolve the issue.
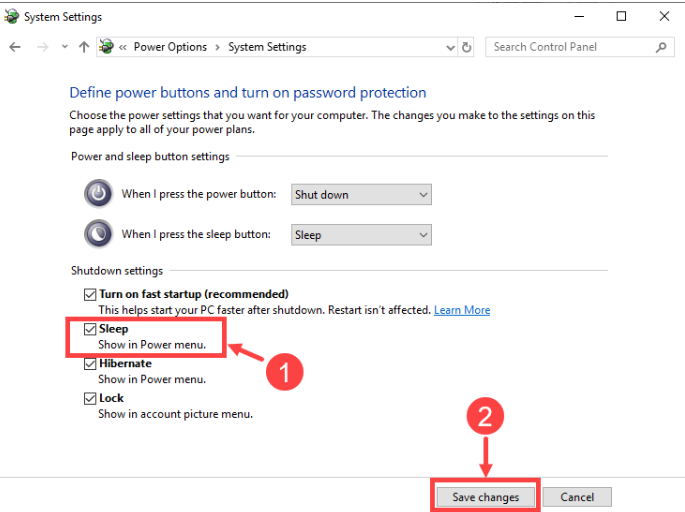
Step 1: Open ‘Control Panel’ in Windows PC via Windows Search Box and go to ‘System and Security > Power Options > Choose what the power buttons do > Change settings that are currently unavailable’
Step 2: Make sure ‘Sleep’ box is checked, click ‘Save Changes’ to let the changes take effect. Once done, check if you can access sleep mode/sleep option in computer without any issue.
Method 3: Enable Sleep Mode via Local Group Policy
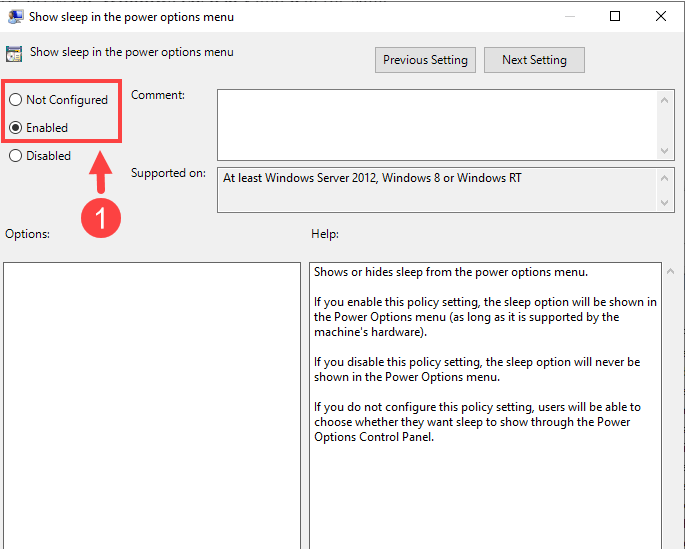
Step 1: Press ‘Windows + R’ keys on keyboard, type ‘gpedit.msc’ in ‘Run’ window and hit ‘Ok’ button to open ‘Local Group Policy Editor’ and go to following path.
Computer Configuration -> Administrative Templates -> Windows Components -> File Explorer
Step 2: Find and double-click on ‘Show sleep in the power option menu’ to open in Properties. Select ‘Enabled’ or ‘Not Configured’ radio option and then hit ‘Apply > Ok’ button to save the changes. Once done, check if it works for you.
Method 4: Update graphics card driver
You can update graphics card driver to latest & compatible version in order to fix the issue.
Step 1: Open ‘Device Manager’ in Windows PC via Windows Search Box and expand ‘Display Adapters’ category
Step 2: Right-click on your graphics card driver and select ‘Update Driver’ and follow on-screen instructions to finish update process. Once done, restart your computer and check if the issue is resolved.
Download or reinstall graphics card driver update in Windows PC [Automatically]
You can also try to update all Windows drivers including graphics card driver and all other device drivers using Automatic Driver Update Tool. You can get this tool through button/link below.
Conclusion
I am sure this post helped you on How to fix Sleep Option missing in Windows 10 with easy ways. You can read & follow our instructions to do so. That’s all. For any suggestions or queries, please write on comment box below.


