What is ‘SCCM install error 0x87d00607’ in Windows 10?
If you (SCCM Client) are facing ‘SCCM install error 0x87d00607’ issue in your Windows 10 computer when you try to deploy a packge or application through SCCM, then you are in right place for the solution. Here, you will be guided with easy steps/methods to resolve the issue. Let’s starts the discussion.
SCCM (Microsoft Endpoint Configuration Manager or System Center Configuration Manager): SCCM is system management software product designed and developed by Microsoft for managing large groups of computers running Windows NT, Windows Emended, MacOS, Linux or Unix as well as Windows phone, Symbian, iOS, and Android mobile OS. Configuration manager provides remote control, patch management, software distribution, operating system deployment, network access and hardware and software inventory.
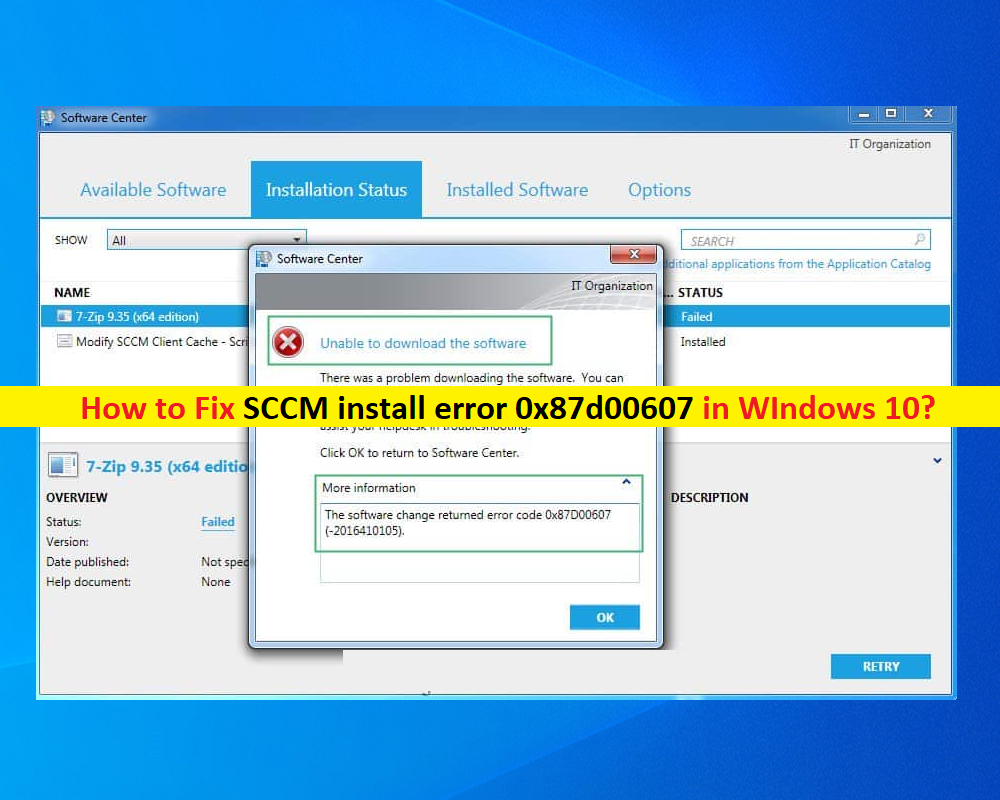
However, several users or SCCM clients reported that they faced ‘SCCM install error 0x87d00607’ problem while they tried to deploy a package or application through SCCM. This error indicates that the content is not found by SCCM/client. The error message states ‘There was a problem downloading the software. You can try starting installation again, of if problem continues, the information shown in section below can assist your helpdesk in troubleshooting’ along with ‘The software change returned error code 0X87D00607 (-2016410105)’.
There could be several reasons behind SCCM Installation Error Code 0X87D00607 (-2016410105) problem including improper configuration of boundaries or boundary groups, pre-staged content, blockage from firewall, etc. Sometimes, this error can be occurred due to some temporary issue in SCCM server, and you can try to fix the issue just by restarting your SCCM server and check if it works for you.
This error can also be occurred due to incorrect date & time on server and client machines. You should make sure date & time are correct on both SCCM server and SCCM client machine. You should also make sure all updates or hotfixes of SCCM are applied on machine. Also, make sure you the application you are trying to install or uninstall has official installer/uninstaller check if the official installer/uninstaller resolves the issue.
If you are trying to install updated version of application like MS Office suite that is already installed on your SCCM client machine, check if uninstalling the older version of app offers you to install newer version without any issue. Let’s go for the solution.
How to Fix SCCM install error 0x87d00607 in Windows 10?
Method 1: Fix ‘SCCM Installation Error Code 0X87D00607 (-2016410105)’ in Windows 10 with ‘PC Repair Tool’
‘PC Repair Tool’ is easy & quick way to find and fix BSOD errors, DLL errors, EXE errors, problems with programs/applications, malware or viruses issues, system files or registry issues, and other system issues with just few clicks. You can get this tool through button/link below.
Method 2: Change the default browser of SCCM client machine

This issue can be occurred on your SCCM client machine if the default web browser is not set to ‘Edge’ or Internet Explorer due to different OS dependencies in corporate networking environment. You can change default browser of SCCM client machine in order to fix the issue.
Step 1: In Windows 10, type ‘Default Apps’ in Windows Search Box and open ‘Default Apps’ from results appear
Step 2: In the opened window, click the option under ‘Web Browser’ and select ‘Internet Explorer’
Step 3: Once done, restart your SCCM client machine and check if the error is resolved.
Method 3: Add SMS_DP path in IIS Settings
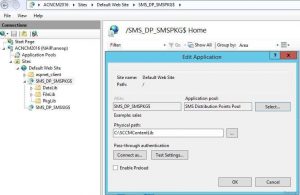
SMS_DP hosts the log files of DP to validate content, pre-stage content, and is temporary storage hub of package/application before its inclusion in content library. ‘SCCM Installation Error Code 0X87D00607 (-2016410105)’ error can be occurred if SMS_DP path is not configured properly. You can add its path in IIS settings in order to fix the issue.
Step 1: Log into DP server and go to its ‘IIS Settings’
Step 2: Now, select the ‘Server’ and open ‘ISAPI and CGI Restrictions’
Step 3: Check if any entry for SMS_DP is present there, if not, add the new entry with following path
C:\Windows\system32\inetsrv\smsfileisapi.dll
Step 4: Save the changes and check if the error is resolved.
Method 4: Use HTTP to Client connections
Improper configuration of SCCM client connections protocol can be another possible reason behind the issue. You can connect to sever by using HTTP protocol in order to fix the issue.
Step 1: Open ‘SCCM’ and in left pane, expand ‘Site Configuration’
Step 2: Now, select ‘Servers and Site System Rules’ in right pane and open ‘Management Point’
Step 3: Select ‘HTTP’ and Apply your changes once done, please check if the error is resolved.
Method 5: Unblock the source files of Package/application
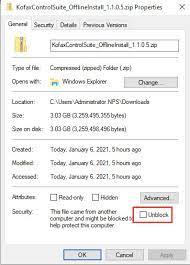
This error can also be occurred if your Windows OS doesn’t trust on some of source files and block their restrictions. You can unblock the source files of application/package in order to fix the issue.
Step 1: Open ‘File Explorer’ in Windows 10 and go to folder of source files of your package/application, right-click on any files and select ‘Properties’
Step 2: In ‘Properties’ window, under ‘General’ tab, tick ‘Unblock’ checkbox under ‘Security’ section and hit ‘Apply’ and ‘OK’ button to save the changes. Repeat the same step for all source files and once done, please check if the error is resolved.
Method 6: Change the Deployment Options of package/application
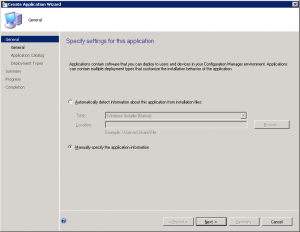
Step 1: Open ‘Properties’ of your package/application in SCCM and go to ‘Content’ tab
Step 2: In the opened window, expand ‘Deployment Options’ and select ‘Download Content from Distribution Point and run locally’ option, save changes and check if the error is resolved.
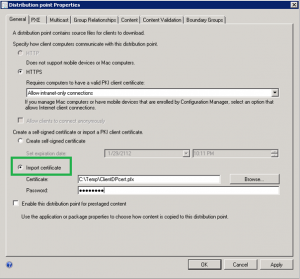
Method 7: Disable Pre-staged Content of Distribution point
Step 1: Open SCCM and open ‘Properties’ of Distribution Point
Step 2: Now, deselect ‘Enable this distribution point for pre-staged content’ checkbox to uncheck and ‘Apply’ the changes
Step 3: Wait for about 5 minutes and check if the problem is resolved.
Method 8: Enable Fallback Location for Content
You can also try to fix the issue by enabling fallback location for the content.
Step 1: Open ‘Properties’ of your package/application and go to ‘Content’ tab
Step 2: Check ‘Allow Clients to use fallback source location for content’ checkbox and select ‘Download content from Distribution point and run locally’ option from ‘Deployment Options’ dropdown. Once done, apply the changes and check if the error is resolved.
Method 9: Allows the SCCM client machine to use Distribution Points
If your organization is using SCCM’s distribution points to distribute application/package, then allowing SCCM client machine to use the distribution points form default site boundary group may fix this error.
Step 1: Open your package/application’s properties in SCCM and go to ‘Content’ tab
Step 2: Select ‘Allow Clients to Use Distribution Points from Default Site Boundary Group’ and apply the changes. Wait for about 5 minutes and check if the error is resolved.
Method 10: Modify Boundaries and Boundary group in SCCM
This error can be occurred if boundaries and boundary group is not properly configured. You can edit these settings in order to fix the issue.
Step 1: Open SCCM and go to following path
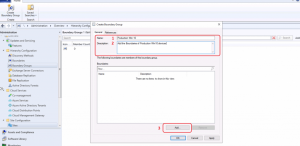
Administration>>Overview>>Hierarchy Configuration>>Boundary Groups
Step 2: In the opened path, go to ‘Reference’ tab of Boundary Group and check ‘Use this Boundary Group for site assignment’ under ‘Site Assignment’
Step 3: Now, ‘Add the Server’ to the boundary group and apply the changes and check if the error is resolved.
Step 4: If not, make sure boundary groups are enabled in ‘Properties’ of Distribution Point and check ‘IPs’ of SCCM client machine are included in Boundary group
Step 5: Keep in mind that adding IPs like 10.22.8.0 to 10.22.9.10 will not add 10.22.9.0 will not in boundary group so you need to add IPs accordingly. Also check if you using IPv6 range of SCCM client machine in boundary group.
Method 11: Allow SCCM Required Ports in Firewall of SCCM Client machine
This error can also be occurred due to interference of Windows Firewall program in your SCCM client Windows machine. You can allow SCCM required ports in Firewall settings in order to fix the issue.
Step 1: Type ‘Firewall’ in Windows Search and open ‘Windows Defender Firewall with Advanced Security’ option from results appear
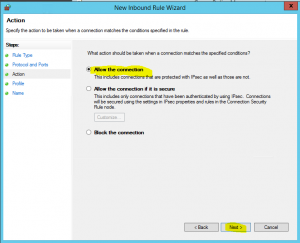
Step 2: In the opened window, select ‘Outbound Rules’, in ‘Action’ pane, click ‘New Rule’. In the opened window, select ‘Port’ option as Rule Type and select ‘TCP’ radio option as ‘Protocol and Ports’, select ‘Specific Remote port’ and enter ‘3268’ in text box and hit ‘Next’
Step 3: Select ‘Allow the Connection’ radio option in next window, select all three typos of network and hit ‘Next’
Step 4: Name the rule as per your requirement and hit ‘Finish’ and check if the error is resolved.
Conclusion
I am sure this post helped you on How to fix SCCM install error 0x87d00607 in Windows 10 with several easy steps/methods. You can read & follow our instructions to do so. That’s all. For any suggestions or queries, please write on comment box below.


