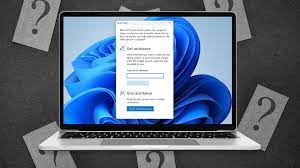
Windows Quick Assist app allows us to establish remote connections with others, making working together possible. The app is found pre-installed on the latest Windows 11 and therefore you do not require any third party apps to share the screen with others now.
Recently, many people have reported that quick assist not working windows 11. There are different types of Quick Assist issues that different users face. Some of the common Quick Assist not working issues that the users reportedly noticed are as follows:
- Quick Assist not working – normally, bugs within the app cause this issue. The app can’t load in such a case when users start it,
- The app is not showing up – the error message the app is not showing up with Windows Quick Assist appears when the app is not enabled in the app’s optional features,
- Quick Assist Service not working – if you receive this error, this probably means that the app connects to the RDP or Remote Desktop Service and fails in doing so,
- Quick Assist not generating code – most of the users reported about this issue have corrupted profile, pending windows updates, corrupted registry and system files, malware attacks, corrupted disk file system and user directory and etc,
- Quick Assist is not working – This error occurs when the app features get blocked by some third party software such as antivirus tool making it hard to start.
If you can’t see to receive the support from your Windows Quick Assist App, you should follow the below provided troubleshoot methods and we would assure that these will definitely help you in getting the problem resolved.
Possible fixes for quick assist not working windows 11
Fix 1: Check for system requirements for Quick Assist
If you are using Quick Assist for the first time, you should check whether your system fulfill the minimum system requirements for the Quick Assist app to work. Here is how:
- Click on the Windows Search on the Taskbar,
- Type in Microsoft Store and hit Enter,
- On the search bar at the top, check for Quick Assist app,
- On the app, scroll down to the system requirements section and see if you see green checkmarks. The green marks show that your PC meets the minimum requirements for the app to work.
Fix 2: Run Quick Assist as Administrator
First remediation method that you should follow for the fix for quick assist not working windows 11 to run Quick Assist app with admin. This method works for the many users. This may work for you as well:
- Press Win+ S to open Windows Search,
- Type in Quick Assist and click on Run as Administrator.
Fix 3: Reset Quick Assist App
Windows 11 carries a handy repairing tool that will look for the problems related to app. If quick assist not working windows 11, you should try repairing the app using the tool by the below steps:
- On the Start menu, click on the gear-shaped icon to launch Settings app,
- In the Apps tab, click on Installed apps,
- Scroll down to find Quick Assist, click on the three-dot menu next to it and then select Advanced options,
- Scroll down to the Reset Section and click on Repair.
Fix 4: Reset Internet Settings
Miss-configured internet settings might be the culprit for the said issue. Several users have reported that they get the fix for the issue just by resetting the internet settings of the device. Read below how you can do this:
- Open Windows Search, type in Internet Options and press Enter,
- In the Internet Properties Window, head over the Advanced tab and click on Restore advanced settings button, then click Apply followed by Ok button,
- Restart your device and see if the app is now working.
Fix 5: Re-register the user’s account
- Go to Search, type in Windows powershell and choose Run as Administrator,
- When the shell opens up, type the below command and hit Enter:
Get-AppXPackage | Foreach {Add-AppxPackage -DisableDevelopmentMode -Register “$($_.InstallLocation)\AppXManifest.xml”}
- Restart your device once done.
Fix 6: Perform PC diagnosis
- On the Windows Search, type Command Prompt as select Run as Administrator,
- Type sfc / scannow in the command line and hit Enter.
- Restart your device
- After reboot, open Command prompt as Admin again and this type enter the below command:
DISM /Online /Cleanup-Image /RestoreHealth
Conclusion
That’s all! We have provided all possible fixes for quick assist not working windows 11. Hope so, these methods really work for your case. If you want, you can automate the fixing process by using automatic PC Repair Tool.


