Tips to fix Peer Networking Grouping error 1068 in Windows 10/11:
In this article, we are going to discuss on How to fix Peer Networking Grouping error 1068 in Windows 10/11. You will be guided with easy steps/methods to resolve the issue. Let’s starts the discussion.
‘Peer Networking Grouping error 1068’ in Windows 10/11:
Peer-to-peer networking is serverless networking technology that allows several network devices to share resources and communicate directly with each other. This technology is available for XP with Service Pack 1 (SP1) and later clients that run the Advanced Networking Pack for Peer-to-Peer Infrastructure. Peer-to-Peer Grouping API combines the Peer-to-Peer Graphing, Identify Manager, and PNRP APIs to form a cohesive and convenient solution for peer-to-peer networking application development.
Windows offers you a HomeGroup feaure which has been developed to make file sharing experience much easier than before. It is feature allowing you to share files and printers with few other Windows PCs that are connected to same local network. The entire HomeGroup feature is based on Peer Network Grouping service, which enabled the multi-party communication using peer-to-peer grouping.
However, several users reported that they faced Peer Networking Grouping error 1068 when Peer Networking Grouping service fails to work properly. The error is appeared with message saying “Windows could not start the Peer Networking Grouping service on local computer”. This error indicates HomeGroup feature is not working completely in your device. This issue can also be occurred due to outdated Windows OS, incorrect settings relating to HomeGroup service, and other issues. Let’s go for the solution.
How to fix Peer Networking Grouping error 1068 in Windows 10/11?
Method 1: Fix Peer Networking Grouping error 1068 with ‘PC Repair Tool’
‘PC Repair Tool’ is easy & quick way to find and fix BSOD errors, DLL errors, EXE errors, problems with programs/applications, malware or viruses infections in computer, system files or registry issues, and other system issues with just few clicks.
Method 2: Delete the idstore.sst file
Step 1: Open ‘File Explorer’ in Windows PC and go to ‘C: > Windows > ServiceProfiles > LocalService > AppData > Roaming > PeerNetworking’
Step 2: Once you are in Peer Networking folder, find and delete idstorre.sst file from there. Once done, restart your computer and check if it works for you.
Method 3: Make sure the peer networking services are running
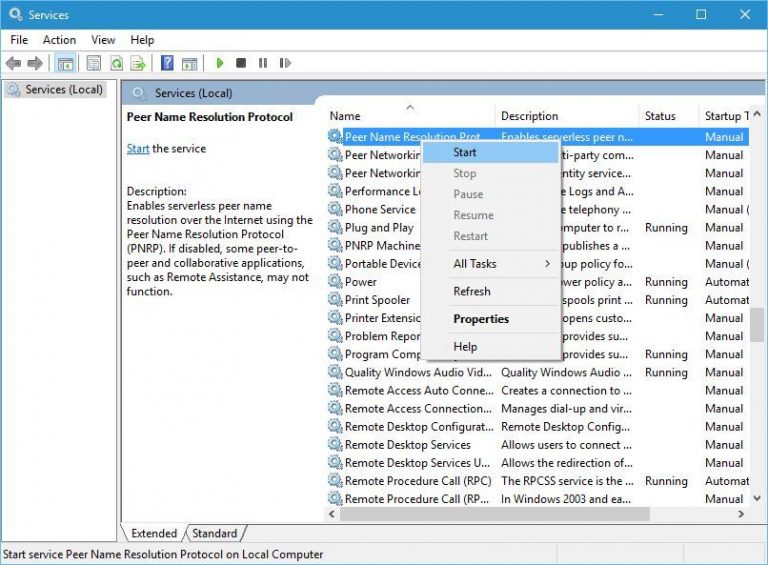
Step 1: Open ‘Services’ app in Windows PC via Windows Search Box
Step 2: Find the following services:
Peer Name Resolution Protocol
Peer Networking Identity Manager
Peer Networking Grouping
PNRP Machine Name Publication
Step 3: Right-click on each service and select ‘Start/Restart’ to start the service and then check if the issue is resolved.
Method 4: Check Peernet Registry key
Step 1: Open ‘Registry Editor’ app in Windows PC via Windows Search Box and go to following path
Computer > HKEY_LOCAL_MACHINE > SOFTWARE > Policies > Microsoft > Peernet
Step 2: Find and double-click on ‘Disabled’ entry to edit, set its value to ‘0’ and hit ‘Ok’ button to save the changes. Once done, check if it works.
Method 5: Make sure Peer Networking is not disabled in Local Group Policy
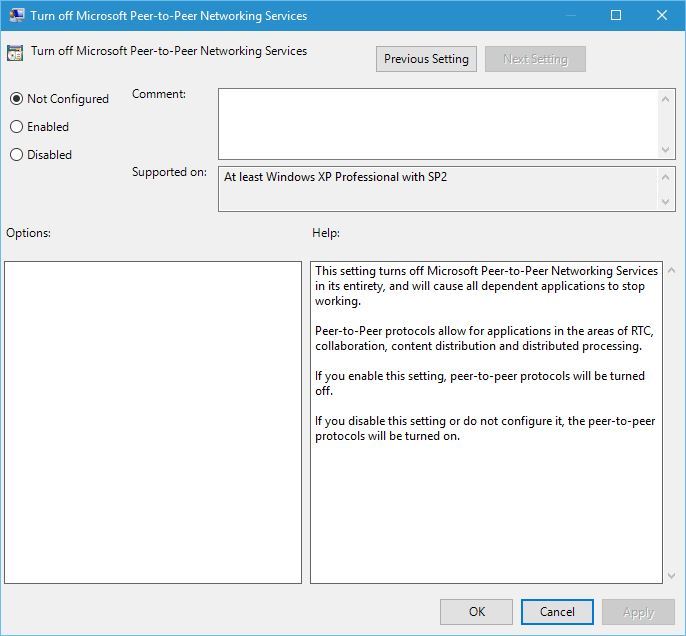
Step 1: Press ‘Windows + R’ keys on keyboard, type ‘gpedit.msc’ in ‘Run’ window and hit ‘Ok’ button and go to following path in left pane.
Computer Configuration > Administrative Templates > Network > Microsoft Peer-to-Peer Networking Services
Step 2: Double-click on ‘Turn off Microsoft Peer-to-Peer Networking Services’ to open its properties. Select ‘Not Configured’ radio option and then hit ‘Apply > Ok’ button to save the changes and then check if it works.
Method 6: Remove files from MachineKeys folder
Step 1: Open ‘File Explorer’ in Windows PC and go to following path
C: > ProgramData > Microsoft > Crypto > RSA > MachineKeys
Step 2: Select all files available in folder and delete them. Once done, restart your computer and check if it works for you.
Method 7: Run HomeGroup Troubleshooter
Step 1: Type ‘HomeGroup’ in Windows Search Box and select ‘Homegroup’ Control Panel option
Step 2: In the opened window, click ‘Start the Homegroup troubleshooter’ option. Wait till the troubleshooter looks for the issue and fixes them.
Method 8: Change MachineKeys folder security permission
Step 1: Open ‘File Explorer’ in Windows PC and go to ‘C: > ProgramData > Microsoft > Crypto > RSA’ path
Step 2: Right-click on ‘MachineKeys’ folder and select ‘Properties’ option. Go to ‘Security’ tab and click ‘Edit’ under ‘Group or usernames’ section
Step 3: Select ‘Everyone’ option under ‘Group or usernames’ section. In ‘Permissions for Everyone’ section, select ‘Allow’ checkmark in front of ‘Full Control’ option, and then hit ‘Apply > Ok’ button to save the changes and restart your computer and check if the issue is resolved.
Method 9: Run Get-NetConnectionProfile command
Step 1: Right-click on ‘Start Menu’ and select ‘Windows Powershell (Admin)’
Step 2: Type the following command and hit ‘Enter’ key to execute.
PowerShell Get-NetConnectionProfile
Step 3: Once executed, restart your computer and check if the issue is resolved.
Method 10: Update Windows 10 OS
Step 1: Open ‘Settings’ app in Windows PC and go to ‘Update & Security >Windows Update’ and click ‘Check for updates’ button
Step 2: Download and install all available updates in computer and once updated, restart your computer and check if the issue is resolved.
Method 11: Change Properties of Peer Name Resolution Protocol Service
Step 1: Open ‘Services’ app in Windows PC via Windows Search Box
Step 2: Find and double-click ‘Peer Name Resolution Protocol’ service to open its Properties. Click ‘Log On’ tab, select ‘Local System Account’ under ‘Lo on as’ section and then hit ‘Apply > Ok’ button to save the changes.
Method 12: Check if the following services are running
Step 1: Open ‘Services’ app in Windows PC via Windows Search Box
Step 2: Look for following services and check if it running.
Application Layer Gateway Service
Network Connections
Network Location Awareness (NLA)
Plug and Play
Remote Access Auto Connection Manager
Remote Access Connection Manager
Remote Procedure Call (RPC)
Telephony
Step 3: If not, start the service and then check if the issue is resolved.
Method 13: Disable or uninstall antivirus software
You can disable or uninstall antivirus/firewall in your computer in order to fix. After disabling or antivirus in computer, check if it works for you toward resolving the issue.
Conclusion
I am sure this post helped you on How to fix Peer Networking Grouping error 1068 in Windows 10/11 with easy ways. You can read & follow our instructions to do so. That’s all. For any suggestions or queries, please write on comment box below.


