
DLL (Dynamic Link Library) files are one of the essential components of Windows. These files contain instructions to command several different computer programs to perform tasks. It’s pertinent to mention Operating Systems uses DLL files to complete tasks like finding files or storage space. So it’s imperative to keep these files intact for the working of OS in an efficient manner.
Furthermore, DLL files are also associated with drivers. Without this file, the driver fails to run as intended and as a consequence the users face several errors, one instance of such error is Nvgpucomp64.dll BSOD Error.
Nvgpucomp64.dll is associated with the graphics processes in Windows; it’s often linked with Nvidia drivers. Its plays a crucial role in managing complex tasks such as graphics computations. 9Its well known that we need fully operational drivers for running games. And as we have earlier mentioned Nvgpucomp64.dll is associated with drivers. So if in case, these files are not intact, it manifests BSOD Error.
And if we speak about the reasons that lead to this error, it may include the following:
#. Obsolete drivers
#.Outdated System files
#. Outdated Windows Versions
#. Issues with RAM
These were some of the factors that cause the above mention error, but thankfully there are a number of methods to resolve this error.
Also Read: Fveapi.dll is missing from your Computer
Try these Methods to troubleshoot Nvgpucomp64.dll BSOD Error on Windows 10
Method 1: Scan your PC for Malware
You are most likely to face the above mention error, if your PC is infected with malware. The threat actors often targets crucial windows files which badly affects the user’s experience. So we suggest you to scan your PC for malware. To do so follow the below mention guidelines:
Step 1: In the Windows Search bar type in Windows Security and press Enter
Step 2: Now select Virus & threat protection > choose Scan Options
Step 3: Choose Microsoft Defender Offline Scan and click Scan Now
Step 4: Your PC will immediately reboot and start a deep scan
Method 2: Update your PC to the latest Version
Often times you face such DLL error due to outdated Windows. Updated Windows Versions are compatible with your system files. So ensure your PC is updated to the latest version.
Here’s how:
Step 1: In Windows Search type in Updates and press Enter
Step 2: Once you are prompted with new window, click Check for Updates and wait
Step 3: If there are optional updates available, install them as well
Step 4: Once you are done with the updating process, Restart your Computer
Method 3: Update your Graphics Driver
As we have earlier mentioned Nvgpucomp64.dll is associated with graphics drivers, so it’s imperative to keep your drivers updated. Obsolete drivers are incompatible and are most likely to throw the error. So ensure your graphics drovers are updated.
Here’s how:
Step 1: Right-click on the Start button and select Device Manager from the menu
Step 2: Expand the Display Adapters section > Right-click on your graphics card and select Update Driver
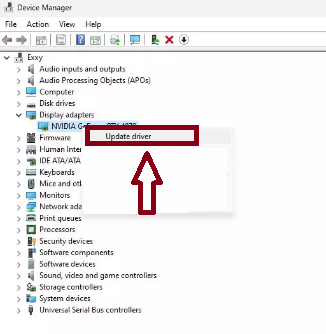
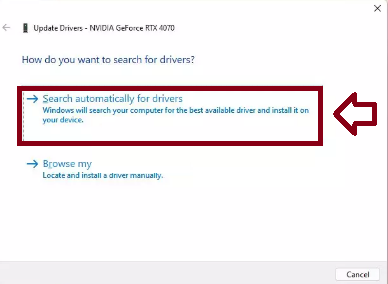
Step 3: Choose Search Automatically for drivers >if updates are found, allow them to install
Step 4: Now Restart your PC after updating all requisite drivers.
Alternatively, you can use an automatic driver tool to update your drivers. This tool is professional and will update your drivers to the latest version in just few clicks.
⇑Get Driver Tool from Here⇓
Method 4: Reinstall your graphics driver
In this method we suggest you to reinstall your graphics driver, to do so follow the below mention guidelines:
Step 1: Open Device Manager >Expand the Display Adapters section
Step 2: Right-click on your graphics card and choose Uninstall device
Step 3: Now mark the box to delete all the driver software
Step 4: Then confirm the uninstallation > Finally Restart your PC
Method 5: Roll back your Graphics driver
Several users have claimed they managed to resolve the error using this method so you can also try the same for yourself.
Here’s how:
Step 1: First of all open Device Manager >expand the Display adapters section
Step 2: Right-click on your graphics card and choose Properties, then navigate to the Driver tab
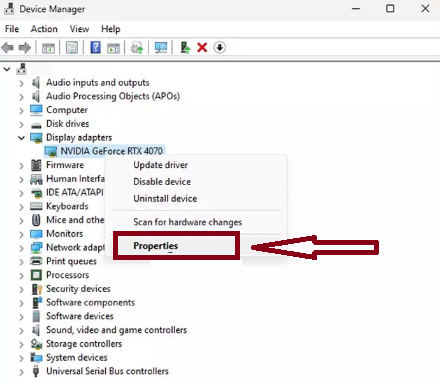
Step 3: Now click Roll Back Driver and follow the prompts> If the button is greyed out, a rollback isn’t available for that driver
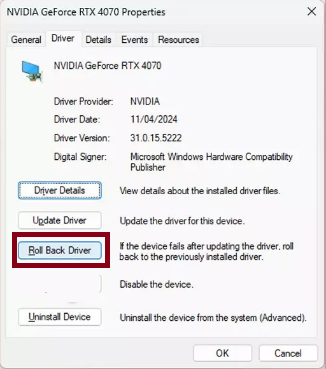
Step 4: Finally Restart your PC after rolling back
Method 6: Use Windows Memory Diagnostic to check your RAM
In this method we suggest you to use this built-in feature available in the latest Windows 11 OS. This tool conducts a RAM test to detect the possible problems with your PC’s memory.
To proceed follow the below mention guidelines:
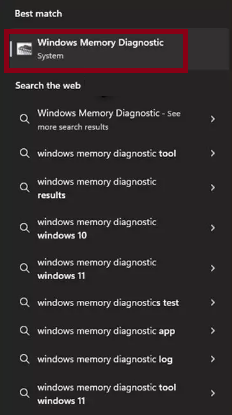
Step 1: In Windows Search type in Windows Memory Diagnostic and press Enter key > Select Windows Memory Diagnostics result
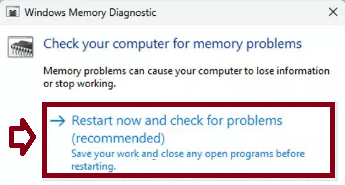
Step 2: Now click Restart now and check for problems (recommended) (note that your PC will restart immediately)
Step 3: A memory test will run during startup ad display any detected errors– this might take a while
Step 4: Replace or Repair faulty RAM module(s) if errors are found.
Method 7: Check the hard drive for errors using Check Disk Utility
If you are still struggling with Nvgpucomp64.dll BSOD Error then check your hard drive. To proceed follow the below mention guidelines:
Step 1: Open Command Prompt as administrator >click Yes when UAC asks for access
Step 2: Type in the following command and press Enter after:
chkdsk c: /f
(Note: use chkdsk c: /f /r /x command if you see SSD as your primary partition)
Step 3: If you receive an error, type in Y, close down Command Prompt and restart your PC
Step 4: After a Restart, Windows will begin to scan your disk. After your system boots back up, you can find the results in the Event Viewer
Method 8: Use SFC and DISM Scan
Corrupted System files are incompatible and may create several kind of nuisance. These two utility tools will repair your corrupted system files. To do so follow the below mention steps:
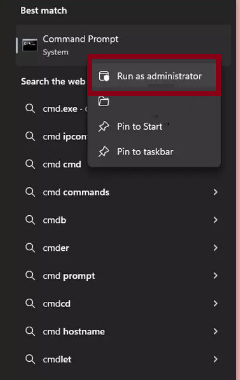
Step 1: In Windows Search type in cmd > Right-click on the Command Prompt result and select Run as administrator
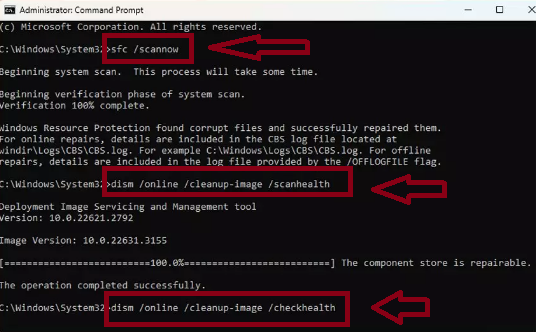
Step 2: When the UAC window pops up, click Yes > In the Command Prompt window, paste the following command and press Enter key:
sfc /scannow
Step 3: Wait for the scan to complete > Once the SFC scan is finished, run the following set of DISM Commands, pressing Enter after each one:
DISM /Online /Cleanup-Image /CheckHealth
DISM /Online /Cleanup-Image /ScanHealth
DISM /Online /Cleanup-Image /RestoreHealth
Step 4: Once the DISM scan is completed, Restart your PC
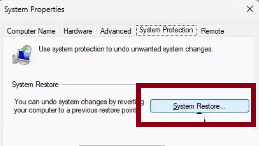
Method 9: Use System Restore feature
We suggest you to use System Restore feature, this feature will bring back your PC to the point where you were not facing the error.
Here’s how:
Step 1: In Windows Search type in Create a Restore Point and press Enter key > navigate to System Restore and click Next
Step 2: Now mark the Show more restore points option if available> Choose the time when the problem did not exist and click Next
Step 3: Confirm the Process-your device will Restart
Method 10: Turn Off Adpative Boost Technology BIOS
If none of the above mentioned methods works for you we suggest you to try this method, to do so follow the below mention guidelines:
Step 1: First of all Restart your PC and press the key to enter BIOS (usually Delete, F2, F10, or Esc)
Step 2: Go to the Advanced, Performance, or Power Management tab using the arrows keys> now locate Adaptive Boost Technology under a menu like CPU Configuration or Advanced CPU Features
Step 3: Select Adaptive Boost Technology and change the setting to Disabled > Press F10 to save and exit the BIOS
Step 4: Finally Confirm the save when prompted and allow your PC to restart
Go for an Automatic Solution
These were some of the tried and tested methods to get rid of the error but its pertinent to mention these methods are lengthy and will definitely consume your time. If you are someone who have time constraints or want a hassle free solution in such case, we suggest you an automatic PC Repair Tool. This professional tool is capable for resolving errors originated due to system corruption. It can fix critical Windows errors such as DLL Errors, Registry Errors and BSOD Errors.
⇑Get PC Repair Tool from Here⇓
Final Thoughts
That’s all folks! Nvgpucomp64.dll files are one of the essential parts of Windows Operating System. It is responsible for the proper functioning of applications on your PC. Since these files are related to the graphics processes, so you won’t be able to perform any graphic related tasks. But thankfully the error can be tackled using simple methods. Hope you liked the article and you manage to get past the error


