Fveapi.dll is a Dynamic Link Library file, like other DLL files, it also contains set of instructions that different programs can use. These files are specifically created to promote efficiency and reusability in computer systems.
What is Fveapi.dll?
Fveapi.dll file specifically contains functions related to Bitlocker. Bitlocker is a security feature in Windows that is responsible for protecting your data. This file plays a vital role as it ensures that the Bitlocker feature is working in an efficient manner. Without this file, Windows OS might struggle to manage the encryption and decryption processes which leads to security threats.
Where is fveapi.dll located?
Fveapi.dll should be located in the folder C:\Windows\System32. If this file is not located in this directory, it could be a Trojan.
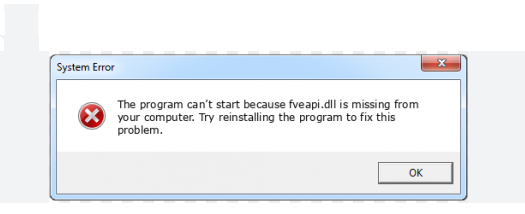
It’s noteworthy to mention if there’s any issues with the Fveapi.dll it may lead to severe troubles. Here in this article we are going to discuss about the same error. Several users have claimed Fveapi.dll is missing” error, this error manifests when users try to access the Settings. Once the error occurs, one cannot operate within Settings and they are prompted to refresh the page. Upon refreshing the page, you may encounter a message stating “FVEAPI.dll is either not designed to run on Windows or it contains an error.”
As we have earlier mentioned this file is related with the Bitlocker which manages the encryption and decryption process. The occurrence of this error is a warning that you need to take immediate action to fix the error. Note that issues with the Fveapi.dll files can lead to critical problems such as encryption of all drives on PC.
Ad if talk about the causes that surface the error, then there are several factors which throws the error such as presence of malware on your PC, missing/corrupted system files, software confliction. But thankfully, there are some tried and tested methods which can potentially fix the error and prevent you from the severe consequences.
Also Read: Steam_api.dll not found, amd_ags_x64.dll not found
Try these Methods to bypass Fveapi.dll is missing from your computer
Method 1: Update Windows to the latest Version
If you want to resolve the error, you can start with updating your Windows. Sometimes even a simple Windows Update can fix the error. To proceed follow the below mention guidelines:
Step 1: Use Windows + I keys to open Settings > Go to Update & Security
Step 2: In the Windows Update tab, click on Check for Updates > the new update is found- Install Now
If this method didn’t work for you, try the next one.
Method 2: Run SFC & DISM Scans
In this method we suggest you to run SFC & DISM Scans; these two utility tools will repair all your system files. To do so follow the below mention guidelines:
Here’s how:
Step 1: In Windows Search, type in cmd > Right-click on Command Prompt and choose Run as administrator
Step 2: User Account Control window will show up- click Yes when prompted> then, copy and paste the following command, then Press Enter key:
sfc /scannow
Step 3: Now wait for the scan to complete, once the scan is finished, run the following DISM Commands ad don’t forget to press Enter after each one:
DISM /Online /Cleanup-Image /CheckHealth
DISM /Online /Cleanup-Image /ScanHealth
DISM /Online /Cleanup-Image /RestoreHealth
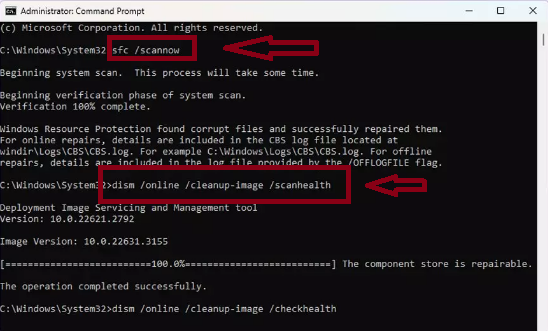
Step 4: Now close the Command Prompt and Restart your device.
Method 3: Access Safe Mode (if required)
If you are facing the error due to malware or software conflicts, in such case Safe Mode can help in diagnosing the issues.
Here’s how:
Step 1: From the login screen, hold the Shift key on your keyboard and click Power> Restart
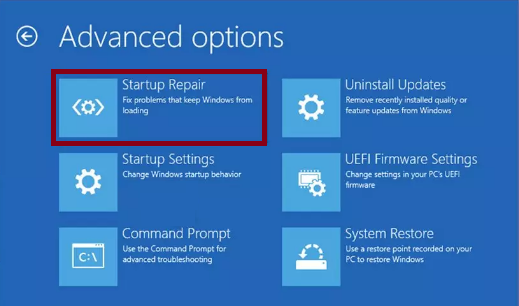
Step 2: Once you enter the recovery environment, click Troubleshoot
Step 3: Navigate to Advanced Options >Startup Settings
Step 4: Once prompted, click Restart > After Restart, choose either 4/F4 for Safe Mode or 5/F5 for Safe Mode with Networking.
Step 5: Once in Safe Mode, proceed with the troubleshooting steps below:
Method 4: Repair or Reset the Settings
In this method we suggest you to repair or reset the Settings, to do so follow the below mention guidelines:
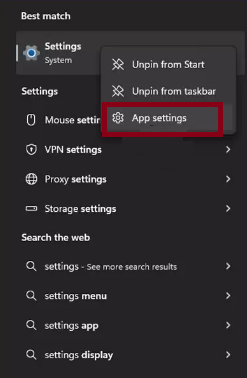
Step 1: In Windows Search type in Settings , right-click on the result and select App Settings
Step 2: Scroll down and click Repair > If that does not work, try the Reset option
Method 5: Run a Malware Scan
You are most likely to face the above mention error, if your system is infected with malware. So you can scan your PC. To do so follow the below mention guidelines:
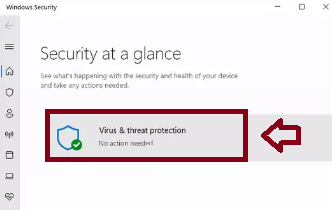
Step 1: In Windows Search bar, type in Windows Security and press Enter key> Select Virus & threat protection.
Step 2: Choose Scan options > then choose Microsoft Defender Offline Scan and click Scan Now
Step 3: Your PC will immediately reboot and start a deep scan
Method 6: Reregistering Settings app
In this method we suggest you to Reregister the Settings app, to proceed follow the below mention guidelines:
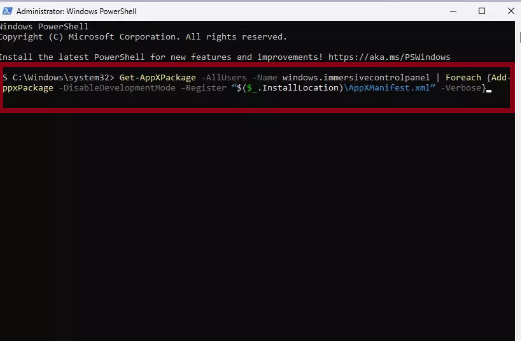
Step 1: In Windows Search, type in PowerShell > then right-click and select Run as administrator
Step 2: When UAC shows up, click Yes > Copy and paste the following command, pressing Enter after:
Get-AppXPackage -AllUsers -Name windows.immersivecontrolpanel | Foreach {Add-AppxPackage -DisableDevelopmentMode –Register “$($_.InstallLocation)\AppXManifest.xml” -Verbose}
Step 3: Finally close down PowerShell and check if the issue resolved or not
Method 7: Create a New User Account
Several users have claimed that creating a new User Account can resolve the error, to do so, use the following steps:
Step 1: Open Window Settings >Navigate to Accounts then Family/Family & other users.
Step 2: Under Other Users, click Add account/Add someone else to this PC.
Step 3: Now follow the prompts to create a new user account. If you don’t have Microsoft account details, you can choose I don’t have this person’s sign-in information followed by Add a user without a Microsoft account.
Step 4: Then Assign a username and password for the new accountand complete the setup
Step 5: Then go back to the Accounts section. Under Family/Family & other users, select the newly created account and click Change Account type
Step 6: Under Account type, choose Administrator and click OK

Method 8: Try System Restore
If none of the above mentioned methods works for you, in such case it is suggested to use the System Restore feature.
Here’s how:
Step 1: In search box type in System Restore and click Create a restore point > in the System Properties window, click System Restore
Step 2: Click Next, choose a restore point from before the issue began, and click Next again
Step 3: Then follow the on-screen instructions to complete the restoration
Step 4: Finally Restart your computer after the process completes

Go for an Automatic Solution
The above mentioned methods are quite effective and have potential to fix the error, but these methods are lengthy and consume lots of time. So considering the time constraints, we suggest you to use an automatic PC Repair Tool. This tool can resolve the errors originated due to system corruption, so try this tool once.
⇑Get PC Repair Tool from Here⇓
Bottom Line
That’s all guys! We have mentioned all the possible methods to resolve the Fveapi.dll is missing from your computer. We have tried to mention all the possible fixes to get past the error. Now it’s your turn to use our guidelines.


