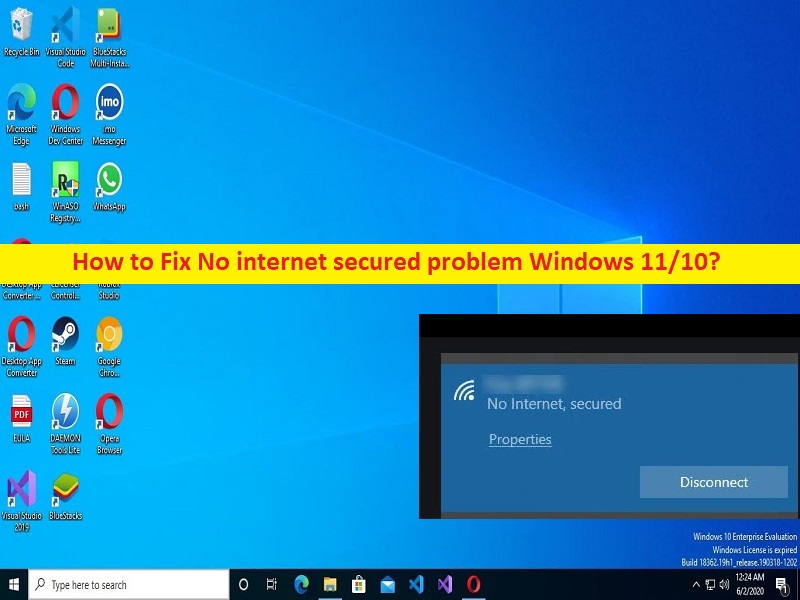
What is ‘No Internet, Secured’ problem in Windows 11/10?
If you are facing No internet secured problem Windows 11/10 or ‘No internet, secured’ error when you try to connect WiFi network/internet in Windows 10/11 computer, and looking for ways to fix the issue, then you are in right-place for the solution. Here, you are provided with easy steps/methods to resolve the issue. Let’s starts the discussion.
‘No Internet, Secured’ error problem:
It is common Windows Problem considered as WiFi/Internet connection problem. This error is usually appeared when you try to connect to a WiFi Signal or WiFi network in Windows 10/11 computer. Sometimes, the error is appeared with ‘Connected, but not internet’ that indicates you are able to connect to WiFi network properly but the WiFi internet not working for you for some reasons. This type of issue can be occurred possibly if network administrator or owner of WiFi network restricts you from using their WIFi.
In such case, you need to contact them and ask to remove the restrictions so that you can access their WiFi network. This issue can be occurred due to WiFi network set to allow only limited devices and your device is unable to connect to that WiFi network possibly due to Wifi data limit not allowing your device. This issue can be occurred due to some issues in your Windows computer itself like corrupted/outdated WiFi drivers, incorrect network settings, malware or viruses infections in computer, corruption in Windows computer, and other issues. Let’s go for the solution.
How to fix No internet secured problem Windows 11/10?
Method 1: Fix No internet secured problem with ‘PC Repair Tool’
‘PC Repair Tool’ is quick & easy ways to find and fix BSOD errors, DLL errors, EXE errors, problems with programs/applications, malware or viruses infections in computer, system files or registry issues, and other system issues with just few clicks.
Method 2: Get close the internet router/WiFi device
This issue can be occurred due to long distance between your Windows computer and network device like router, modem or WiFi device. You can try to move your computer near to WiFi/router in order to make shorter distance between them and fix the issue.
Method 3: Restart your computer and router
This issue can be occurred due to some temporary issues in your computer and router. You can fix the temporary issues just by restarting your router and computer both in order to fix this error, and check if it works for you toward resolving the issue.
Method 4: Disable VPN
Interference of VPN connection in computer could be a reason behind the issue. You can fix the issue by disabling your VPN connection in computer and then check if it works for you.
Method 5: Run Internet Connections and Network Adapter troubleshooter

Windows built-in troubleshooters can resolve the issue.
Step 1: Open ‘Settings’ app in Windows PC via Windows Search Box and go to ‘Update & Security > Troubleshoot > Additional Troubleshooters’
Step 2: Find and click on ‘Internet Connections’ or ‘Network Adapter’ troubleshooter, and click ‘Run the troubleshooter’ button and follow on-screen instructions to finish troubleshooting. Once finished, check if the issue is resolved.
Method 6: Forget Internet connection
One possible way to fix the issue is to forget the internet connection and then reconnect to it.
Step 1: Open ‘Settings’ app in Windows PC and select ‘Network & Intent > WiFi > Manage Known networks’
Step 2: Select WiFi network you are trying to fix, and click ‘Forget’. Once done, retry connecting to same WiFi network again and check if the issue is resolved.
Method 7: Reinstall network adapter driver

You can also try to fix the issue by uninstalling and then reinstall network adapter drivers in order to fix corruption in network adapter driver.
Step 1: Open ‘Device Manager’ app in Windows PC via Windows Search Box and expand ‘Network Adapters’ category
Step 2: Right-click on your network adapter driver, and select ‘Uninstall Device’ to uninstall it and after that, restart your computer
Step 3: Restarting computer will automatically reinstall correct network adapter driver in computer.
Download or reinstall network driver update in Windows PC [Automatically]
You can also try to update all Windows drivers including network adapter driver using Automatic Driver Update Tool. You can get this tool through button/link below.
Method 8: Refresh your connection using Command Prompt
Resetting network settings in computer can resolve the issue.
Step 1: Type ‘cmd’ in Windows Search Box and press ‘CTRL + SHIFT + ENTER’ keys on keyboard to open ‘Command Prompt as Administrator’
Step 2: Type the following commands and hit ‘Enter’ key after each to execute.
netsh winsock reset
netsh int ip reset
ipconfig /release
ipconfig /renew
ipconfig /flushdns
Step 3: Once executed, restart your computer and check if the issue is resolved.
Method 9: Change Wifi properties
Step 1: Open ‘Control Panel’ app in Windows PC via Windows Search Box and go to ‘Network and Internet > Network and Sharing Center > Change Adapter Settings’
Step 2: Right-click on your WiFi network and select ‘Properties’. Under ‘Networking’ tab, make sure these 7 options have checkmark next to them:
- Client for Microsoft Networks
- File and Printer Sharing for Microsoft Networks
- QoS Packet Scheduler
- Internet Protocol Version 4 (TCP/IPv4)
- Microsoft LLDP Protocol Driver
- Link-Layer Topology Discovery Responder
- Link-Layer Topology Discovery Mapper I/O Driver
Step 3: Check the checkmarks if not, and remove checkmark from ‘Internet Protocol Version 6 (TCP/IPv6)’ and then save the changes. Once done, restart your computer and check if the issue is resolved.
Method 10: Change DNS server
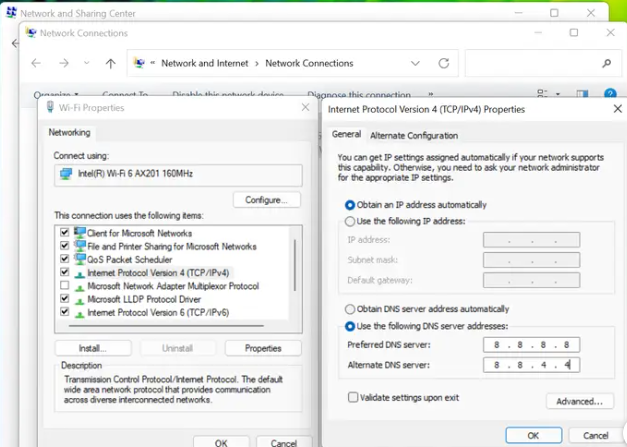
You can try to fix the issue by changing DNS server.
Step 1: Open your Network Connection’s Properties using above method
Step 2: Find and double-click on ‘Internet Protocol Version 4 (TCP/IPv4)’ to open its Properties
Step 3: Select ‘Use the following DNS server addresses’ field, type ‘8.8.8.8’ and ‘8.8.4.4’ in preferred and alternate DNS server field, and then hit ‘Apply > Ok’ button to save the changes. Once done, check if the issue is resolved.
Method 11: Contact your internet service provider
If the issue is still persist, you can contact your internet service provider, report your problem to them and ask for the solution. Hope your problem will be resolved by the official, and then check if the issue is resolved.
Conclusion
I hope this article helped you on How to fix No internet secured problem Windows 11/10 with easy ways. You can read & follow our instructions to do so. That’s all. For any suggestions or queries, please write on comment box below.


