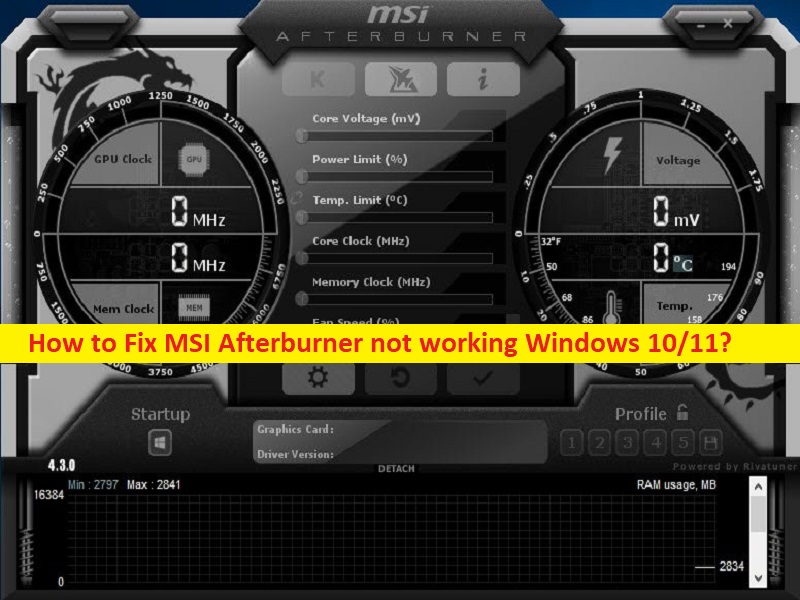
What is ‘MSI Afterburner not working’ issue in Windows 10/11?
In this article, we are going to discuss on How to fix MSI Afterburner not working Windows 10/11. You are provided with easy steps/methods to resolve the issue. Let’s starts the discussion.
‘MSI Afterburner not working’ issue:
MSI Afterburner is one of most used graphics card software for good reason. It is reliable, works on any card, give you complete control, allows you monitor your hardware in real-time and best of all. It is completely free and can be used with graphics card from all brands. However, several users reported they faced MSI Afterburner not working Windows 10/11 issue when they tried to apply overclock on the startup.
This issue indicates you are unable to use functions of MSI Afterburner in Windows 10/11 computer for some reasons. The possible reasons behind the issue can be game overlays, integrated graphics cards, general misconfigurations, and others. It is possible to resolve the issue with our instructions. Let’s go for the solution.
How to Fix MSI Afterburner not working Windows 10/11?
Method 1: Fix MSI Afterburner not working issue with ‘PC Repair Tool’
‘PC Repair Tool’ is easy & quick way to find and fix BSOD errors, DLL errors, EXE errors, problems with programs/applications, malware or viruses infections in computer, system files or registry issues, and other system issues with just few clicks.
Method 2: Disable Steam Overlay
Step 1: Open ‘Steam’ app in Windows PC and go to ‘Library’, right-click on game that is causing issue, and select ‘Properties’
Step 2: Uncheck ‘Enable the steam overlay while in-game’ option and then save the changes, once done, check if the issue is resolved
Method 3: Disable NVIDIA overlay
Step 1: Launch NVIDIA GeForce Experience software and click ‘Settings’ at top-right corner
Step 2: Disable the toggle for ‘In-game overlay’
Method 4: Run MSI Afterburner with Admin permission
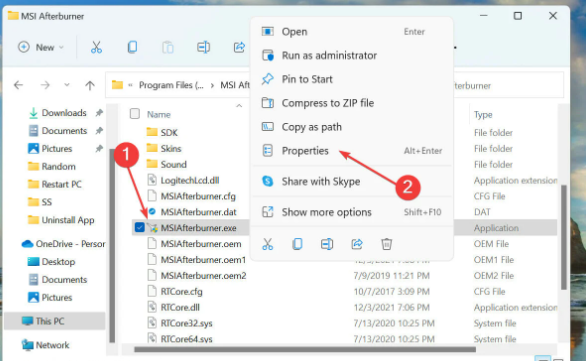
Step 1: Open ‘File Explorer’ in Windows PC and go to installation folder of MSI Afterburner
Step 2: Right-click on executable of MSI Afterburner software, and select ‘Properties’, click ‘Compatibility’ tab, tick ‘Run this program as an administrator’ checkbox, and hit ‘Apply > Ok’ button to save the changes. Once done, launch MSI Afterburner and check if the issue is resolved.
Method 5: Manually select detection level to high in RivaTuner
Step 1: Open ‘File Explorer’ and go to following path
C:\Program Files (x86)\RivaTuner Statistics Server
Step 2: Double-click ‘RTSS.exe’ file to launch ‘RivaTuner’ tool and confirm UAC prompt
Step 3: Click ‘Add’ button at bottom and go to location where the game is saved, and select its executable file, and click to open it
Step 4: Select ‘High’ under Application Detection level and save the changes, and check if the issue is resolved
Method 6: Run MSI Afterburner in compatibility mode
Step 1: Open File Explorer and go to installation folder of MSI Afterburner in main drive
Step 2: Find and right-click on executable of MSI Afterburner, and select ‘Properties’
Step 3: Click ‘Compatibility’ tab, tick ‘Run this program is in compatibility mode for’, select the dropdown and select your Windows OS and prior one, and then hit ‘Apply > Ok’ button to save the changes. Once done, launch MSI Afterburner and check if the issue is resolved.
Method 7: Disable integrated graphics card
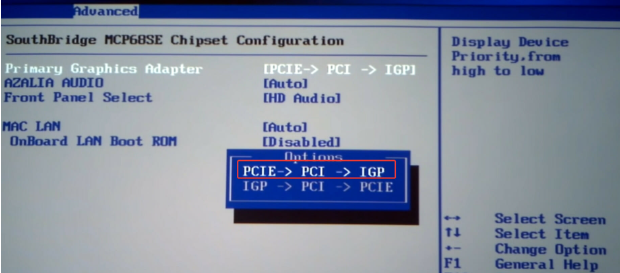
Step 1: Restart your computer and when booting initiates, press ‘F12’, ‘Del’ key or other BIOS supported key to enter into BIOS mode
Step 2: Once you are in BIOS mode, go to ‘Advanced’ tab, click ‘Chipset’ from options list here, click ‘SouthBridgeConfiguration’, select ‘Primary Graphics Adapter’ option
Step 3: Make sure you select the option that has PCIE listed fist and the IGP at the last
Step 4: Once done, save and exit BIOS and restart your computer normally, and check if the issue is resolved.
Method 8: Uninstall and reinstall MSI Afterburner app
If the issue is still persist, you can uninstall and then reinstall MSI Afterburner app in computer in order to fix the issue.
Step 1: Open ‘Settings’ app and go to ‘Apps > Apps & Features’
Step 2: Find and select ‘MSI Afterburner’, and click ‘Uninstall’ to uninstall it and after that, restart your computer
Step 3: After restart, download and reinstall MSI Afterburner app from official site, and once installed, launch it and check if the issue is resolved.
Conclusion
I hope this post helped you on How to fix MSI Afterburner not working Windows 10/11 with easy ways. You can read & follow our instructions to do so. That’s all. For any suggestions or queries, please write on comment box below.


