What is ‘INET_E_RESOURCE_NOT_FOUND error’ in browser on Windows 10?
If you are facing INET_E_RESOURCE_NOT_FOUND error in your browser like Edge/IE/Chrome in Windows 10 computer while trying to access certain WebPages, then you are in right place for the solution. Here, you will be guided with easy steps/methods to resolve the issue. Let’s starts the discussion.
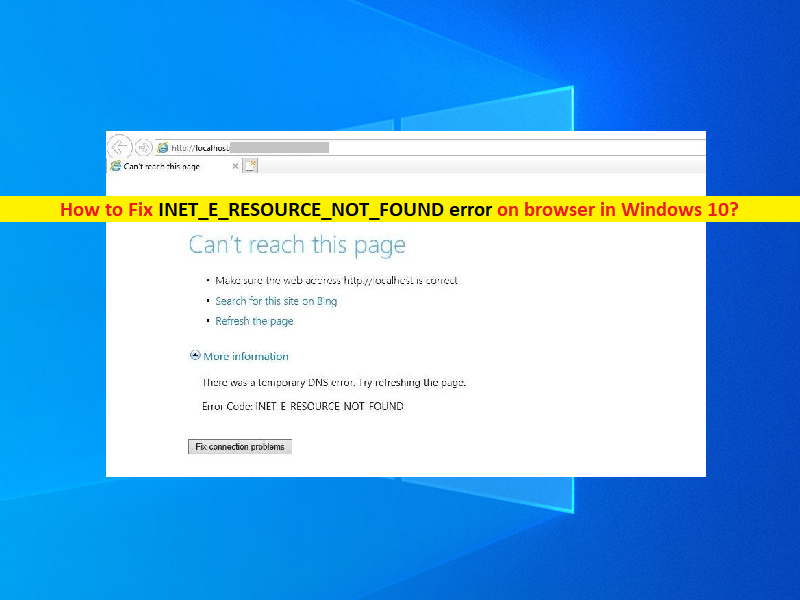
‘INET_E_RESOURCE_NOT_FOUND’ error: It is common error usually appeared on your browser like Edge/Internet Explorer (IE)/Chrome or other browsers while trying to access certain WebPages. This error indicates you are unable to browse the internet or unable to access certain WebPages in your browser on Windows 10 computer for some reasons. This error is usually occurred on Google Chrome, Firefox, IE and Edge browsers. Let’s take a look at error message.
“Hmm… cannot reach this page. Make sure that you’ve got the right address. Details: There was a temporary DNS error. Error Code: INET_E_RESOURCE_NOT_FOUND”
INET_E_RESOURCE_NOT_FOUND error on your browser indicates the website you are trying to visit couldn’t be found, DNS name doesn’t exist, the temporary DNS error, or other issue with DNS server. The possible reason behind the issue can be bad or wrong network configuration that causing resolution malfunctions that can’t be ignored. You can re-configure network settings or perform network settings reset in order to fix the error. This error can also be occurred due to some issue with your network/internet connection.
You should make sure you have stable internet connection and speed, and there is no issue with internet connection at all. You can perform router restart/reset operation in computer in order to fix the issue. However, this error can also be occurred due to some issues in your browser software like outdated/corrupted browser software and other problems. Let’s go for the solution.
How to fix INET_E_RESOURCE_NOT_FOUND error in browser on Windows 10?
Method 1: Fix INET_E_RESOURCE_NOT_FOUND error with ‘PC Repair Tool’
If this error is occurred due to some issues in your Windows computer, then you can run PC Repair Tool to fix the issue. This software offers you to find and fix BSOD errors, DLL errors, EXE errors, problems with programs/applications, malware or viruses issues, system files or registry issues, and other system issues with just few clicks.
Method 2: Restart your router
One possible way to fix network connection issue is to restart your router in order to fix the error.
Step 1: Turn OFF your router/modem and unplug the power cable from router, and wait for few minutes
Step 2: After few minutes, plug the power cable back to router and turn ON your router
Step 3: Wait to establish the connection and check if you can access the WebPages in your browser without any error.
Method 3: Rename Connections Folder in Windows Registry
You can fix the issue by using Registry Editor in order to rename Connections folder.
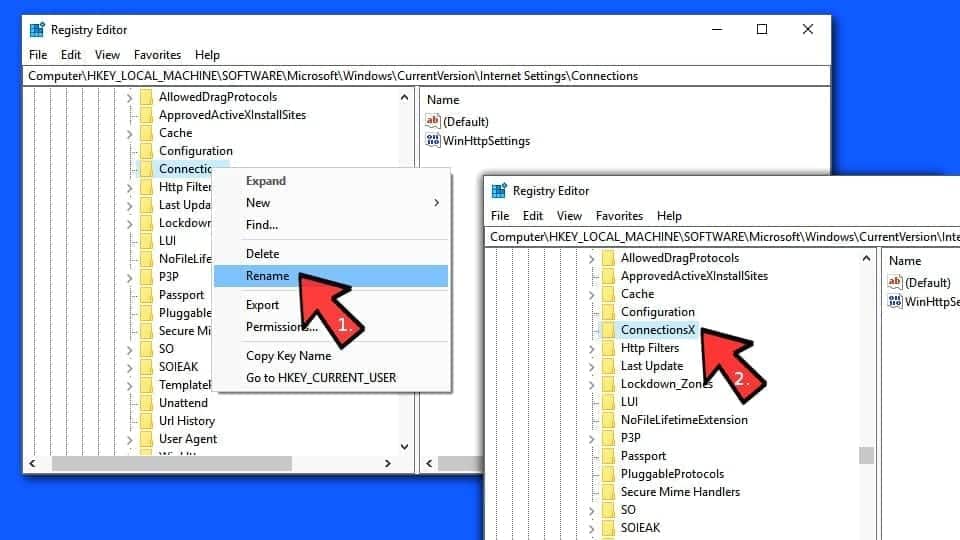
Step 1: Open ‘Registry Editor’ in Windows PC via Windows Search Box and navigate to following path
HKEY_LOCAL_MACHINE > Software > Microsoft > Windows > CurrentVersion > Internet Settings > Connections
Step 2: Right-click on ‘Connections’ folder in left pane, and select ‘Rename’ and rename it to ‘ConnectionsX’ and hit ‘Enter’ key to save, and check if it works for you.
Method 4: Disable TCP Fast Open option in Microsoft Edge
One possible way to fix the issue is to disable TCP Fast Open option in MS Edge browser.
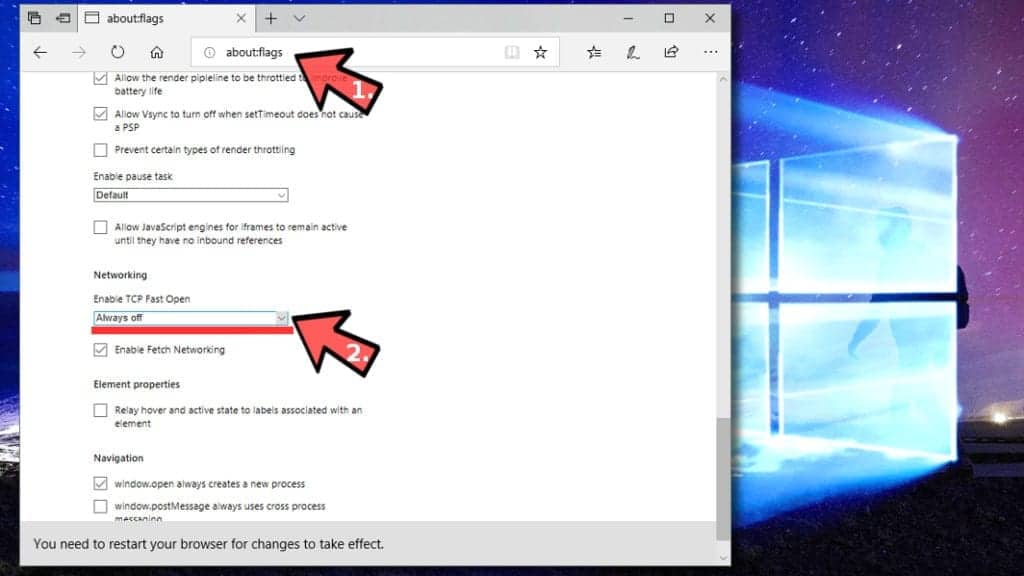
Step 1: Open ‘Microsoft Edge’ browser and type ‘about:flags’ into address bar of browser and hit ‘Enter’ key
Step 2: On the opened page, look for ‘Enable TCP Fast Open’ option. You can press ‘CTRL + SHIFT + D’ keys on keyboard in browser to open ‘Hidden Diagnostic’ section.
Step 3: Now, set the ‘Enable TCP Fast Open’ option to ‘Always OFF’. Once done, restart your browser and check if it works.
Method 5: Open Private Browsing session or Incognito mode
If you are unable to browser in normal browser window, then you can try incognito mode or private browsing session and check if you can access the WebPages without any issue.
Step 1: Open ‘Microsoft Edge’ browser and click ‘Three-Dots’ icon at top-right corner and select ‘New InPrivate Window’ option
Method 6: Change UAC (User Account Control) settings
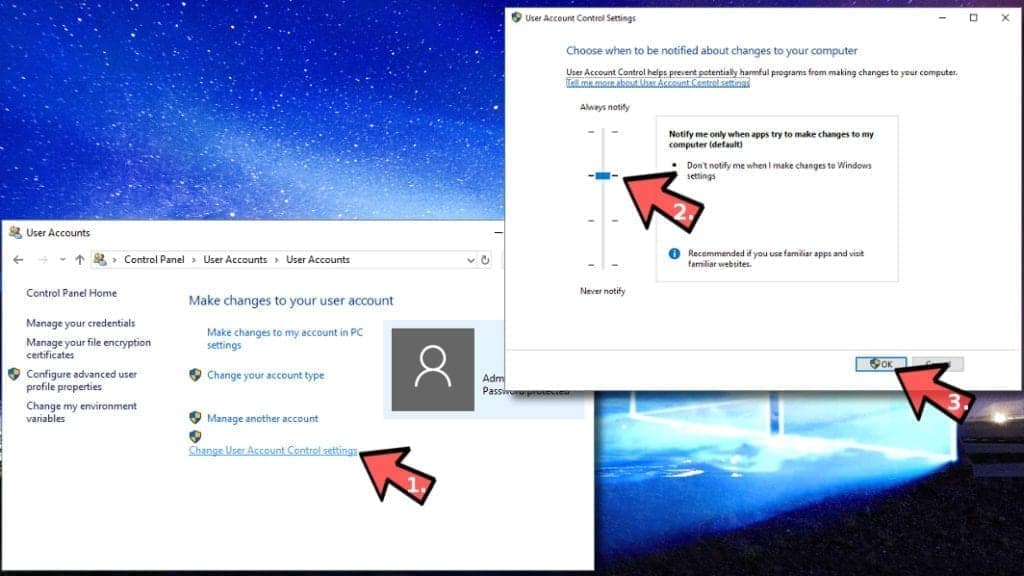
Step 1: Open ‘Control Panel’ in Windows PC via Windows Search Box and go to ‘User Accounts > User Accounts’
Step 2: Make sure the option you pick is second one if counting from the top and click ‘Ok’ to save the changes
Method 7: Flush DNS
Another possible way to fix the issue is to flush the DNS in your computer.
Step 1: Type ‘cmd’ in Windows Search Box and press ‘SHIFT + ENTER’ keys on keyboard to open ‘Command Prompt as Administrator’
Step 2: Type ‘ipconfig /flushdns’ command and hit ‘Enter’ key to execute
Step 3: Once executed, you should see ‘Windows IP Configuration Successfully flushed the DNS Resolver Cache’, and check if the error is resolved.
Method 8: Uninstall and then reinstall browser software
This issue can be occurred due to some issues with your browser like Edge/Chrome or other browser that is causing error, itself so you can uninstall and then reinstall the browser in order to fix the issue.
Step 1: Press ‘Windows + R’ keys on keyboard, type ‘%LocalAppData%\Packages\Microsoft.MicrosoftEdge_8wekyb3d8bbwe\AC\MicrosoftEdge\User\Default’ in ‘Run’ window and hit ‘Ok’ button to open the folder
Step 2: Now, find ‘DataStore’ folder, right-click on it and select ‘Copy’, navigate to Windows desktop, right-click anywhere on desktop and select ‘Paste’ to paste the folder on desktop
Step 3: Close MS Edge browser completely. Now, open File Explorer and click ‘View’ tab and tick ‘Hidden Items’ checkbox by clicking on it, and navigate to following path
C:\Users\YourUserNameHere\AppData\Local\Packages
Step 4: Now, find ‘Microsoft.MicrosoftEdge_8wekyb3d8bbwe’, right-click on it and select ‘Delete’ option to delete it and after that, restart your computer
Step 5: After restart, open ‘Windows PowerShell as Admin’ in your compuer and execute the following command
Get-AppXPackage -AllUsers -Name Microsoft.MicrosoftEdge | Foreach {Add-AppxPackage -DisableDevelopmentMode -Register “$($_.InstallLocation)\\AppXManifest.xml” -Verbose}
Step 6: Once executed, restart your computer again and check if the error is resolved.
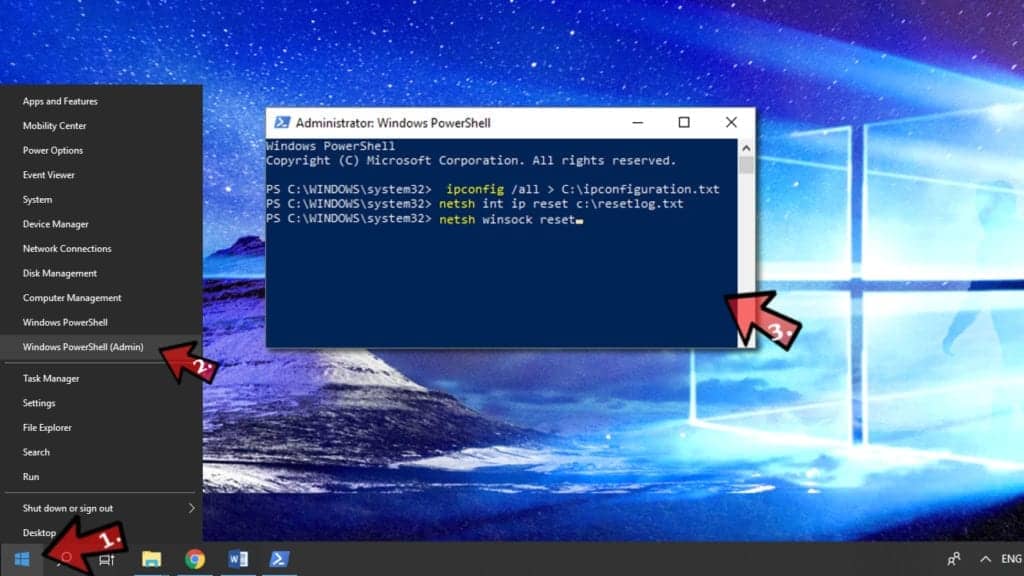
Method 9: Fix Socket error using Netsh winsock reset
Step 1: Open ‘Windows PowerShell as Admin’ in Windows PC and execute the following commands one-by-one
ipconfig /all > C:\ipconfiguration.txt
netsh int ip reset c:\resetlog.txt
netsh winsock reset
Step 2: Once executed, restart your computer and check if it works.
Method 10: Use VPN
If the issue is still persist, then you can try using VPN connection in order to bypass the issue on computer. You can try NordVPN, Express VPN or other trustworthy VPN service for this and check if the error is resolved.
Conclusion
I am sure this post helped you on How to fix INET_E_RESOURCE_NOT_FOUND error on browser in Windows 10 with several easy steps/methods. You can read & follow our instructions to do so. That’s all. For any suggestions or queries, please write on comment box below.


