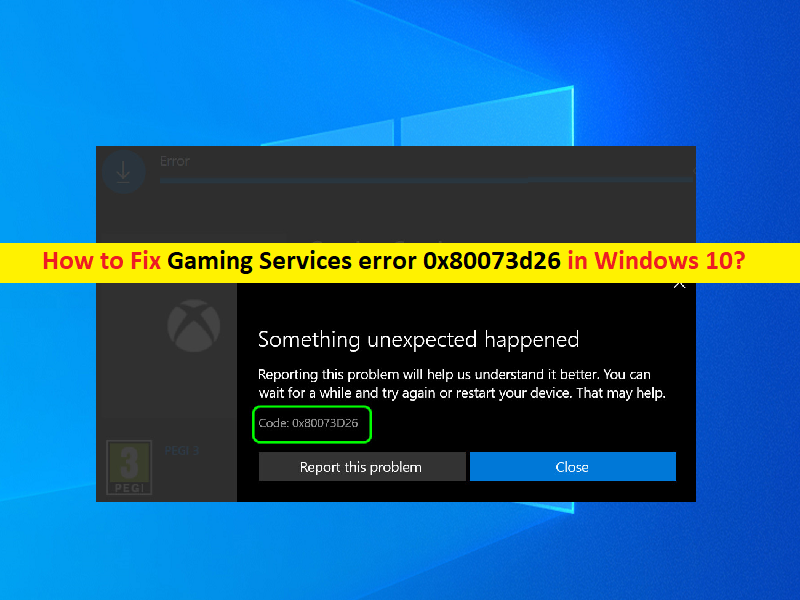
What is ‘Gaming Services error 0x80073d26’ in Windows 10?
In this post, we are going to discuss on “How to fix Gaming Services error 0x80073d26 in Windows 10”. You will be guided with easy methods to resolve the error. Let’s starts the discussion.
‘Gaming Services error 0x80073d26’: It is common Windows Problem usually occurred when you try to install a game from Microsoft Store in your Windows 10 computer but it fails with ‘Something unexpected happened, error code 0x80073d26’. This issue indicates you unable to install Gaming Services in your Windows computer for some reasons possibly due to conflicting applications like EVGA Precision, corrupted registry values of Gaming Services, outdated/corrupted Windows OS and other issues in your Windows computer.
If you are not aware, Xbox Game Pass app offers you to access list of 300 games to choose from, although it is based on a monthly subscription. Players who have enough time to play many games in short period of time benefit from the services the most – it seems like more than 23 million people are indeed interested. To be able install Xbox Game Pass’ games in your Windows 10 computer, you need to ensure that Gaming Services are set up and running via Microsoft Store.
However, that’s when the attempt to download the games stopped due to Gaming Services error 0x80073d26. Several users reported that they were able to push the download to completion stage, and only then error is appeared. This issue is usually occurred if there is some issue in Microsoft Store. You should make sure Microsoft Store is working well. It is possible to resolve the issue with our instructions. Let’s go for the solution.
How to fix Gaming Services error 0x80073d26 in Windows 10?
Method 1: Fix ‘Gaming Services error 0x80073d26’ with ‘PC Repair Tool’
‘PC Repair Tool’ is easy & quick way to find and fix BSOD errors, DLL errors, EXE errors, problems with programs/applications, malware or viruses issues, system files or registry issues, and other system issues with just few clicks.
Method 2: Reset Microsoft Store cache
Step 1: Press ‘Windows + R’ keys on keyboard, type ‘wsreset’ in ‘Run’ window and click ‘OK’ button
Step 2: A black pop-up window will show up – do not close it
Step 3: Wait to finish the resetting process and once done, check if the issue is resolved.
Method 3: Reset Microsoft Store App
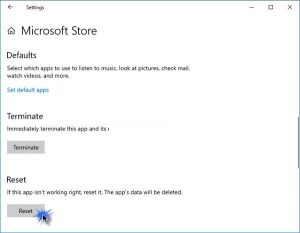
Step 1: Open ‘Settings’ App in Windows 10 via Windows Search Box and go to ‘Apps > Apps & Features’
Step 2: Find and select ‘Microsoft Store’, and click ‘Advanced Options’. Click ‘Reset’ button and click ‘Reset’ button again to confirm resetting and once finished, restart your computer and check if the issue is resolved.
Meted 4: Run SFC scan and DISM scan
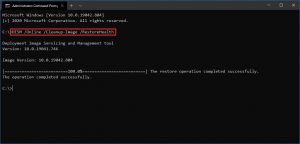
Corruption in system files and hard disk system image can repaired by running SFC scan and DISM scan in computer in order to fix this error.
Step 1: Type ‘cmd’ in ‘Windows Search Box’ and press ‘SHIFT + ENTER’ keys on keyboard to open ‘Command Prompt as Administrator’
Step 2: Type the following commands one-by-one and hit ‘Enter’ key after each to execute
sfc /scannow
DISM /Online /Cleanup-Image /CheckHealth
DISM /Online /Cleanup-Image /ScanHealth
DISM /Online /Cleanup-Image /RestoreHealth
Step 3: Once executed, restart your computer and check if the error is resolved.
Method 5: Delete registry entries relating to Gaming Services in Windows 10
One possible way to fix the issue is to delete registry entries relating to Gaming Services in your computer.
Step 1: Press ‘Windows + R’ keys on keyboard, type ‘regedit’ in ‘Run’ window and hit ‘Ok’ button to open ‘Registry Editor’ and navigate to following path
Computer\\HKEY_LOCAL_MACHINE\\SYSTEM\\CurrentControlSet\\Services
Step 2: Scroll down until you find GamingServices and GamingServicesNet, right-click on it and select ‘Delete’ option to delete them. Once done, restart your computer and check if it works for you.
Method 6: Run Windows Store Apps troubleshooter
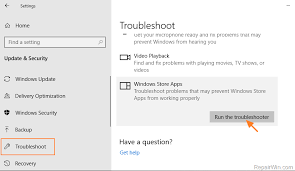
Windows 10 built-in Windows Store Apps troubleshooter can resolve the issue. Let’s try.
Step 1: Open ‘Settings’ App and go to ‘Update & Security > Troubleshoot > Additional Troubleshooters’
Step 2: Find and select ‘Windows Store Apps’ troubleshooter, and click ‘Run the troubleshooter’ button, follow on-screen instructions to finish troubleshooting and once done, restart your computer and check if the issue is resolved.
Method 7: Update Windows 10 OS
Updating Windows OS to latest available update version can resolve the issue.
Step 1: Open ‘Settings’ App and go to ‘Update & Security > Windows Update’ and click ‘Check for updates’ button
Step 2: Download and install all available updates in Windows computer and once updated, restart your computer and check if the error is resolved.
Method 8: Use PowerShell to reinstall Gaming Services
If the issue is still persist, then you can use PowerShell commands to reinstall Gaming Services in your computer in order to fix the error.
Step 1: Press ‘Windows + X’ keys on keyboard and select ‘Windows PowerShell (Admin)’
Step 2: Type the following commands one-by-one and hit ‘Enter’ key after each to execute
Get-AppxPackage *gamingservices* -allusers | remove-appxpackage -allusers
Remove-Item -Path “HKLM:\System\CurrentControlSet\Services\GamingServices” -recurse
Remove-Item -Path “HKLM:\System\CurrentControlSet\Services\GamingServicesNet” –recurse
Step 3: Once executed, restart your computer and after restart, open ‘Windows PowerShell (Admin)’ again and run the following command
start ms-windows-store://pdp/?productid=9MWPM2CQNLHN
Step 4: Now, Microsoft Store will launch with Gaming Services page and once launched, install Gaming Services and check if the error is resolved.
Conclusion
I am sure this post helped you on How to fix Gaming Services error 0x80073d26 in Windows 10 with several easy steps/methods. You can read & follow our instructions to do so. That’s all. For any suggestions or queries, please write on comment box below.


