Many a user recently reported about esrv.exe application error in Windows 10 that occurs on every startup. The problem is not related to the Windows 10 technical preview builds as it has been confirmed to happen on updated computers as well. The full error message can be read as:
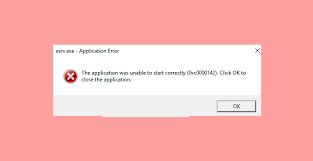
esrv.exe – Application Error: The application was unable to start correctly (0xc0000142). Click OK to close the application.
On clicking OK button, the pop-up goes away for the time being, but it appears by the next time when the system startup. It appears as the problem is likely to occur when users applies a large Windows Update or upgrade to Windows 10 from previous version.
Know about esrv.exe application error in Windows 10
Esrv.exe refers a process belongs to Intel Driver Update. The error message indicates that the Intel Driver Update was not properly removed or handled either by the users manually or automatically from Windows Update during the installation of an update.
Because of the removal is not done effectively, some of its parts might call for esrv.exe process with every startup. Since Windows can’t find the specific process associated with it, the esrv.exe application error in Windows 10 appears on the screen.
The Intel driver Update support has recently been replaced with Intel Driver & Support Assistant. It could possible that something goes wrong during the process when the Windows try to make the transition itself that ends up the error message on the screen.
Possible fixes for esrv.exe application error in Windows 10
If you are dealing with this issue, follow the below provided troubleshooting steps that will allow to fix issue:
Fix 1: Uninstall Intel Driver Update
To initiate with, you should uninstall the program that belongs to it. You can uninstall Intel Driver Update conventionally from the steps provided below:
- Press Win+ R. type in appwiz.cpl and hit Enter,
- In the opened Programs and Features window, scroll down to Intel Diver Software,
- Right-click on it and choose Uninstall,
- Follow the on-screen instructions to remove it,
- Now, close the Programs and features and restart the computer,
- Check now, if the issue has been resolved,
- If yes, return to the Programs and Features and check if Intel Driver Software has been replaced with Intel driver & Support Assistant,
- If not, download the utility manually.
Do not hesitate in removing Intel driver Update. Intel has already replaced it with Intel Driver & Support assistant. If this option does not work, move to our second solution.
Fix 2: Rename every instance of esrv.exe
Some of the users facing the esrv.exe application error in Windows 10 manually resolve the issue just by find every instance of esrv.exe and running the extension of the file. Here is the quick guide:
- Open File Explorer and access to the C drive,
- On the root section of the drive, use search box on the top right and search for esrv.exe,
- Right-click on every instance of esrv.exe you see in the appeared window and click Remove,
- Then, simply ad .old at the end of the extension and now your OS disregards that file,
- Click on Yes option on the Rename option you receive to confirm the modification and finally reboot the device to see if the problem goes away.
Fix 3: Use Autoruns to remove Startup key related to esrv.exe
If none of the methods above work, you should delete the startup keys that are calling esrv.exe service. We recommend you use Autoruns –a program especially equipped to remove run, runonce, registry keys and startup folders.
Since the problem occurs with every startup, it could occur because of a schedule task left behind by an improper un-installation or due to some glitches. Follow the guide provided below to remove startup mention of esrv.exe to prevent apparition of the error:
- Download Autoruns and after the download use some decompression software to extract the content in an accessible folder,
- Open the folder from where you extracted the contents and double-click on the Autoruns executable,
- The initial window will reappear and everything will be loaded with the startup items,
- Press Ctrl + F, type esrv.exe in the search box and click Find Next,
- Now, right-click on the first blue highlighted occurrence and select Delete to remove the startup item,
- Bring up the search function again and repeat the procedure till there is no startup item mentioning esrv.exe left,
- Close Autoruns now and restart your computer,
- At the next startup, you should no longer see the esrv.exe application error in Windows 10.
Conclusion
That’s all! We have provided all possible fixes for esrv.exe application error in Windows 10. Hope so, these methods are helpful for you in getting the required fix. For any questions, queries and suggestion, kindly contact us from below the comment section.


