What is ‘Audio Services Not Responding’ error in Windows 10?
In this article, we are going to discuss on How to fix Audio Services Not Responding error Windows 10. You are provided with easy steps/methods to resolve the issue. Let’s starts the discussion.
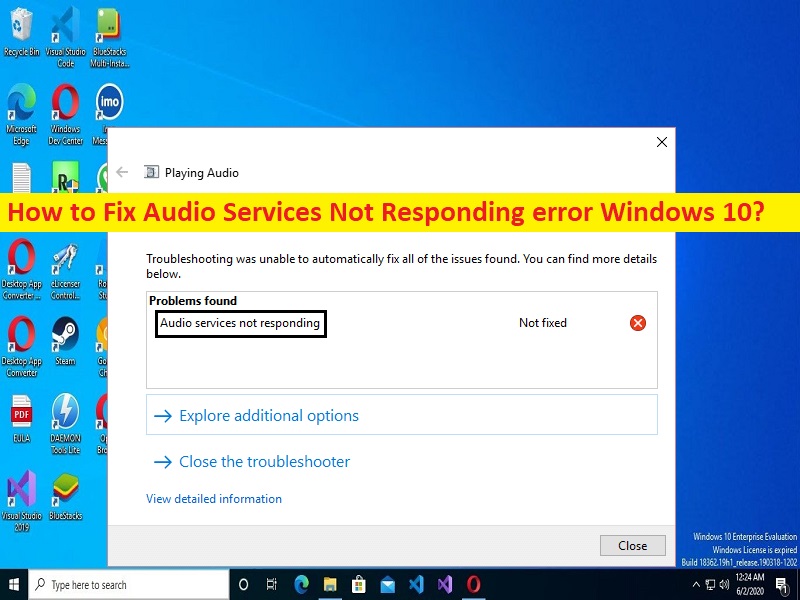
‘Audio Services Not Responding’ error:
It is common Windows Problem considered Audio Service relating issues. This issue indicates when you run Windows built-in Playing Audio troubleshooter in order to check and fix sound issues, you may experience ‘Audio Services Not Responding’ error message on troubleshooter window as results. This error indicates Windows Audio service is working or responding in your Windows computer that’s why the error is occurred. Sometimes, this type of issue is occurred due to some temporary issues in Windows computer.
You can fix the temporary issue just by restarting your computer in order to fix this error, and then check if it works for you toward resolving the issue. This issue can be occurred due to corrupted Audio components, issue with sound card drivers, corruption in system files and system image or registry, incorrect or bad configured sound relating settings, malware or viruses infections in computer, and other system issues. If you are facing the same issue and looking for ways to fix, then you are in right-place for the solution. Let’s go for the solution.
How to fix Audio Services Not Responding error Windows 10?
Method 1: Fix Audio Services Not Responding error with ‘PC Repair Tool’
‘PC Repair Tool’ is easy & quick way to find and fix BSOD errors, DLL errors, EXE errors, problems with programs/applications, malware or viruses infections in computer, system files or registry issues, and other system issues with just few clicks.
Method 2: Restart Windows Audio services
One possible way to fix the issue is to restart Windows Audio services in computer.
Step 1: Open ‘Services’ app in Windows PC via Windows Search Box
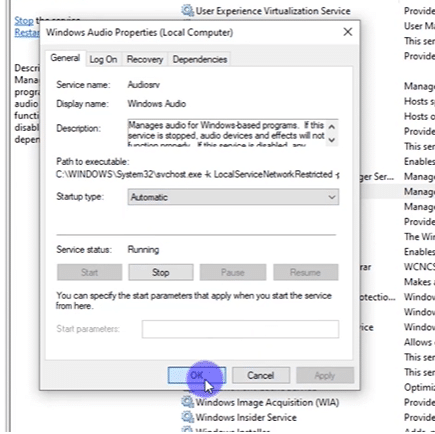
Step 2: Find and double-click ‘Windows Audio’ service to open its Properties. Select ‘Automatic’ option from ‘Startup Type’ dropdown, and hit ‘Start’ button under ‘Service Status’ section, and then hit ‘Apply > Ok’ button to save the changes. Once done, restart your computer and check if the issue is resolved.
Method 3: Check Audio components
Step 1: Open ‘Services’ app using above method and look for following services
- RPC Endpoint Mapper
- DCOM Server Process Launcher
- Remote Procedure Call (RPC)
Step 2: Double-click on each service one-by-one to open its Properties. And repeat the ‘step 3’ of above method to restart these services. Once done, restart your computer and check if the issue is resolved.
Method 4: Fix Audio Services Not Responding error using Command Prompt
Step 1: Type ‘cmd’ in Windows Search Box and press ‘CTRL + SHIFT + ENTER’ keys on keyboard to open ‘Command Prompt as Administrator’
Step 2: Type the following commands and hit ‘Enter’ key after each line to execute.
net localgroup administrators networkservice /add
net localgroup administrators localservice /add
Step 3: Once executed, restart your computer and check if the issue is resolved.
Method 5: Fix Audio Services Not Responding error Windows 10 using Registry Editor
Step 1: Open ‘Registry Editor’ app in Windows PC via Windows Search Box and go to following path
HKEY_LOCAL_MACHINE>SYSTEM>CurrentControlSet>Services>AudioEndPointBuilder
Step 2: Click ‘Parameters’ and look for ‘ServiceDII’ located towards the right-pane and go through ‘Data’ column
Step 3: If the value data is not set to ‘%SystemRoot%\System32\AudioEndPointBuilder.dll’, you need to change it to this
Step 4: Once done, restart your computer and check if the issue is resolved.
Method 6: Install default sound card driver
Step 1: Type ‘Control System’ in Windows Search Box and press open ‘System’ window from results appear
Step 2: Click ‘Advanced System Settings’ in left-pane and click ‘Hardware’ tab, and select ‘Device Installation Settings’
Step 3: Click ‘No (Your device might not work as expected)’ option, and hit ‘Save Changes’ and then close the window
Step 4: Now, press ‘Windows + X’ keys on keyboard and select ‘Device Manager’
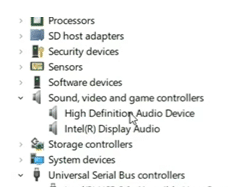
Step 5: Expand ‘Sound, video and game controllers’ category, right-click on your sound card and select ‘Uninstall Device’ to uninstall it
Step 6: Now, click ‘Actions > Scan for hardware changes’ option, then restart your computer and check if the issue is resolved.
Method 7: Update sound card driver
Updating sound card driver to latest & compatible version can resolve the issue.
Step 1: Open ‘Device Manager’ app in Windows PC via Windows Search Box and expand ‘Sound, video and game controllers’ category
Step 2: Right-click on your sound card driver, and select ‘Update Driver’ and follow on-screen instructions to finish update process, and once updated, restart your computer and check if the issue is resolved.
Download or reinstall sound card driver update in Windows PC [Automatically]
You can also try to update all Windows drivers including sound card driver update using Automatic Driver Update Tool. You can get this tool through button/link below.
Method 8: Run SFC Scan and DISM Scan
You can run SFC Scan and DISM Scan in computer to repair corruption in system files and system image in order to fix the issue.
Step 1: Open ‘Command Prompt as Administrator’ using ‘Method 4’
Step 2: Type the following commands and hit ‘Enter’ key after each to execute.
sfc /scannow
DISM /Online /Cleanup-Image /RestoreHealth
Step 3: Once executed, restart your computer and check if the issue is resolved.
Method 9: Change Bitrate of Playback Devices
Step 1: Open ‘Sound’ window via Windows Search Box and click ‘Playback Devices’
Step 2: Select the current playback device, double-click on its Properties.
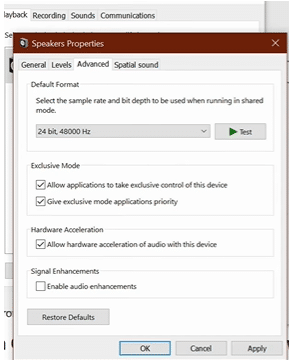
Step 3: Click ‘Advanced’ tab and modify the bit rate to 24bit/44100Hz or 24bit/192000Hz according to your speaker configuration
Step 4: Once done, save the changes and check if the issue is resolved.
Method 10: Disable Audio Enhancement
You can apply certain changes to audio settings like disabling Audio Enhancement in computer to fix the issue.
Step 1: Open ‘Sound’ window via Windows Search Box and click ‘Playback’ tab
Step 2: Right-click ‘Default Device’, and click ‘Properties’
Step 3: Click ‘Enhancements’ tab and click ‘Disable all enhancements’ checkbox, and then try playing audio on your computer
Method 11: Perform system restore
If the issue is still persist, you can try to fix the issue by performing system restore in computer.
Step 1: Press ‘Windows + R’ keys on keyboard, type ‘rstrui’ in ‘Run’ window and hit ‘Ok’ button to open ‘System Restore’ app
Step 2: Click ‘Next’, select a restore point according to date & time when there was no issue at all in computer, and then click ‘Next > Finish’ to start restoring process and once done, check if the issue is resolved.
Method 12: Clean Windows 10 install
You can also try to fix the issue by performing clean Windows 10 installation. To do so, you need to insert a bootable Windows 10 Installation Media USB into computer and boot your computer with it, and run Windows installation setup and follow on-screen instructions to finish.
Conclusion
I am sure this post helped you on How to fix Audio Services Not Responding error Windows 10 with easy ways. You can read & follow our instructions to do so. That’s all. For any suggestions or queries, please write on comment box below.


