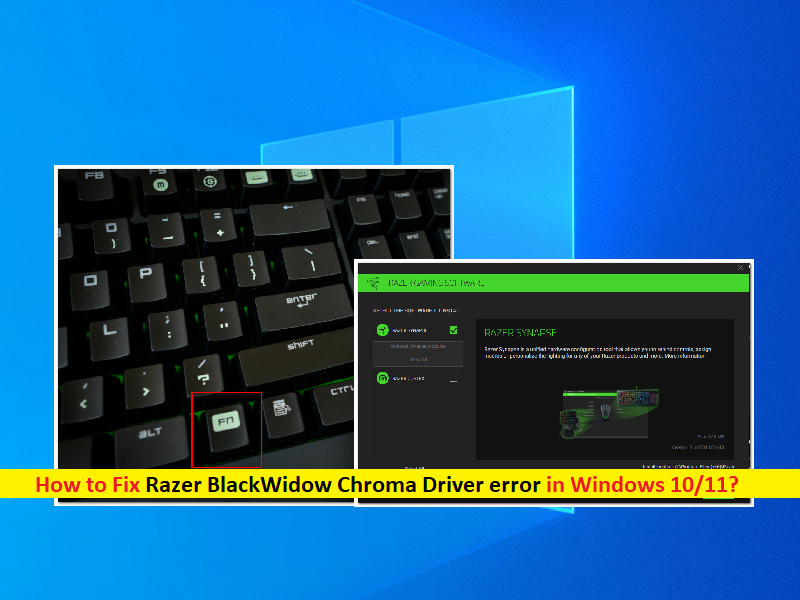
What is ‘Razer BlackWidow Chroma Driver error’ in Windows 10/11?
In this post, we are going to discuss on How to fix Razer BlackWidow Chroma Driver error in Windows 10/11. You will be guided with easy steps/methods to resolve the issue. Let’s starts the discussion.
‘Razer BlackWidow Chroma Driver’: Razer BlackWidow Chroma is great keyboard overall and an easy recommendation for gamers in almost every genre. It offers responsive typing, robust software and just enough keys in fairly compact design. The way the Razer BlackWidow Chroma saves space is by eschewing a large wrist rest, which most other gaming keyboards possess.
However, several Windows 10/11 users reported that they faced Razer BlackWidow Chroma Driver error or Razer BlackWidow Chroma keyboard not recognised in Windows 10/11 when they tried to use Razer BlackWidow Chroma keyboard to gaming or for general purposes on their Windows 10/11 computer. This issue indicates your Windows 10/11 computer is unable to detect Razer BlackWidow Chroma keyboard and Razer BlackWidow Chroma Driver for some reasons.
Most affected users reported that the only time the Razer BlackWidow Chroma keyboard gets recognized by their Windows computer is when the Synapse Software is opened. There could be several reasons behind the issue including the outdated/corrupted/incompatible or missing Razer BlackWidow Chroma Driver, issue with Razer Synapse Software, outdated keyboard driver, bricked keyboard device, corruption in system files or system image, and other Windows issues.
You should make sure Razer BlackWidow Chroma Driver or your keyboard driver is properly installed in computer and is up-to-date to latest & compatible driver version in your computer. If not, Razer BlackWidow Chroma Driver update is necessary in computer in this case. It is possible to fix the issue with our instructions. Let’s go for the solution.
How to fix Razer BlackWidow Chroma Driver error in Windows 10/11?
Method 1: Fix Razer BlackWidow Chroma Driver error with ‘PC Repair Tool’
‘PC Repair Tool’ is easy & quick way to find & fix BSOD errors, DLL errors, EXE errors, problems with programs/applications, malware or viruses issues, system files or registry issues, and other system issues with just few clicks.
Method 2: Force the Firmware menu
You can fix the issue by forcing the installation of compatible driver by holding on FN key on keyboard as you are plugged in the keyboard. By holding the FN key while plugging in your keyboard, you are essentially signalling that you want USB connection to be used for installing the keyboard driver. After you connect Razer BlackWidow Chroma keyboard, you should notice a menu popup asking if you want to install Razer Keyboard driver, follow on-screen instructions to install latest driver version and see if the problem is fixed.
Method 3: Reinstall Razer Synapse Software
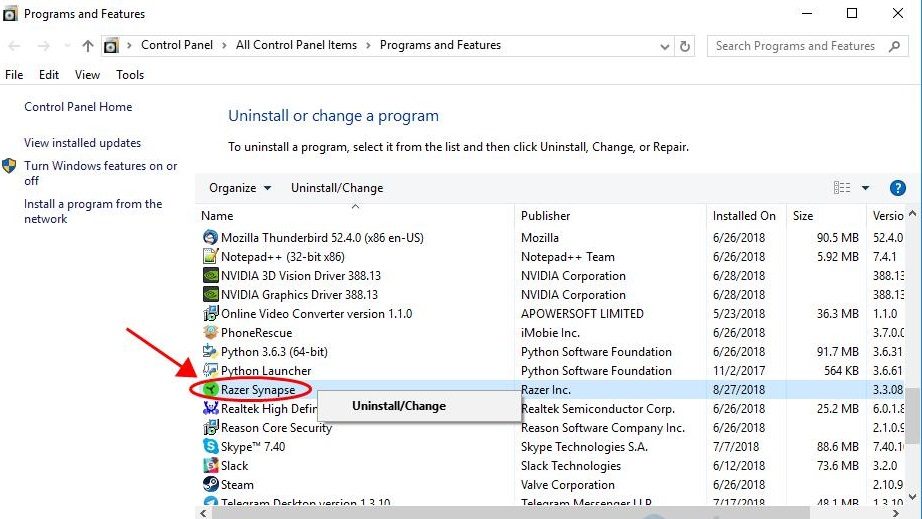
One possible way to fix the issue is to uninstall and then reinstall Razer Snyapse Software in your Windows computer.
Step 1: Open ‘Control Panel’ in Windows PC and go to ‘Uninstall a Program > Programs and Features’
Step 2: Find and select ‘Razer Synapse’ software, and click ‘Uninstall’ to uninstall it and after that, restart your computer
Step 3: After restart, open your browser and visit ‘https://www.razer.com/synapse-3’ page official to download Razer Synapse Software from there.
Step 4: Once downloaded, double-click on downloaded setup file and follow on-screen instructions to finish installation and once installed, restart your computer and check if the issue is resolved.
Method 4: Update or Rollack Razer BlackWidow Chroma Driver
Step 1: Open ‘Device Manager’ in Windows PC via Windows Search Box and expand ‘Keyboards’ category
Step 2: Right-click on your Razer BlackWidow Chroma keyboard and select ‘Properties’. Click ‘Driver’ tab and click ‘Update Driver’ and follow on-screen instructions to finish update process and once updated restart your computer and check if the issue is resolved.
Step 3: If not, repeat the above step but this time click ‘Rollback Driver’ button instead of ‘Update Driver’ and follow on-screen instructions to finish rolling back driver process and once finished, restart your computer and check if the issue is resolved.
Download or reinstall Razer BlackWidow Chroma Driver update in Windows PC [Automatically]
You can also try to update all Windows drivers including Razer BlackWidow Chroma Driver update using Automatic Driver Update Tool. You can get this tool through button/link below.
Method 5: Contact Razer Support

If the issue is still persist, you can contact Razer Official support via ‘https://www.razer.com/contact-us’ official page and report your problem, and ask them for the solution. Hope your problem will be resolved.
Step 1: Open your browser and visit ‘https://www.razer.com/contact-us’ page
Step 2: On the opened page, click ‘Product Support’ under ‘Razer Support’, click ‘Keyboard’ under ‘Select a product’ and then select ‘Razer BlackWidow Chroma’ model you are facing issue with
Step 3: Now, click ‘Contact Support’, use ‘Contact Reason’ context menu to select ‘Razer keyboards & keypads’ and then enter Serial Number of your device and click ‘Submit’ button.
Method 6: Reset Windows 10
If the issue is still persist, then you can perform Windows 10 reset operation in computer in order to fix.
Step 1: Open ‘Settings’ App in Windows PC via Windows Search Box and go to ‘Update & Security > Recovery > Reset This PC’ and click ‘Get Started’ button
Step 2: Follow on-screen instructions to finish resetting process and once finished, restart your computer and check if the issue is resolved.
Conclusion
I hope this article helped you on How to fix Razer BlackWidow Chroma Driver error in Windows 10/11 with several easy steps/methods. You can read & follow our instructions to do so. That’s all. For any suggestions or queries, please write on comment box below.


