What is ‘Error reference source not found in Word document’?
In this article, we are going to discuss on How to fix Error reference source not found in Word document in Windows 10. You are provided with easy steps/methods to resolve the issue. Let’s starts the discussion.
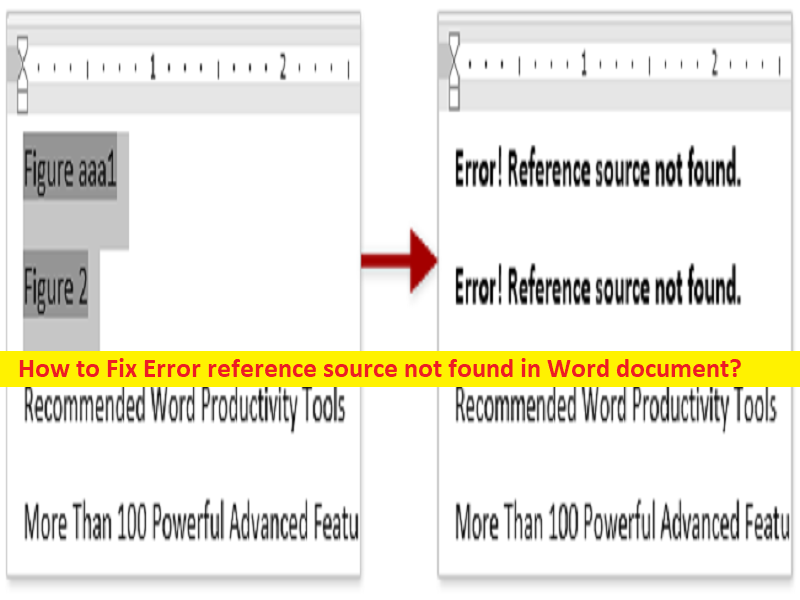
‘Error reference source not found’ error in Word document:
It is common problem considered as Office suite application error. This error is usually appeared in MS Word application document when you try to print documents with your home or work printers in your Windows 10/8/7 computer. This error is known to occur on Windows 7, 8, 8.1, and Windows 10 with various Office versions including Office 2010, Office 2013, and Office 2016. Sometimes, this type of issue is occurred due to some temporary issue in Windows computer. You can fix temporary issue just by restart your computer in order to fix this problem.
This issue can be occurred due to corrupted/outdated Office installation, cross-referenced bookmark has been deleted, malware or viruses infections in computer, incorrect settings in MS Word/Office suite, and/or in system settings, and other issues. It is possible to fix the issue with our instructions. Let’s go for the solution.
How to fix Error reference source not found in Word document in Windows 10?
Method 1: Fix Error reference source not found in Word document with ‘PC Repair Tool’
‘PC Repair Tool’ is easy & quick way to find and fix BSOD errors, DLL errors, EXE errors, problems with programs/applications, malware or viruses infections in computer, system files or registry issues, and other system issues with just few clicks.
Method 2: Locking the field before printing
One possible way to fix the issue is to lock the fields before printing the document.
Step 1: Open MS Word document in MS Word application and select whole document by pressing ‘CTRL + A’ keys on keyboard
Step 2: Once the whole document is selected, press ‘CTRL + F11’ to lock the cross-reference (REF) fields.
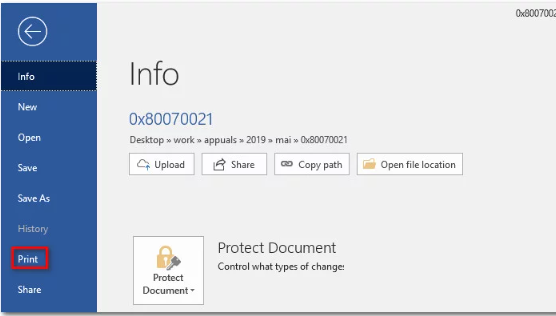
Step 3: When the cross-reference fields have been locked, go to ‘File’ and click on ‘Print’, and check if the issue is resolved.
Method 3: Remove all broken references manually
If you are dealing with cross-reference fields, chances you are struggling with the issue because the bookmarks have been deleted from the document. You can remove all broken references manually to fix the issue.
Step 1: On the MS Word document opened, press ‘CTRL + A’ keys on keyboard to select whole text and then press ‘F9’ key to unlock the fields
Step 2: Once the fields have been unlocked, take the time to revise all text that is referenced to broken content
Step 3: Save the changes and go to ‘File > Print’ and check if the error is resolved.
Method 4: Using Kutools for Word tool
Kutools for Word is conventient way to deleting your corrupted Cross-References fields and if you have a whole lot of broken fields, this tool will be helpful.
Step 1: Open your browser and visit ‘https://www.extendoffice.com/download/kutools-for-word.html’ page to download and install ‘Kutools for Word’, and once installed, restart your computer
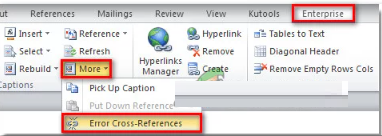
Step 2: After restart, open Word document and go to ‘Enterprise’ tab and click ‘More’ and click ‘End Cross-References’
Step 3: You will get a dialog box telling you how many errors where found. Decide whether you want to delete text or not, and click ‘Ok’ to fix the errors, and check if it works for you.
Method 5: Repair Office installation
If the issue is still persist, you can perform Office suite repair operation in computer in order to fix the issue.
Step 1: Open ‘Control Panel’ app in Windows PC via Windows Search Box and go to ‘Uninstall a Program > Programs & Features’
Step 2: Find and select ‘Office suite’, and click ‘Change’ and then click ‘Quick Repair’, and confirm repairing Office suite
Step 3: Wait to finish and once done, restart your computer and check if the issue is resolved.
Conclusion
I hope this post helped you on How to fix Error reference source not found in Word document in Windows 10 with easy ways. You can read & follow our instructions do so. That’s all. For any suggestions or queries, please write on comment box below.


