Sometimes, enabling secure boot to install Windows 11 has a unexpected consequences- people start seeing that the Bitlocker automatically turns ON and starts encrypting their drive without their permission.
Although this is not officially confirmed from Microsoft that automatic drive encryption carried out by the Bitlocker occurs, there are many people who reported about the problem and say that they can’t turn off bitlocker windows 11.
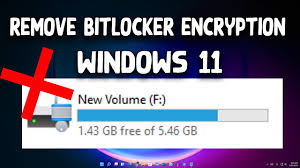
For your information, Bitlocker encryption is a process to secure sensitive data on your drive in Windows using an encryption key. So, this authorizes the users only to have access the data to the encrypted volume.
The problem is that people notice this starts to happen on their system even when they are not interested in doing that. Regardless of the underlying cause, there are several methods through which you can stop Windows 11 from encrypting your OS drive automatically and these are discussed below.
Follow these methods if you can’t turn off bitlocker windows 11
Method 1: Turn off Bitlocker using Control Panel
You can use the classical Control Panel to peform this operation. Here are the required steps:
- Press Win+ R, type Control and hit Enter,
- In the Control Panel interface, click on System and Security from the listed options,
- Under it, select BitLocker Drive Encryption,
- Click on the Turn Off BitLocker option on the page appears,
- On receiving UAC window, click ‘Yes’ to grant administrative privileges,
- Click on the Turn off BitLocker button again to confirm the action,
- The drive decryption process will start now,
- Once the process is complete, restart your PC and check to see if the drive has remained decryption.
Method 2: Turn off BitLocker Windows via Windows Terminal
For some OEMs, the encryption feature re-enable after disable once re-enabling the secure boot option in the BIOS or UEFI settings. You can use this option to disable your BitLocker encryption and ensure that the drive won’t get re-encrypted in future:
- Press Win+ R, type in wt and press Ctrl+ Shift +Enter to open Windows Terminal with Admin privilege,
- Inside it, type the below command and hit Enter (to inquire the status about the BitLocker encryption):
manage-bde -status
- now, type the below command to disable the BitLocker encryption for the OS drive:
Disable-Bitlocker -MountPoint “C:”
(Here, if your OS is different, you should change the command to accommodate your OS drive)
- You will get a report showing the current Protection Status,
- Close the Windows Terminal now and reboot your PC to see any changes take place.
Method 3: Disable BitLocker Encryption using .BAT file
If ‘can’t turn off bitlocker windows 11’ problem persists, you should go for this method. It is the most technical method to disable the BitLocker encryption and it doesn’t automatically re-encrypt the drive at any time in later. Here are the required steps:
- Press Win+ R, type notepad and then press Ctrl+ Shift+ Enter to open note with admin access,
- Inside the elevated Notepad window, paste the below command:
fsutil behavior set disableencryption 1
cipher /d /s:C:\
reg add “HKLM\Software\Policies\Microsoft\Windows\EnhancedStorageDevices” /v “TCGSecurityActivationDisabled” /t REG_DWORD /d “1” /f
sc config BDESVC start= disabled
sc config “EFS” start= disabled
- Click on the File and then click Save As,
- Inside it set the location and name of the file of your choice and set the Save as Type to All Type,
- Do not forget to add .bat at the end of the File Name,
- Click on Save button now and wait for the file to be created,
- Navigate to the location where the .BAT file is, right-click on it and choose Run as Administrator,
- Click Yes on the received prompt,
- Wait now till the process is complete and the BitLocker encryption is disabled automatically.
Conclusion
We’ve covered how to disable BitLocker Encryption. Hope so, can’t turn off bitlocker windows 11 now has been fixed. If the problem continues, we recommend you use PC Repair tool –to find and delete the possibly Windows related issues causing the problem.


