Tips to use Snap Layouts in Windows 11:
In this post, we are going to discuss on How to use Snap Layouts in Windows 11. You are provided with easy ways to perform this operation. Let’s starts the discussion.
‘Snap Layouts in Windows 11’:
Snap Layouts is feature in Windows 11 computer allows you to determine the type of app window arrangement you want to apply. Once you have selected a Snap Layout in Windows 11, the Snap Assist feature of Windows 11 computer then helps you to place the opened app windows into other pane in the Snap Layouts you have selected. Snap Layouts feature allows you to arrange your apps quickly and neatly on your desktop, making it much simpler to see all and use all at once.
With this feature ‘Snap Layouts’, you are allowed to lock up to 4-app windows open at a time so that you can have multiple windows open without having them overlap one another or having to toggle between them. It is quite simple & easy to enable/disable and use Snap Layouts feature in Windows 11 computer with ease. If you are looking for the same on the web, then you are in right-place for the solution. Let’s take a look at steps to perform this operation.
How to use Snap Layouts in Windows 11?
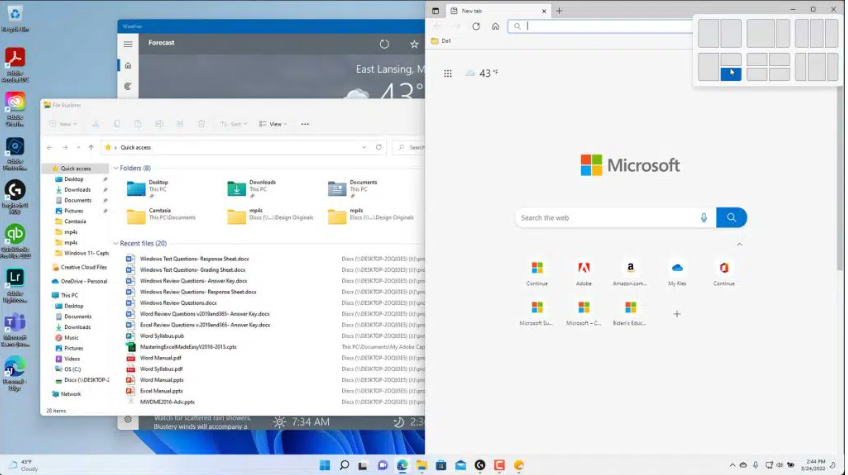
Step 1: At first, hover your mouse pointer/cursor over the ‘Maximum’ button in app window. Or press ‘Windows + Z’ keys on keyboard. The Snap Layouts appears in menu below active app window’s ‘Maximize’ button.
Step 2: Each Snap Layouts shows where you can place the app pane within the desktop. Click into the app pane which to place the current app window within the desired Snap Layouts you want to use. After that, the app window appears in the selected Snap Layouts section of desktop
Step 3: After that, Snap Assist feature in Windows 11 helps you by showing any other open app windows in other available app panes. You can click the app window that appears in other app pane to show it within selected app pane. Repeat the same steps to assigned apps to all app panes in Snap Layouts you have selected.
Step 4: Now, you can adjust the size of each panes and to do so, hover your mouse pointer between the app panes to adjust until a thick gray bar appears and your mouse pointer turns into a double-pointed arrow. Now, drag-and-drop in either direction display by arrows to change the size of app panes and once done, release the mouse buton
Step 5: After that, you can hover over any app included in the app pane in Windows taskbar to show both app and its Snap Layouts app group. You can click either one to select it and bring it to foreground if you have multiple windows opened, if desired, and it’s done.
Fix Windows PC Issues with ‘PC Repair Tool’:
‘PC Repair Tool’ is easy & quick way to find and fix BSOD errors, DLL errors, EXE errors, problems with programs/applications, malware or viruses infections in computer, system files or registry issues, and other system issues with just few clicks.
Conclusion
I am sure this post helped you on How to use Snap Layouts in Windows 11 with easy ways. You can read & follow our instructions to do so. That’s all. For any suggestions or queries, please write on comment box below.


